
XT-6 2WD L6-2.7L SOHC (1989)
Axle Shaft Assembly: Service and Repair
Rear Axle Shaft
Removal and Installation
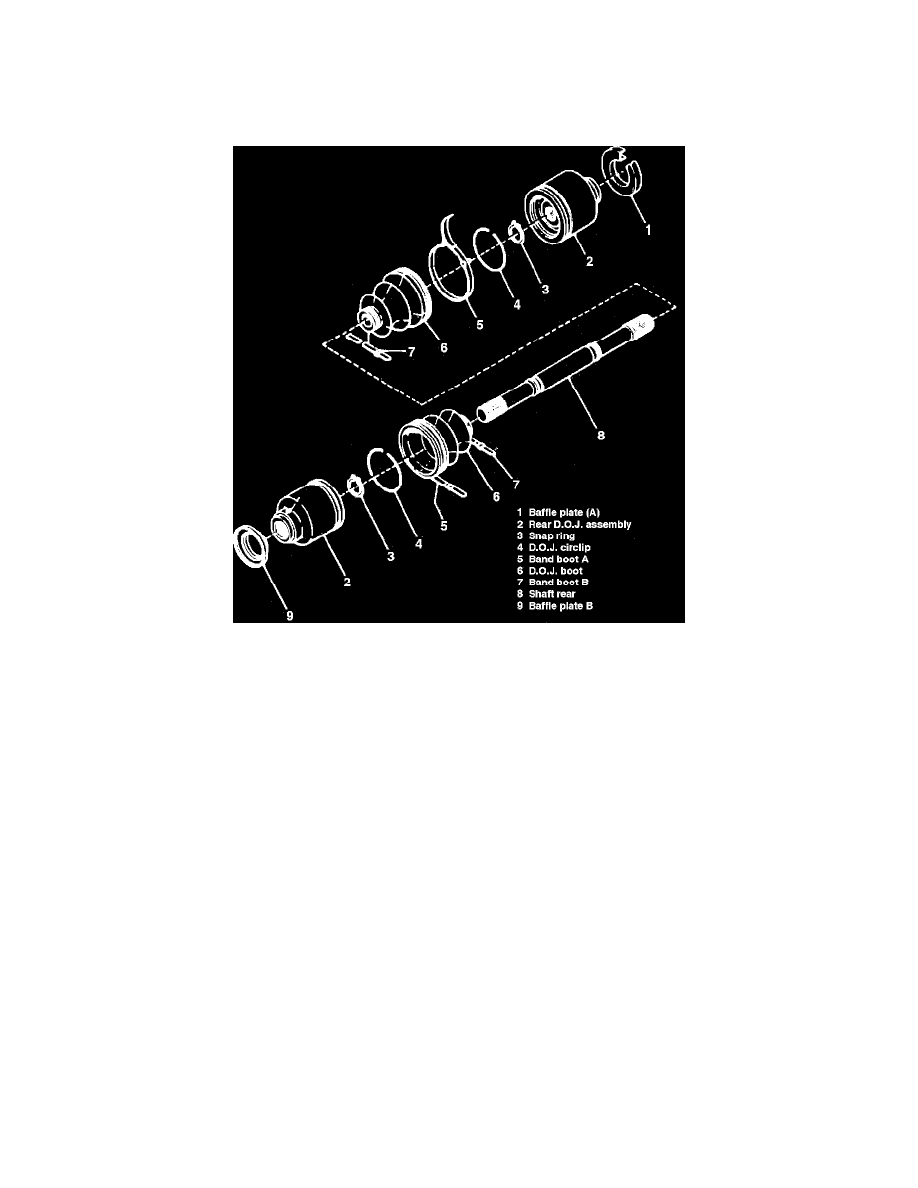
Fig. 1 Exploded View Of Rear Drive Axle
1.
Raise and support vehicle.
2.
Remove rear wheels.
3.
Remove strut-to-inner arm retaining bolts, then separate strut from inner arm.
4.
Remove inner trailing arm-to-body retaining bolts, then separate inner arm from body.
5.
Using a drift and hammer, drive out spring pins at both ends of drive axle, Fig. 1.
6.
Separate outer DOJ from rear axle spindle by pushing inner DOJ toward rear differential while pushing brake drum downward, then remove drive
axle.
7.
Reverse procedure to install.
Disassembly and Assembly
DISASSEMBLY
1.
Remove axle shaft as described previously.
2.
Straighten bent claw of large end of boot on DOJ side of axle shaft, then loosen boot band.
3.
Remove boot band on small end of DOJ side in same manner, then slide boot away from joint.
4.
Remove round circlip at neck of outer race on DOJ side with screwdriver.
5.
Remove outer race on DOJ side from shaft assembly.
6.
Remove balls and move cage to boot side, then turn cage by 1/2 pitch to track groove of inner race and remove snap ring, inner race, cage and
boot. The CVJ is not to be disassembled.
INSPECTION
1.
Check DOJ and CVJ for seizure, corrosion, damage, or excessive wear.
2.
Check shaft for bending, twisting, damage and wear.
3.
Check boot for wear, warping and cracking.
ASSEMBLY