
Aerio L4-2.3L (2006)
c. Check that air in the pneumatic plastic bag is fully evacuated by EVAP leak detection pump within approximately 2 minutes.
If check result is not as described above, replace EVAP leak check module.
CAUTION: Check to make sure that connection is made between correct terminals. Wrong connection can cause damage to EVAP canister
vent valve and EVAP leak detection pump in EVAP leak check module.
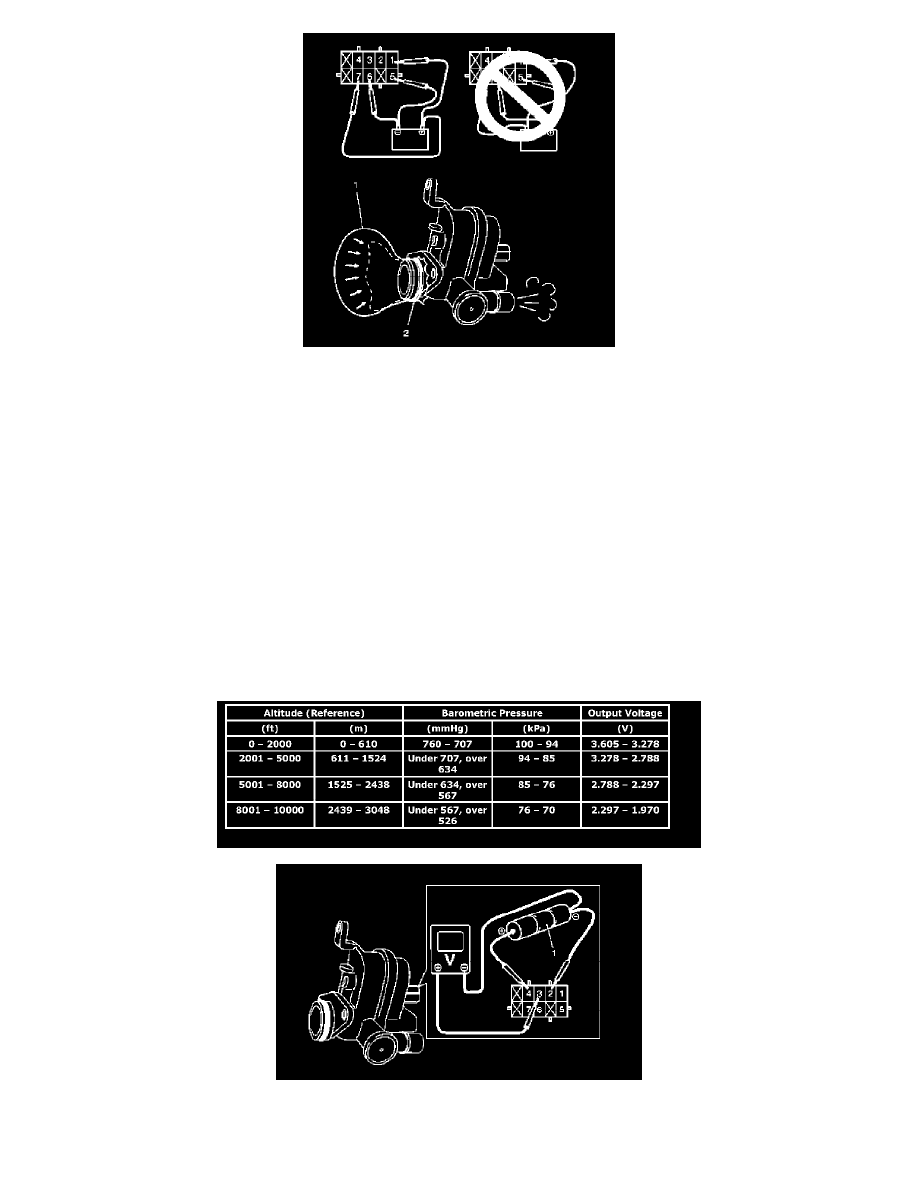
EVAP Leak Check Pressure Sensor (combine with BARO sensor) check
Reference: EVAP Leak Check Module Removal and Installation (Vehicle with ORVR System)
Check barometric pressure and reference vacuum pressure as follows.
1. Initial (barometric) pressure check:
a. Arrange 3 new 1.5 V batteries (1) in series and connect its positive terminal to terminal "4" for EVAP leak check pressure sensor of EVAP
leak check module and negative terminal "2".
b. Check EVAP leak check pressure sensor output voltage (barometric pressure signal voltage) between terminal "3" and "Ground" terminal.
If output voltage is out of specification, replace EVAP leak check module.
If output voltage is within specified value, go to next step.
CAUTION: Check to make sure that connection is made between correct terminals. Wrong connection can cause damage to EVAP leak
check pressure sensor in EVAP leak check module.
EVAP leak check pressure sensor output voltage for initial (barometric) pressure (Terminal "4" voltage 4.5 - 5.5 V, ambient temp. 20 - 30
degrees C (68 - 86 degrees F))