
Aerio L4-2.3L (2006)
Refueling Control Valve: Service and Repair
Refuel Vapor Control Valve Removal and Installation (Vehicle with ORVR System)
Removal
1. Remove fuel tank from vehicle body.
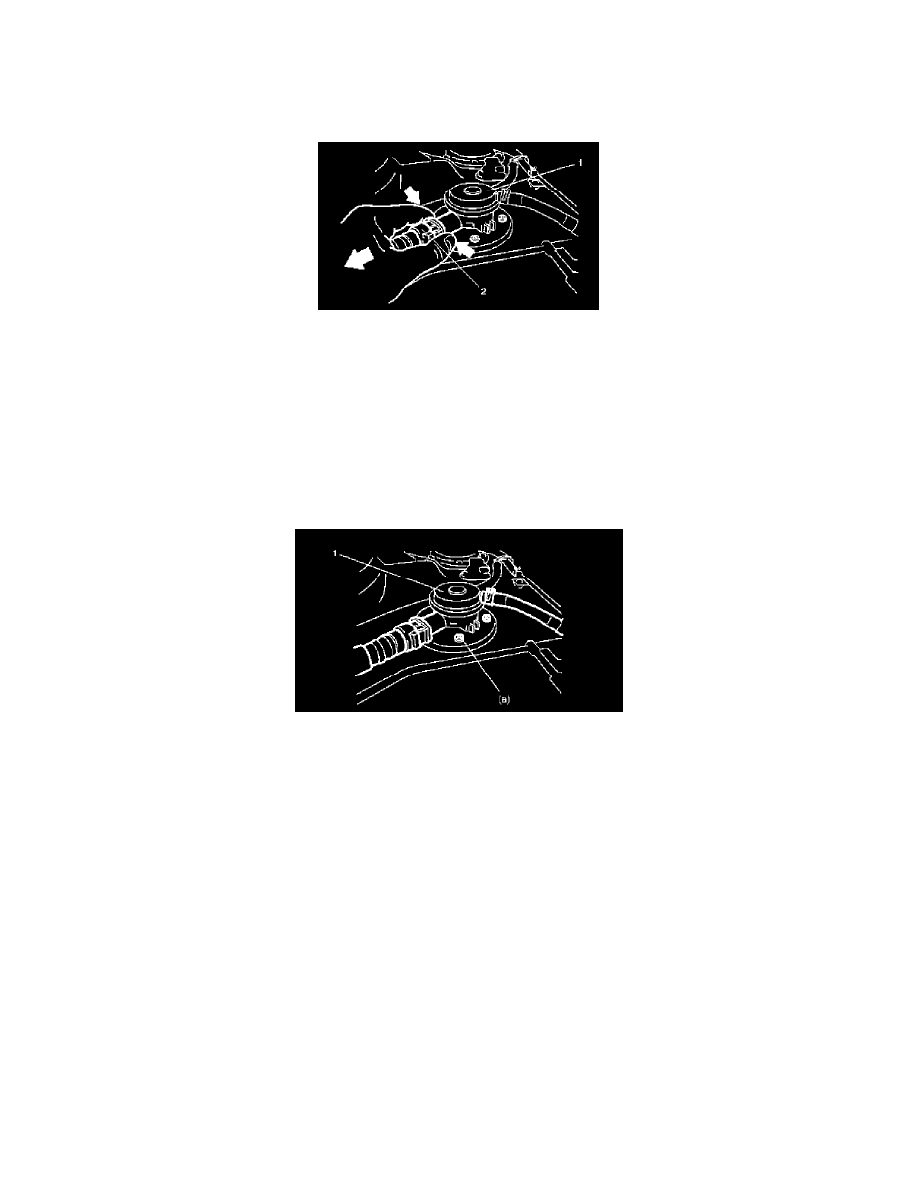
2. Disconnect hoses from vapor control valve (1).
For quick joint (2), disconnect it as follows:
a. Remove mud or dust around joint by blowing compressed air, and push joint fully in arrow direction.
b. Disconnect hose joint while joint lock is unlocked by pushing both sides of joint.
3. Remove vapor control valve from fuel tank.
Installation
Reference: Refuel Vapor Control Valve Inspection (Vehicle with ORVR System)
1. Clean mating surfaces of refuel vapor control valve and fuel tank.
2. Install new gasket, refuel vapor control valve and plate (1) to fuel tank.
CAUTION: At this time, align screw holes in fuel tank gasket and plate accurately, or vapor may leak.
Tightening torque
Refuel vapor control valve bolts a: 1.6 N.m (0.16 kg-m, 1.0 lb-ft)
3. Connect hoses to vapor control valve and clamp them securely.
4. Install fuel tank to vehicle body.