
Aerio AWD L4-2.0L (2003)
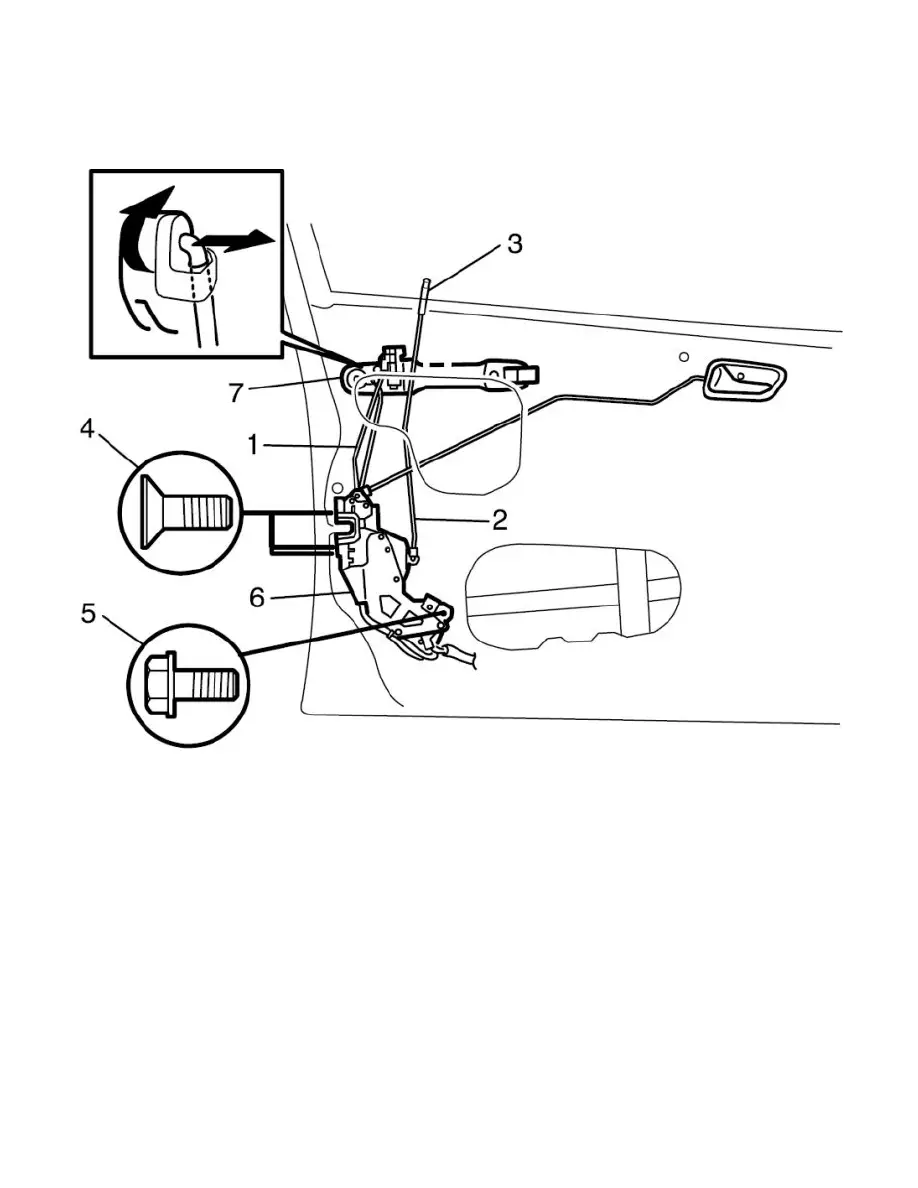
2. Disconnect door opening control rod (1) from outside handle.
3. Disconnect door latch control rod (2).
4. Disconnect door lock motor lead wire (if equipped).
5. Remove door lock knob (3).
6. Loosen door latch screw (4), door latch actuator bolt (5) and remove door latch (6).
7. Remove key cylinder mounting bolt.
8. Remove key cylinder (7).
9. Remove key cylinder plate.
Installation
Reverse removal procedure to install front door lock assembly noting the following instructions.
-
Apply grease to sliding parts of door latch assembly.
: Grease 99000 25010
-
Move door latch striker (2) up or down so its center aligns with the center of groove "A" on the door latch assembly (1) as shown.
Striker should be moved vertically and placed level. Do not adjust door lock.