
Equator 2WD V6-4.0L (2009)
Clutch Pedal Assembly: Testing and Inspection
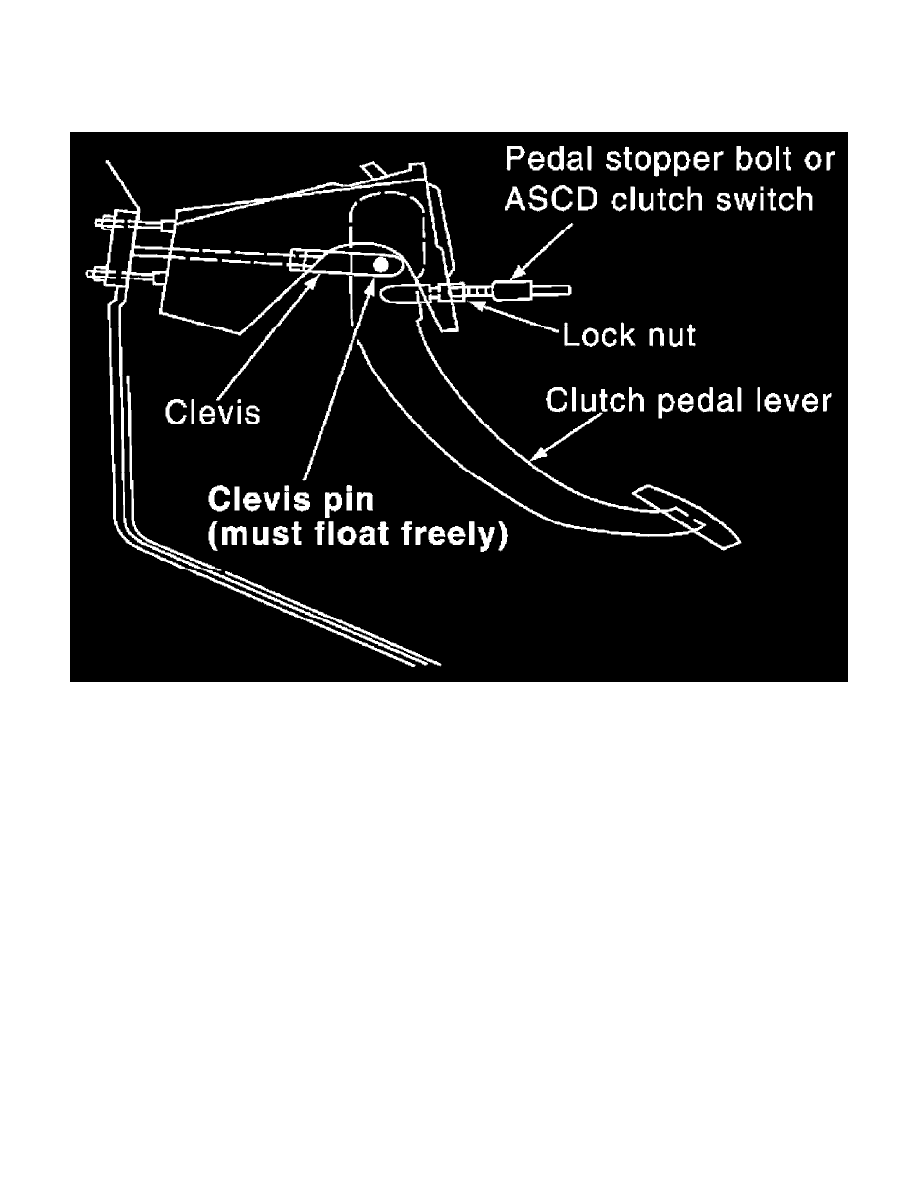
Clutch Pedal: On-Vehicle Inspection and Adjustment
Clutch Pedal: On-Vehicle Inspection and Adjustment
1) Check to see if the clevis pin floats freely in the bore of the clutch pedal. It should not be bound by the clevis or clutch pedal.
a) If the clevis pin is not free, check that the pedal stopper bolt or ASCD clutch switch is not applying pressure to the clutch pedal causing the
clevis pin to bind. To adjust, loosen the lock nut and turn the pedal stopper bolt or ASCD clutch switch.
b) Tighten the lock nut to the specified torque.
c) Verify that the clevis pin floats in the bore of the clutch pedal. It should not be bound by the clutch pedal.
d) If the clevis pin is still not free, remove the clevis pin and check for deformation or damage. Replace clevis pin if necessary. Leave pin
removed for step 2.
2) Check clutch pedal stroke for free range of movement.
a) With the clevis pin removed, manually move the clutch pedal up and down to determine if it moves freely.
b) If any sticking is noted, replace the assembly.
3) Adjust clearance "C" while depressing clutch pedal fully. (With clutch interlock switch)