
Esteem L4-1590cc 1.6L SOHC 0 MFI 16V (1995)
6. Take out 3rd gear needle bearing from shaft.
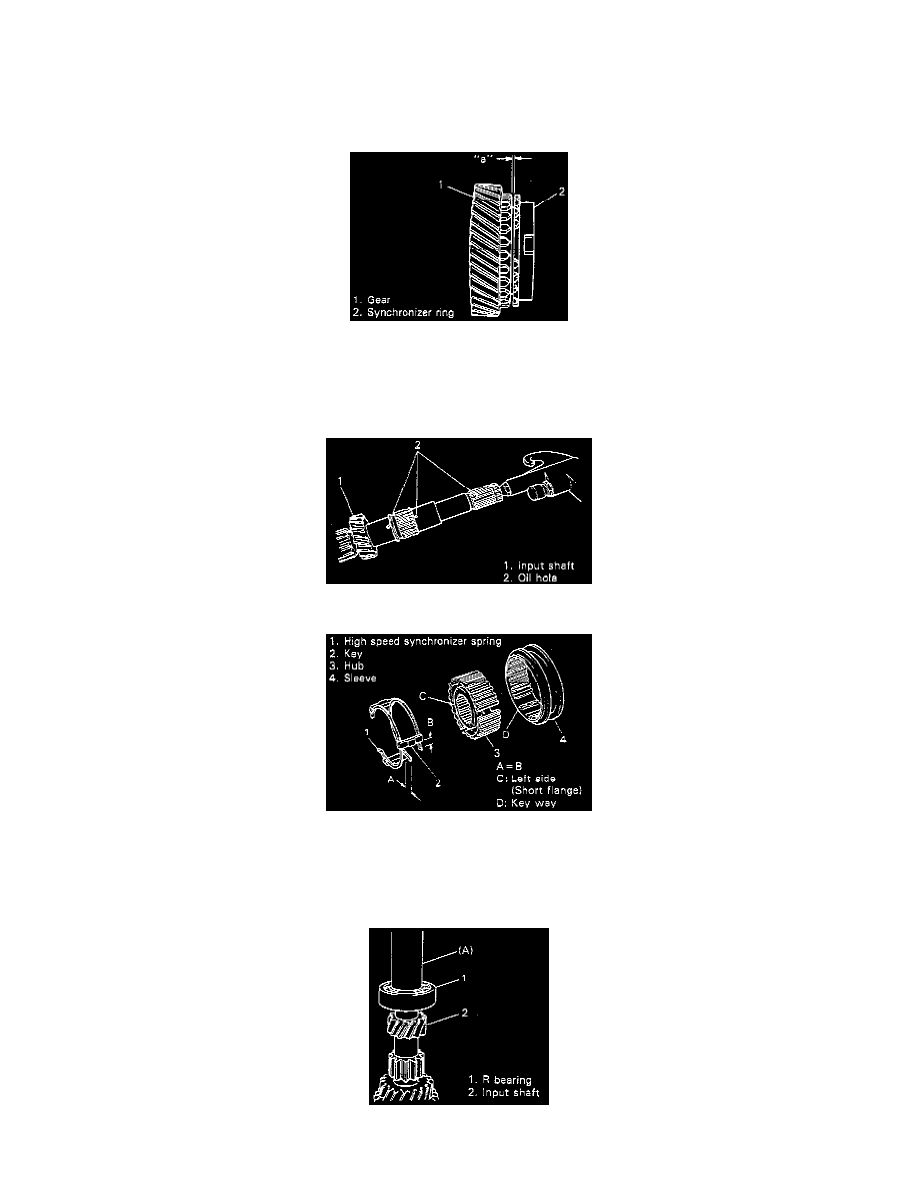
7. Disassemble synchronizer sleeve & hub assembly.
INSPECTION AND REASSEMBLY
1. Clean all components thoroughly, inspect them for any abnormality and replace with new ones as necessary.
2. If synchronizer parts need to be repaired, check clearance "a" between ring and gear, each chamfered tooth of gear, ring and sleeve, then determine
parts replacement.
Clearance "a":
Standard 1.0 - 1.4 mm (0.039 - 0.055 inch)
Service limit 0.5 mm (0.019 inch)
3. To ensure lubrication, air blow oil holes and make sure that they are free from any obstruction.
4. Fit high speed synchronizer sleeve to hub, insert 3 keys in it and then set springs as illustrated.
NOTE:
^
No specific direction is assigned to high speed synchronizer sleeve or each key but it is assigned as assembly.
^
Size of high speed synchronizer sleeve, hub, keys and springs is between those of low speed and 5th speed ones.
5. Drive in R bearing by using Special Tool (A): 09925-98221, or equivalent and hammer.