
Esteem GLX Sedan Plus L4-1.8L (1999)
3. Apply water tight sealant to mating surfaces of brake back plate and rear knuckle.
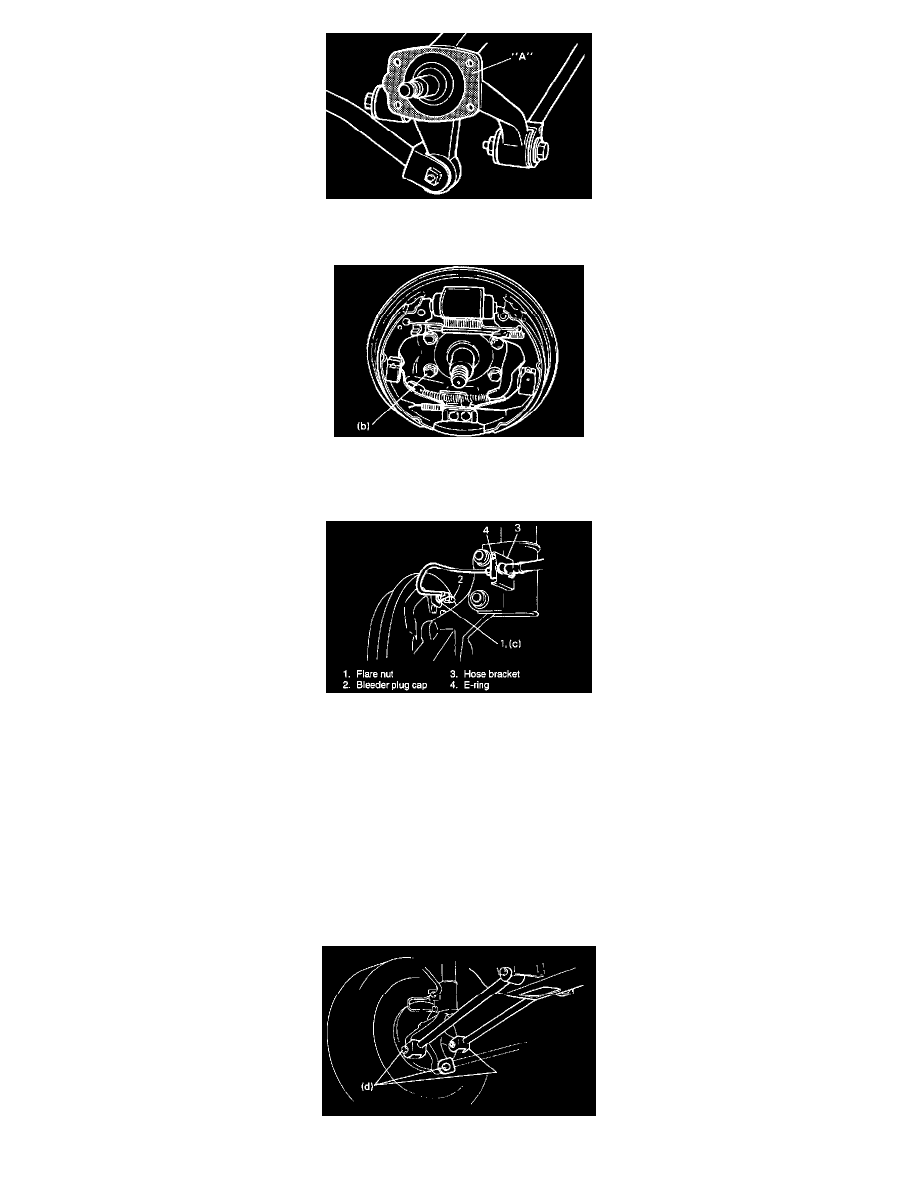
"A": Sealant 99000-31090
4. Install brake back plate and tighten back plate bolts to specified torque.
Tightening Torque (b): 23 Nm (2.3 kg-m, 17.0 ft. lbs.)
5. For ABS equipped vehicle, check to make sure that ABS wheel speed sensor tooth is free from any metal particles and install it to knuckle.
6. Connect brake pipe to wheel cylinder and tighten brake pipe flare nut to specified torque and install bleeder plug cap taken off from pipe back to
bleeder plug.
Tightening Torque (c): 16 Nm (1.6 kg-m, 12.0 ft. lbs.)
7. Attach brake hose to strut bracket with E-ring securely.
8. Install wheel hub.
9. Install brake drum.
10. Fill reservoir with brake fluid and bleed brake system.
11. Upon completion of all jobs, depress brake pedal with about 30 kg (66 lbs.) load three to five times so as to obtain proper drum-to-shoe clearance.
Adjust parking brake cable.
12. Tighten parking brake lever cover screws.
13. Install wheel and tighten wheel nuts to specified torque.
14. Check to ensure that brake drum is free from dragging and proper braking is obtained.
15. Lower hoist and bounce vehicle up and down to stabilize suspension.
16. Tighten control rod outer bolts and trailing rod rear bolt to specified torque with vehicle weight on suspension.