
Forenza L4-2.0L (2004)
Front Cross-Member: Service and Repair
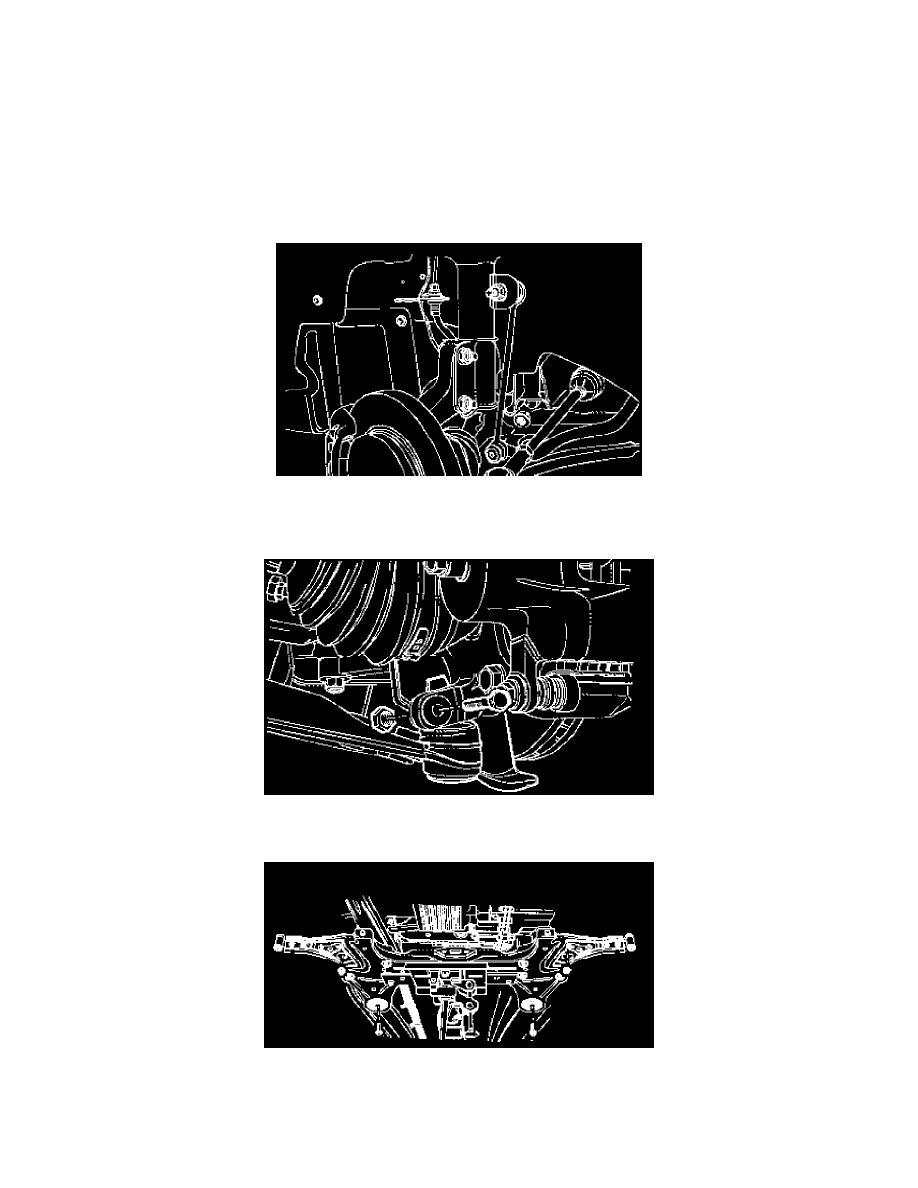
Crossmember Assembly Removal and Installation
Removal
1. Raise and suitably support the vehicle.
2. Remove the wheels.
3. Remove the nuts and bolts from the steering gear mounting bracket.
4. Remove the return line bolt from the clip on the crossmember.
5. Remove the exhaust pipe forward of the catalytic converter.
6. Disconnect the tie rod from the knuckle assembly.
7. Disconnect the ball joint from the knuckle assembly.
8. Disconnect the stabilizer link from the strut assembly.
9. Remove the crossmember link-to-transaxle bracket nut.
1. Remove the right lower engine mount.
2. Remove the rear transmission mount bracket.
10. Remove the rear crossmember-to-body bolts.
11. Remove the front crossmember-to-body bolts.
12. Remove the crossmember assembly from the vehicle.
Installation
1. Install the crossmember assembly.
2. Install the rear crossmember-to-body bolts.