
Forenza L4-2.0L (2004)
11. Install the crankshaft bearing cap bolts.
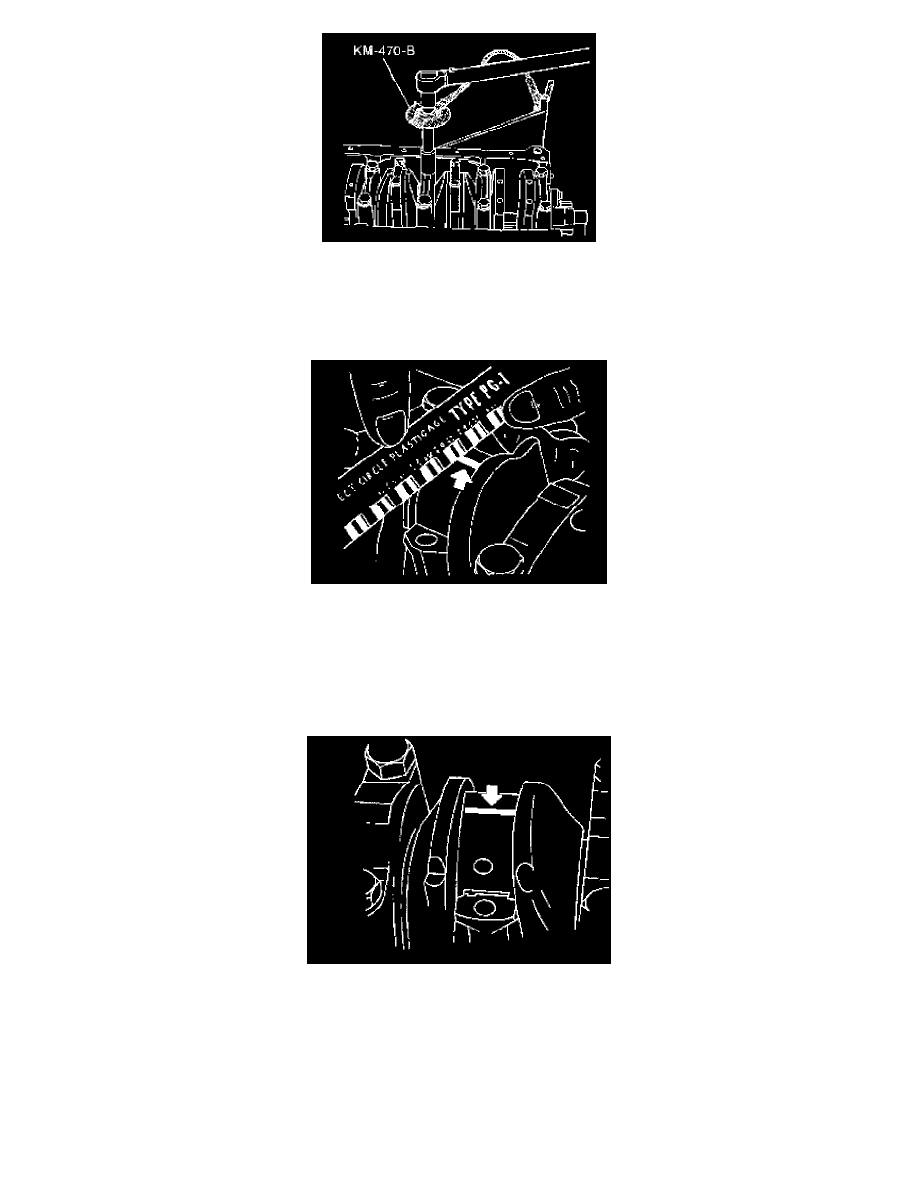
Tighten: Tighten the crankshaft bearing cap bolts to 50 Nm (37 ft. lbs.). Using the angular torque gauge KM-470-B, tighten the crankshaft bearing
cap bolts another 45° plus 15°.
12. Remove the crankshaft bearing caps.
13. Measure the width of the flattened plastic thread of the plastic gauging using a ruler. (Plastic gauging is available for different tolerance ranges.)
14. Inspect the bearing clearances for permissible tolerance ranges.
Inspection - Connecting Rods
1. Coat the connecting rod bearings with engine oil.
2. Install the upper connecting rod bearings into the connecting rod journals.
3. Install the lower connecting rod bearings into the connecting rod bearing caps.
4. Inspect all of the connecting rod bearing clearances using a commercially available plastic gauging (ductile plastic threads).
5. Cut the plastic gauging threads to the length of the bearing width. Lay them axially between the connecting rod journals and the connecting rod
bearings.
6. Install the connecting rod bearing caps.