
Grand Vitara 2WD V6-2.7L (2006)
Connecting Rod Bearing: Specifications
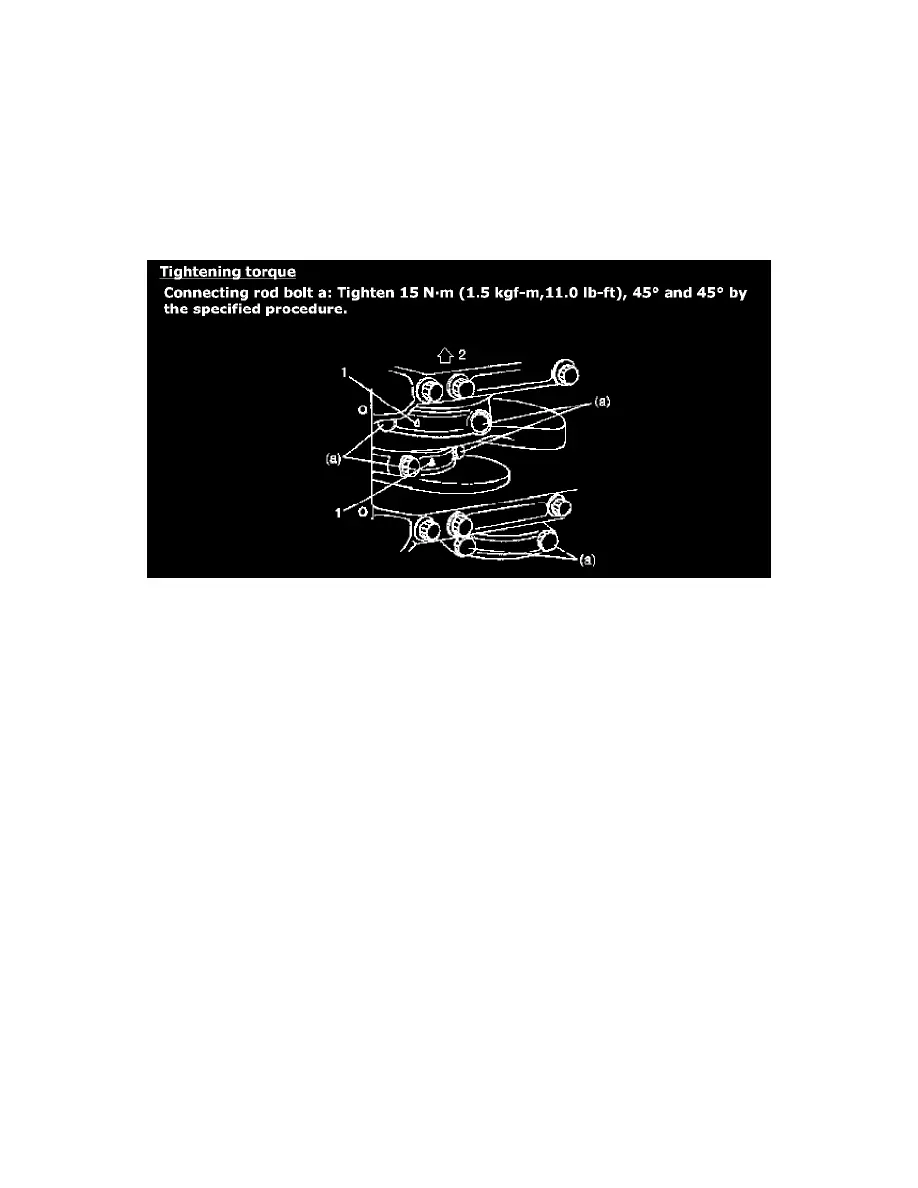
Connecting rod bearing cap (1) install as follows.
NOTE:
If connecting rod bolt is reused, mark sure to check connecting rod bolt for deformation, referring to "Connecting Rod Bolt Deformation (Plastic
Deformation Tightening Bolt)" under Crank Pins and Connecting Rod Bearings Inspection.
a) Point arrow mark (2) on cap to crankshaft pulley side.
b) Apply engine oil to new connecting rod bolts (3).
c) Tighten all connecting rod bolts to 15 Nm (1.5 kgf-m, 11.0 ft. lbs.).
d) Retighten them by turning through 45°
e) Repeat step d) once again.