
Grand Vitara 2WD V6-2.7L (2006)
Drive/Propeller Shaft: Service and Repair
Propeller Shaft Removal and Installation
Propeller Shaft Removal and Installation
Removal
1. Hoist vehicle.
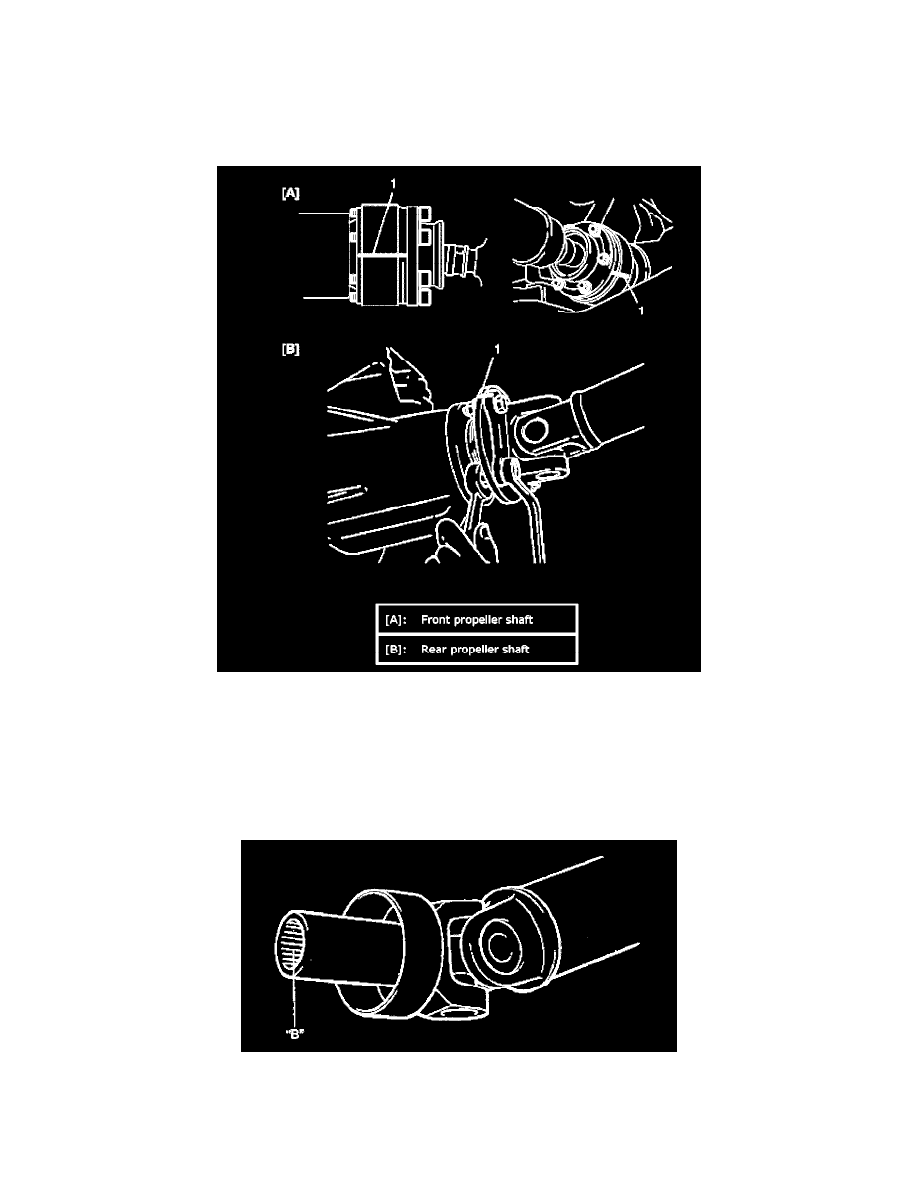
2. Give match marks (1) on joint flange and propeller shaft as shown in the figure.
3. Remove rear propeller shaft.
4. Drain transfer oil when removed front propeller shaft from transfer.
Installation
Reverse removal procedure to install propeller shaft noting the following points.
^
Clean and inspect sliding portion of propeller shaft end (where oil seal contacts) before installation and if even small dent or scratch exists, correct
end clean it again. Then apply grease inside splines of propeller shaft.
B: Grease 99000-25010SUZUKI Super Grease A
^
Install propeller shaft aligning match marks. Otherwise, vibration may occur during driving.
^
Use the following specification to torque universal joint flange nuts and bolts. For front propeller shaft flange bolt (front differential side), apply
thread lock cement to thread part of bolts if reused.
^
Fill transfer oil, if removed front propeller shaft.