
Grand Vitara 2WD V6-2.7L (2006)
Windshield Washer Pump: Service and Repair
Washer Tank and Washer Pump Removal and Installation
Reference: Wipers and Washers Components
Removal
1. Disconnect negative (-) cable at battery.
2. Remove front bumper.
3. Remove right side headlight housing from vehicle body.
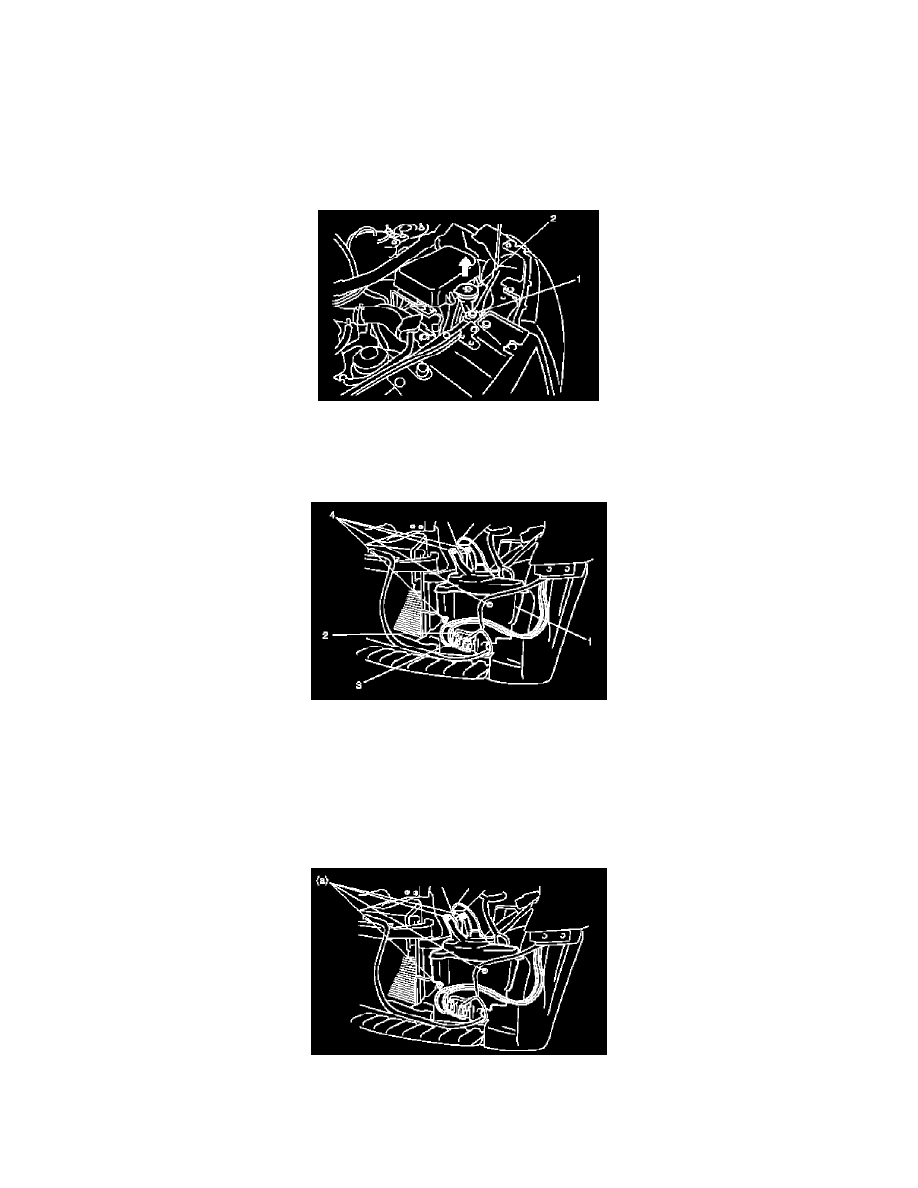
4. Remove grommet (1) and upper part (2) of washer tank.
5. Remove washer tank attaching bolts (4).
6. Disconnect washer pump lead wire couplers and hoses.
7. Remove washer tank (1).
8. Remove windshield washer pump (2) and rear washer pump (3) (if equipped) from washer tank (1).
Installation
Reference: Washer Pump Inspection
Install washer tank and washer pump by reversing removal procedure, noting the following instructions.
-
Connect washer pump connector(s) securely.
-
Tighten washer tank bolts to specified torque.
Tightening torque
Washer tank bolt a: 4 Nm (0.4 kg-m, 3.0 lb-ft)
-
After installing headlight housing be sure to inspect and adjust aiming referring to Headlight Aiming Adjustment with Screen.