
Grand Vitara 4WD V6-3.2L (2010)
Clutch Slave Cylinder: Service and Repair
Clutch Operating Cylinder Assembly Removal and Installation
CAUTION:
^
Do not allow fluid to get on painted surfaces. It may cause painted surface damage.
^
Do not disassemble clutch operating cylinder assembly.
Removal
1) Clean around reservoir cap of brake master cylinder and take out fluid with syringe or such.
2) Dismount transmission assembly.
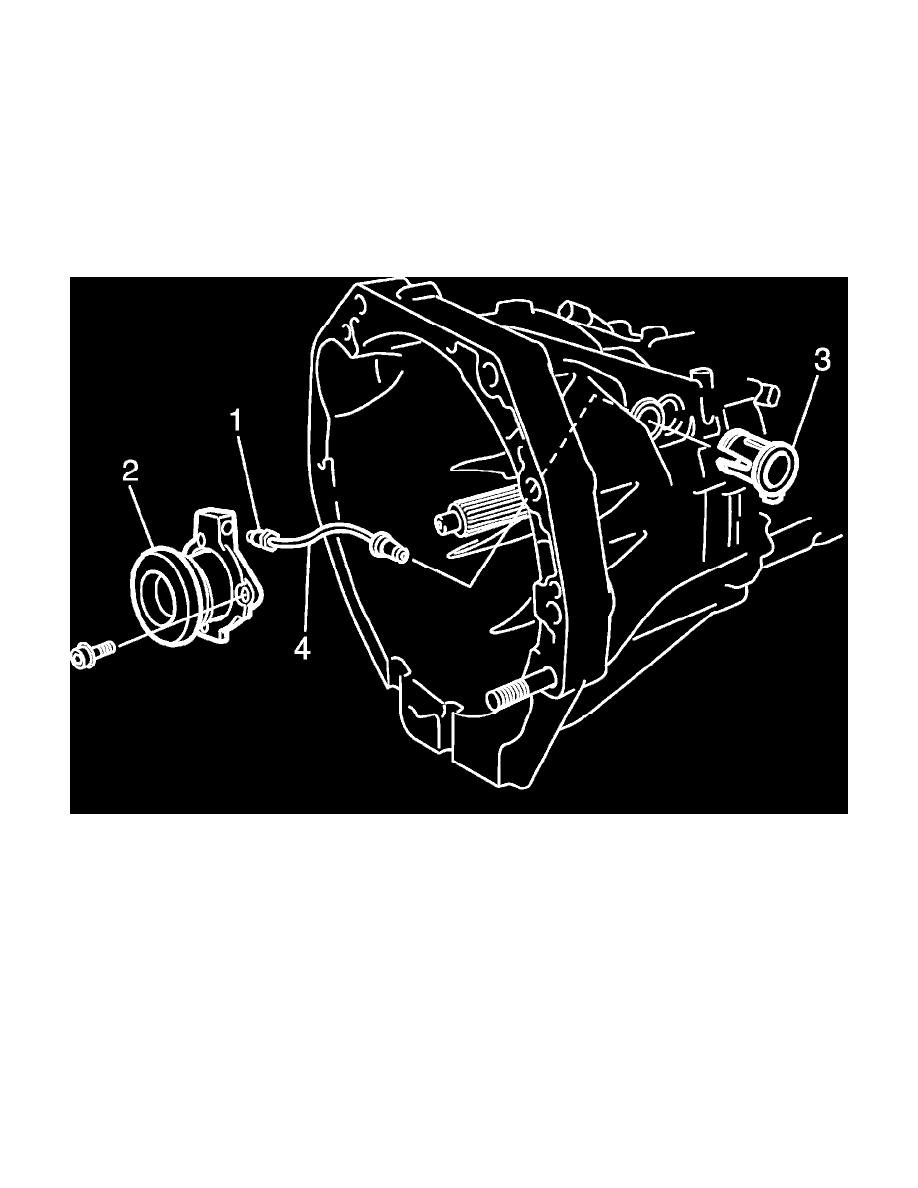
3) Loosen clutch fluid pipe flare nut (1) of clutch operating cylinder assembly (2).
4) Remove clutch pipe joint sleeve (3) from transmission front case and then remove clutch fluid pipe (4).
5) Remove clutch operating cylinder assembly from transmission front case.
Installation
1) Install clutch operating cylinder assembly (2) to transmission front case. Tighten mounting bolts to specified torque.
Tightening torque
Clutch operating cylinder assembly mounting bolt (a): 10 Nm (1.0 kg-m, 7.5 lbf-ft)
2) Connect clutch fluid pipe (4) to clutch operating cylinder assembly temporarily.
3) Install clutch pipe joint sleeve (3) to transmission front case securely and then tighten clutch fluid pipe flare nut (1) to specified torque.
Tightening torque
Clutch fluid pipe flare nut (b): 16 Nm (1.6 kg-m, 11.5 lbf-ft)