
Kizashi AWD L4-2.4L (2010)
Brake Master Cylinder: Service and Repair
Brake Master Cylinder Assembly Inspection
Brake Master Cylinder Assembly Inspection
Reference: Brake Master Cylinder Assembly Removal and Installation
CAUTION:
After inspection, be sure to wash brake fluid off from special tool. Otherwise, brake fluid remaining on special tool may cause damage to it.
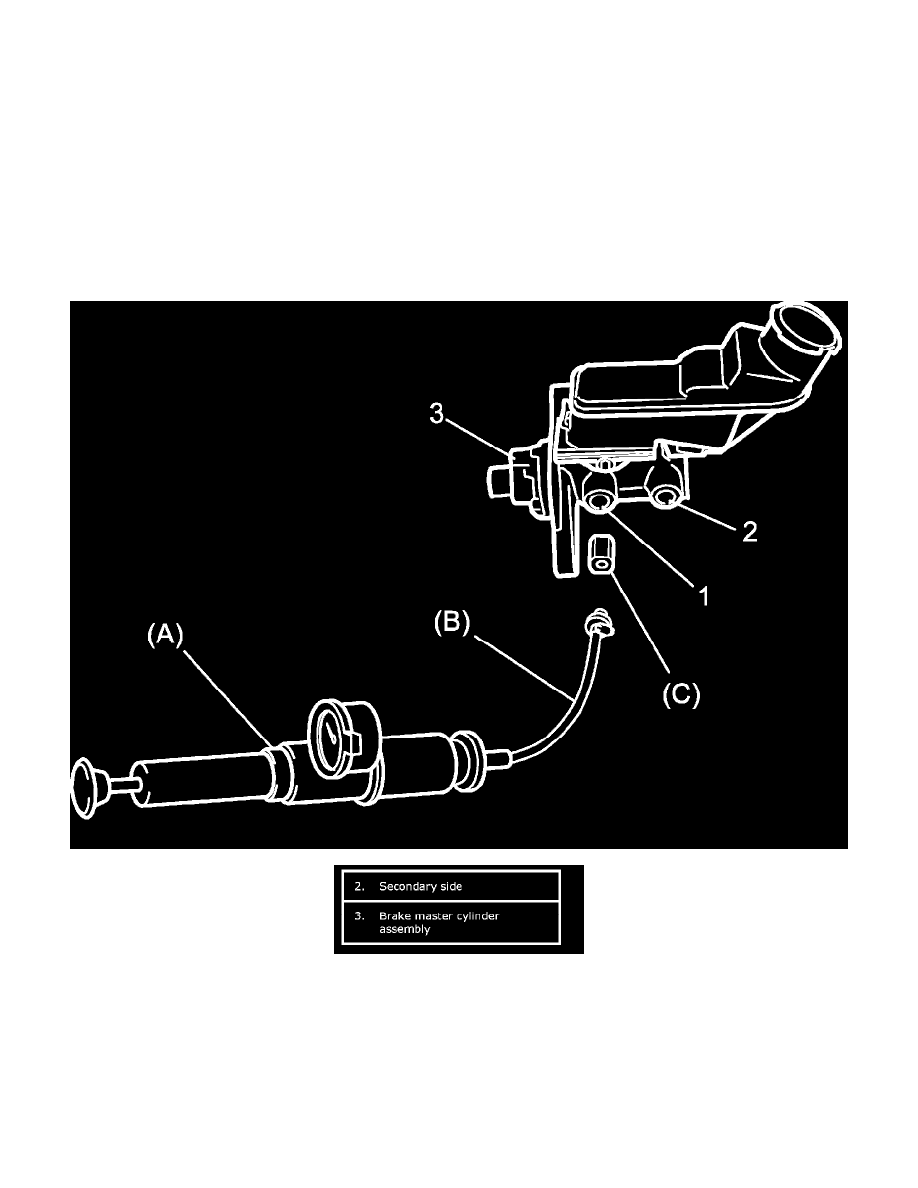
No-Load Inspection
1) Fit special tool to port of primary side (1) as shown below.
Special Tool
(A): 09918-78211
(B): 09952-46010
(C): 09952-48010
2) Apply pressure to brake master cylinder assembly by special tool (A) and confirm that pressure is not established in it.
If pressure is established, it means an abnormality in brake master cylinder assembly. In such case, replace brake master cylinder assembly.
3) Repeat Steps 1) and 2) for port of secondary side.
Air Tightness Inspection
1) With brake master cylinder assembly (1) fixed on vise (2) as shown below, fit special tool to port of primary side.
Special Tool
(A): 09918-78211
(B): 09952-46010
(C): 09952-48010