
Kizashi AWD L4-2.4L (2010)
Installation
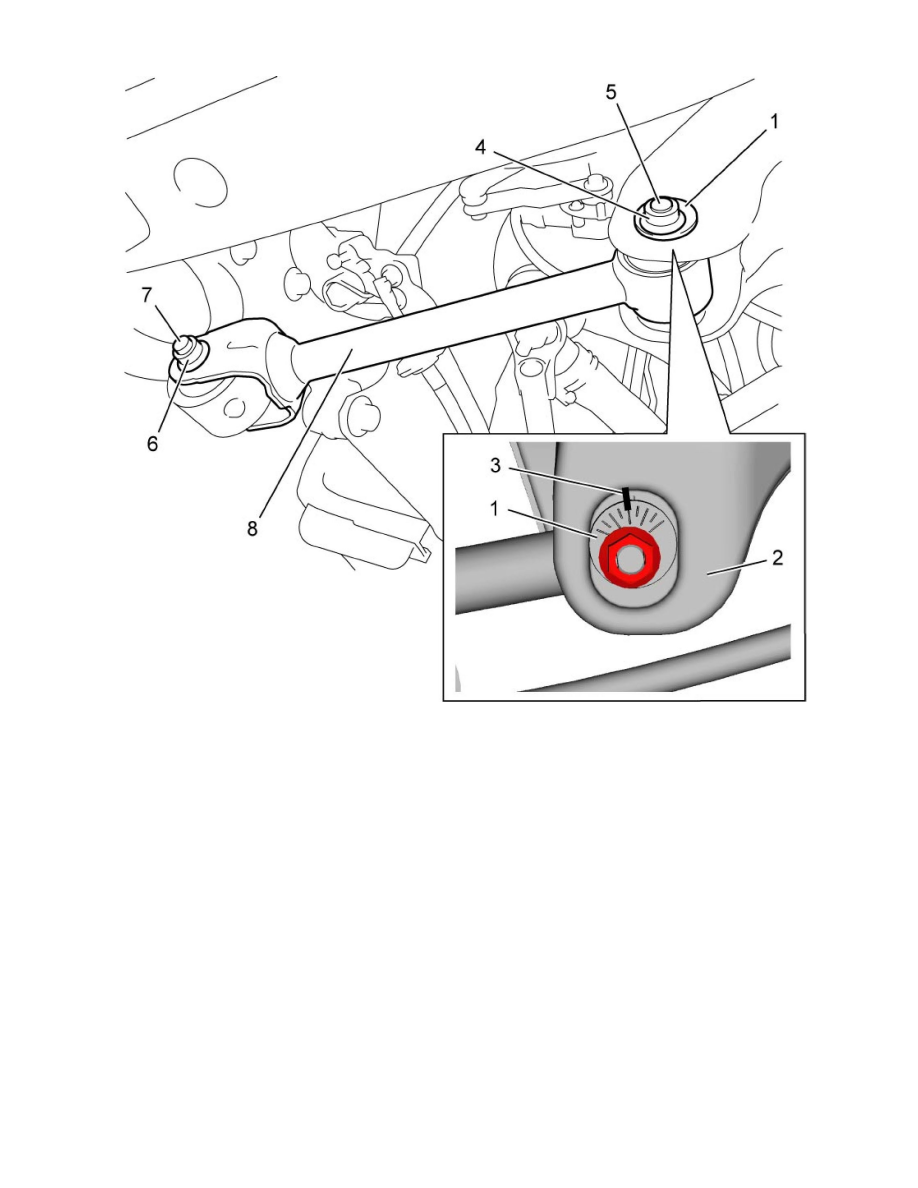
1) Set control rod in position.
2) Insert control rod adjustment bolt (1) from the front side [A] of vehicle.
3) Install adjustment washer (2) with its graduated part facing up.
4) Insert control rod bolt (3) from the front side of vehicle and temporarily secure the bolt with new control rod nut (4) to specified torque.
CAUTION:
Control rod nut is pre-coated with friction stabilizer. Never reuse nut. Otherwise, nut may loosen.
5) Align matchmark (5) on adjustment washer and rear suspension frame, then tighten new control rod lock nut (6) temporarily.
CAUTION:
Control rod lock nut is pre-coated with friction stabilizer. Never reuse lock nut. Otherwise, lock nut may loosen.
Tightening torque
Control rod nut (a): 75 Nm (7.6 kg-m, 55.5 lbf-ft)