
Swift GA L4-1298cc 1.3L SOHC MFI (2001)
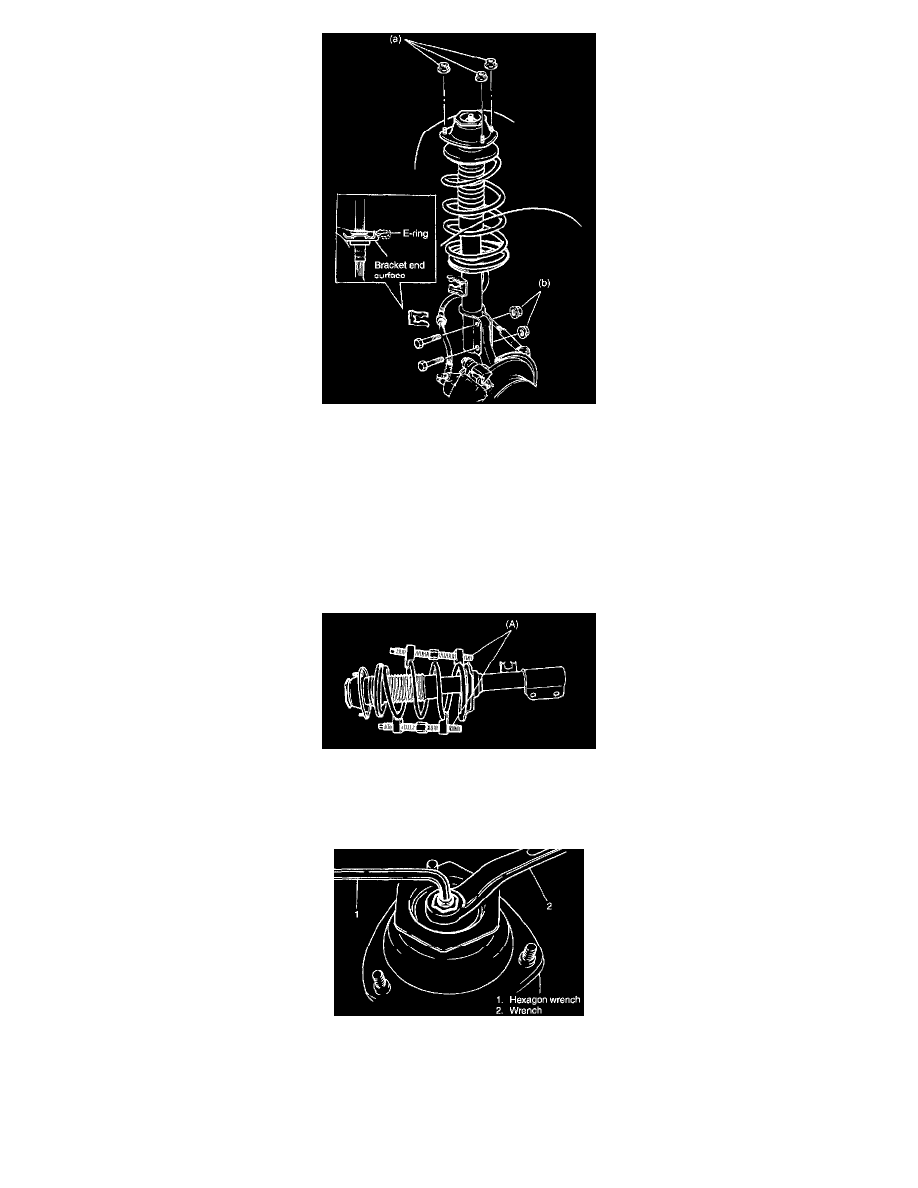
1. Install strut by reversing REMOVAL steps 1) - 7). Insert bolts in such a direction.
2. Torque all fasteners to specification.
Tightening Torque
(a): 28 Nm (2.8 kg-m, 20.5 ft. lbs.)
(b): 80 Nm (8.0 kg-m, 58.0 ft. lbs.)
NOTE: Don't twist brake hose when installing it. Install E-ring as far as it fits to bracket.
Disassembly and Assembly
DISASSEMBLY
1. With special tool (A) placed to spring as shown, turn special tool bolts alternately until spring tension is released. Whether it is released or not can
be known by whether strut turns lightly while strut spring is held stationary.
Special Tool
(A): 09940-71430
2. While keeping spring compressed with special tool as shown, remove strut nut.