
SX4 2WD L4-2.0L (2007)
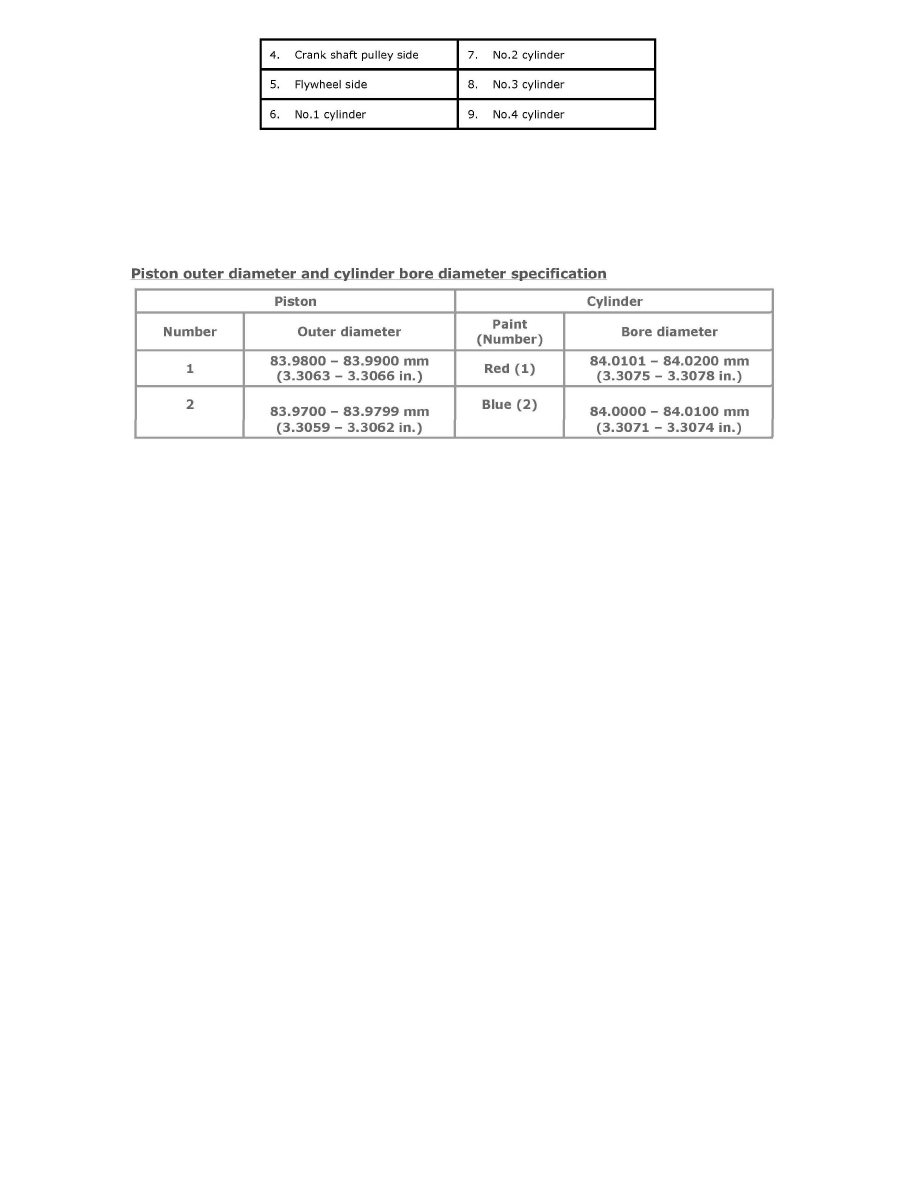
3. Stamped number on piston and painted color (or stamped number) on cylinder block should correspond. That is, install number "2" stamped piston
to cylinder which is identified with blue painted (or "2" stamped) and a number "1" piston to cylinder with red painted (or "1" stamped).
Also, a letter "A" or "B" is stamped on piston head but ordinarily it is not necessary to discriminate each piston by this letter.
Piston outer diameter and cylinder bore diameter specification
Piston outer diameter and cylinder bore diameter specification
4. Install piston pin to piston (1) and connecting rod (3):
After applying engine oil to piston pin, piston pin holes in piston and inner surface of connecting rod small end, fit connecting rod to piston as
shown in figure and insert piston pin to piston and connecting rod, and install piston pin circlips.
NOTE:
^
Oil hole (4) comes on intake side.
^
Circlip (5) should be installed so that circlip end gap comes within such range as indicated by arrow.