
SX4 2WD L4-2.0L (2007)
inflator flying off due to shock from inflator deploying.
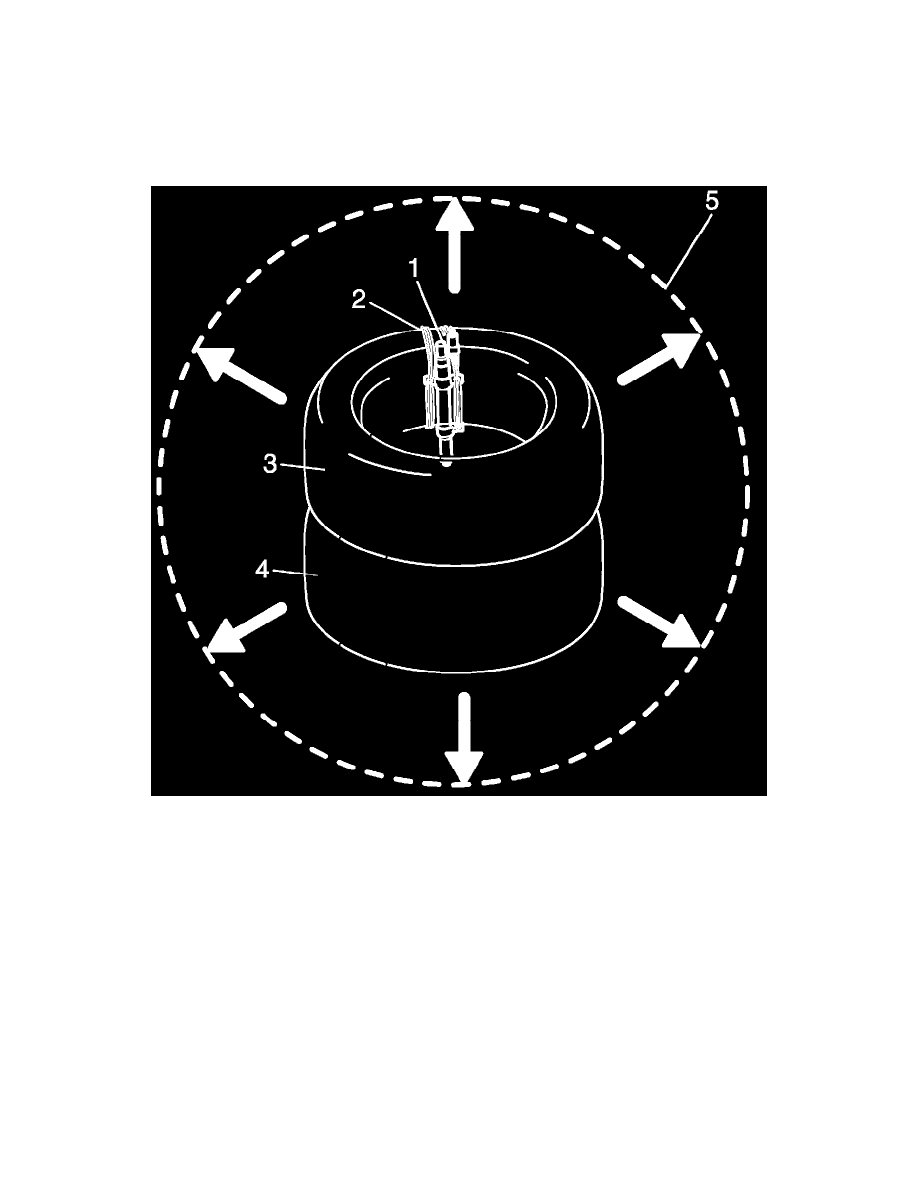
NOTE: Wind wire harness (2) around at least 3 times.
c. Clear space (5) on ground about 185 cm (6 ft) in diameter where side curtain-air bag (inflator) module (1) is set for deployment. Paved,
outdoor location where there is no activity is preferred. If outdoor location is not available, use space on shop floor where there is no
activity and sufficient ventilation is provided. Ensure no loose or flammable object exists within activation area.
d. Pile tire with side curtain-air bag (inflator) module on tire (4).
^
For seat belt pretensioner
a. Cut webbing (1) at tongue plate stopper (3) of seat belt pretensioner (2) side as shown.
NOTE: Hold seat belt pretensioner (2) vertically in the same condition as it is installed. Otherwise, webbing can't be pulled out.
b. Remove tongue plate (4) and shoulder anchor (5) from webbing.
c. Tie webbing (1) tightly at 10 cm (3.9 in.) from cutting edge as shown.