
SX4 2WD L4-2.0L (2007)
Steering Gear: Service and Repair
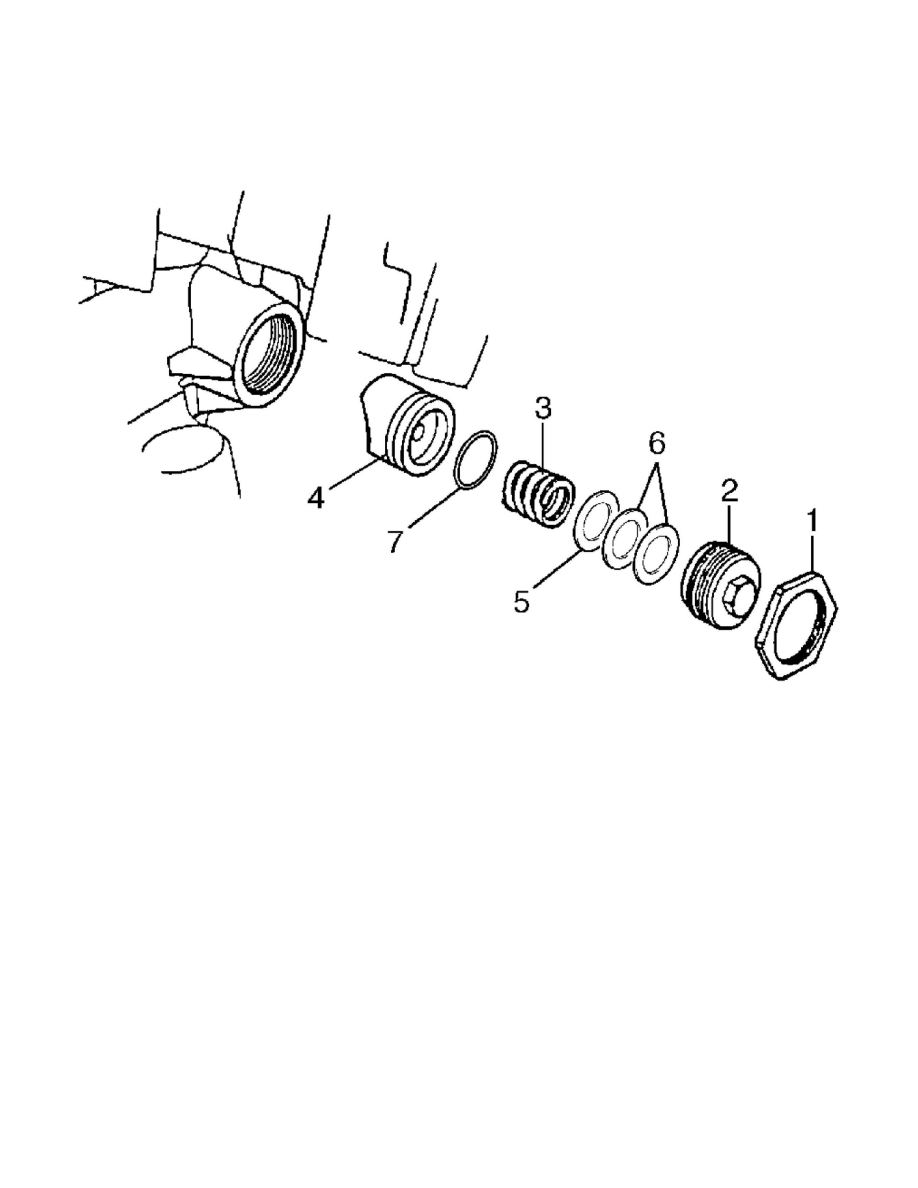
Steering Rack Plunger Removal and Installation
Steering Rack Plunger Removal and Installation
Removal
1. Loosen lock nut (1) with holding damper screw (2).
2. Remove lock nut (1), rack damper screw (2), rack plunger spring (3), washer (5), spring washers (6), O-ring (7) and rack plunger (4).
Installation
1. Install plunger (1), new O-ring (6), washer (4), spring washers (5) and spring (2) as shown.
NOTE: Do not wipe off grease previously applied to new plunger.
2. Apply sealant to rack damper screw (3) and tighten them as follows.
a) Tighten damper screw to 25 Nm (2.5 kgf-m, 18.0 ft. lbs.).
b) Loosen damper screw until 180°.
c) Retighten damper screw to 3.9 Nm (0.39 kgf-m, 3.0 ft. lbs.).
d) After tightening rack damper screw to specified torque, turn it back by 10° or less.
"A": Water tight sealant 99000-31250SUZUKI Bond No.1207F
Tightening torque
Rack damper screw a: Tighten 25 Nm (2.5 kgf-m, 18.0 ft. lbs.) and loosen 180° and then tighten 3.9 Nm (0.39 kgf-m, 3.0 ft. lbs.) and turn
it back by 10° or less by the specified procedure.