
SX4 4WD L4-2.0L (2008)
Impact Sensor: Service and Repair
Side Impact-Sensor Removal and Installation
Side Impact-Sensor Removal and Installation
WARNING: During service procedures, be very careful when handling a sensor.
^
Never strike or jar a sensor.
^
A sensor bolt must be carefully torqued to assure proper operation. Under loose connection, it could cause improper operation of the air
bag system.
REMOVAL
1. Disconnect negative (-) cable at battery.
2. Disable air bag system. Refer to Disabling Air Bag System:Advanced Air Bag. See: Body and Frame/Interior Moulding / Trim/Dashboard /
Instrument Panel/Air Bag(s) Arming and Disarming/Service and Repair/Disabling Air Bag System/Advanced Air Bag
3. Remove center pillar lower trim.
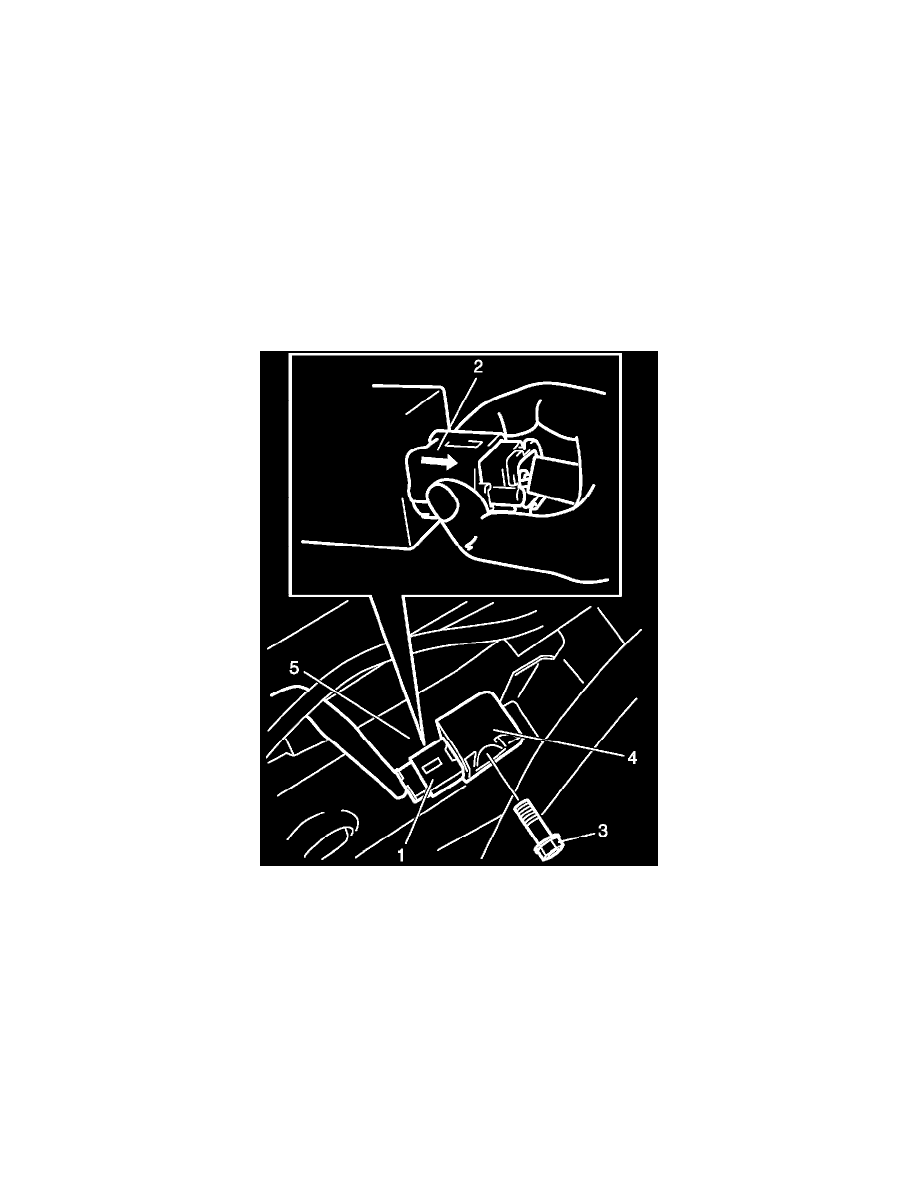
4. Turn up floor carpet at front seat side.
5. Disconnect side impact-sensor connector (1) sliding connector outer (2) as shown.
6. Remove side impact-sensor bolts (3), and side impact-sensor (4) from side sill inner panel (5).
INSTALLATION
Reference: Side Impact-Sensor Inspection:Advanced Air Bag
CAUTION: Proper operation of side impact-sensor requires that sensor is rigidly attached to specified position.
1. Check that none of following faulty conditions exists.
^
Bend, deformity or rust of under body.
^
Foreign matter on mating surface of sensor.
2. Install side impact-sensor (1) to side sill inner panel (2) and tighten side impact-sensor bolt (3) to specified torque.
Tightening torque
Side impact-sensor bolt (a): 9 Nm (0.9 kg.m, 6.5 lbf.ft)