
XL-7 2WD V6-3.6L (2007)
Front Door Striker: Adjustments
Front Side Door Lock Striker Adjustment
To determine if striker adjustment is required, proceed as follows:
WARNING: In order to prevent SIR deployment, personal injury, or unnecessary SIR system repairs, do not strike the door or the door pillar
in the area of the side impact sensor (SIS). Turn OFF the ignition and remove the key when performing service in the area of the SIS.
1. Ensure the door is properly aligned within the door opening before proceeding with the striker adjustment.
2. Close the door onto the striker and note if the door drags on the striker causing the door to move upward or downward upon contact with the
striker. Also note the closing effort to fully engage the latch.
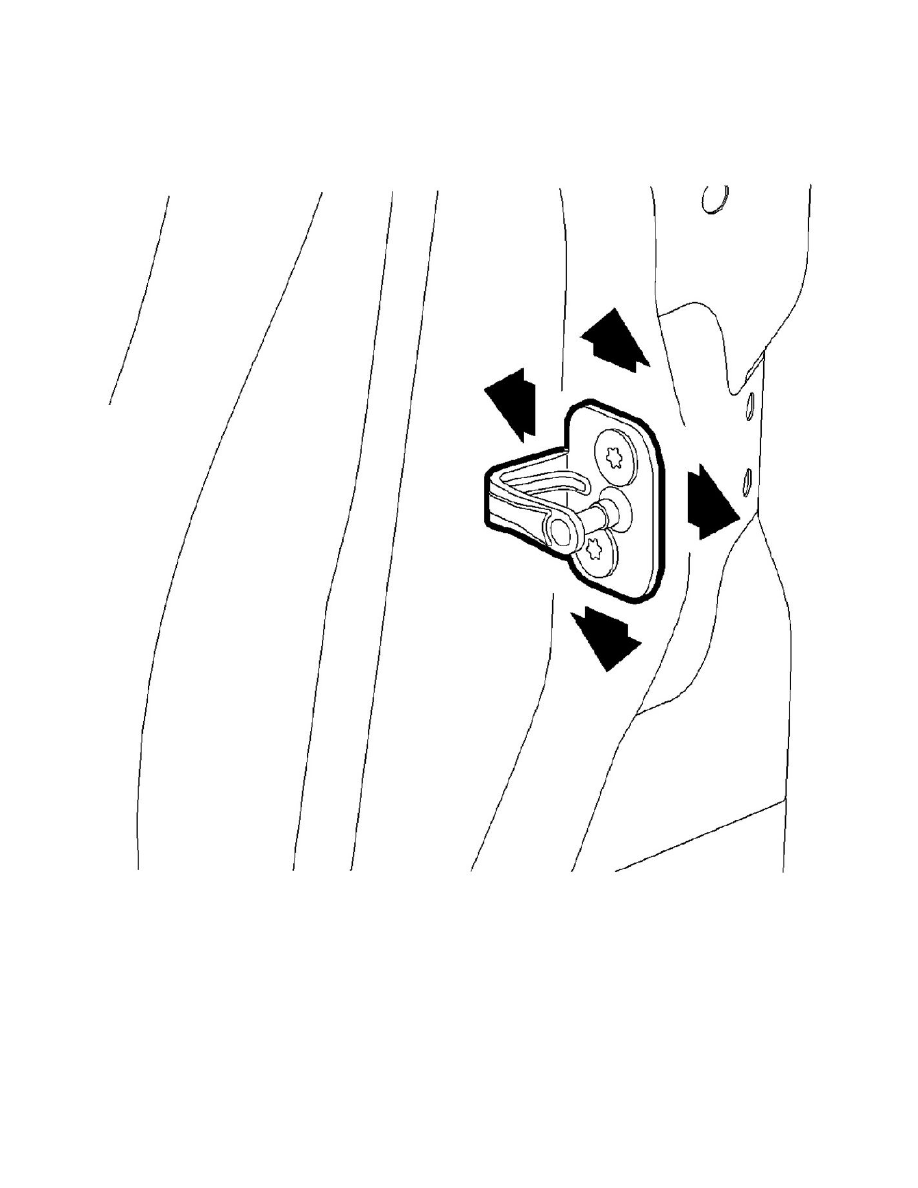
3. Using a grease pencil, mark around the striker for reference of the original position. Loosen the striker.
4. Move the striker to eliminate drag on the striker and door latch and to achieve the proper door position within the door opening. Start with the
up/down position, then position the striker to achieve proper alignment to the door opening. Set the in/out adjustment for the proper door seal
engagement making sure the door closing efforts are correct.
CAUTION: Refer to [Fastener Notice] in Cautions and Notices.
5. Tighten the striker bolts.
Tightening torque
Tighten the door striker bolts to 25 N-m (18 lb ft).