
XL-7 2WD V6-3.6L (2007)
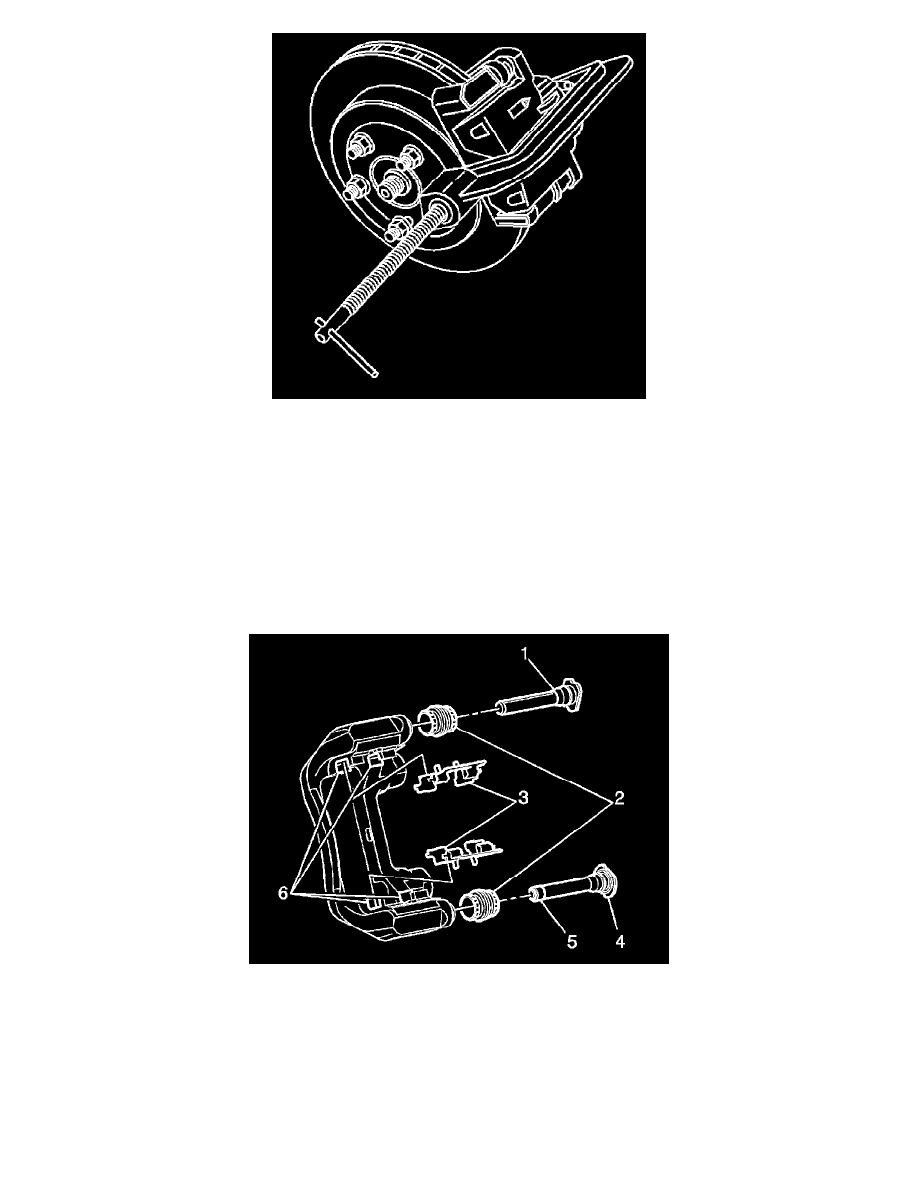
1. Install a large C-clamp, over the body of the brake caliper with the C-clamp ends against the rear of the caliper body and against the outer brake
pad.
CAUTION: When using a large C-clamp to compress a caliper piston into a caliper bore of a caliper equipped with an integral park
brake mechanism, do not exceed more than 1 mm (0.039 in) of piston travel. Exceeding this amount of piston travel will cause damage to
the internal adjusting mechanism and/or the integral park brake mechanism.
2. Tighten the C-clamp just enough to compress the caliper piston 1 mm (0.039 in) of travel only.
3. Remove the C-clamp from the caliper.
4. Grasp the brake caliper and attempt to move the brake caliper vertically. The brake caliper should not exhibit excessive looseness.
5. Without disconnecting the hydraulic brake flex hose, remove the caliper from the caliper bracket, and support the caliper.
6. Inspect the caliper bolts to ensure that they are not bent or damaged. If the bolts are bent or damaged, the bolts require replacement.
7. Ensure the disc brake pads are held firmly in place on the brake caliper mounting bracket, yet slide easily on the mounting hardware (3) without
binding.
8. Inspect the disc brake pad mounting hardware, pad retainers (3), for the following:
^
Bent mounting tabs
^
Excessive corrosion
^
Looseness at the brake caliper mounting bracket
^
Excessive wear and/or looseness at the disc brake pads
^
Missing mounting hardware
9. If any of the conditions listed are found, the disc brake pad mounting hardware requires replacement.
10. Inspect the brake caliper guide pins (1, 4) by gently pushing inward, without disengaging the slides from the boots, then pull outward, and observe