
XL-7 2WD V6-3.6L (2007)
NOTE:
Inspect the stabilizer link seals for damage prior to installation. Replace as required.
NOTE:
Do not allow the stabilizer link ball stud to rotate while installing the link nut.
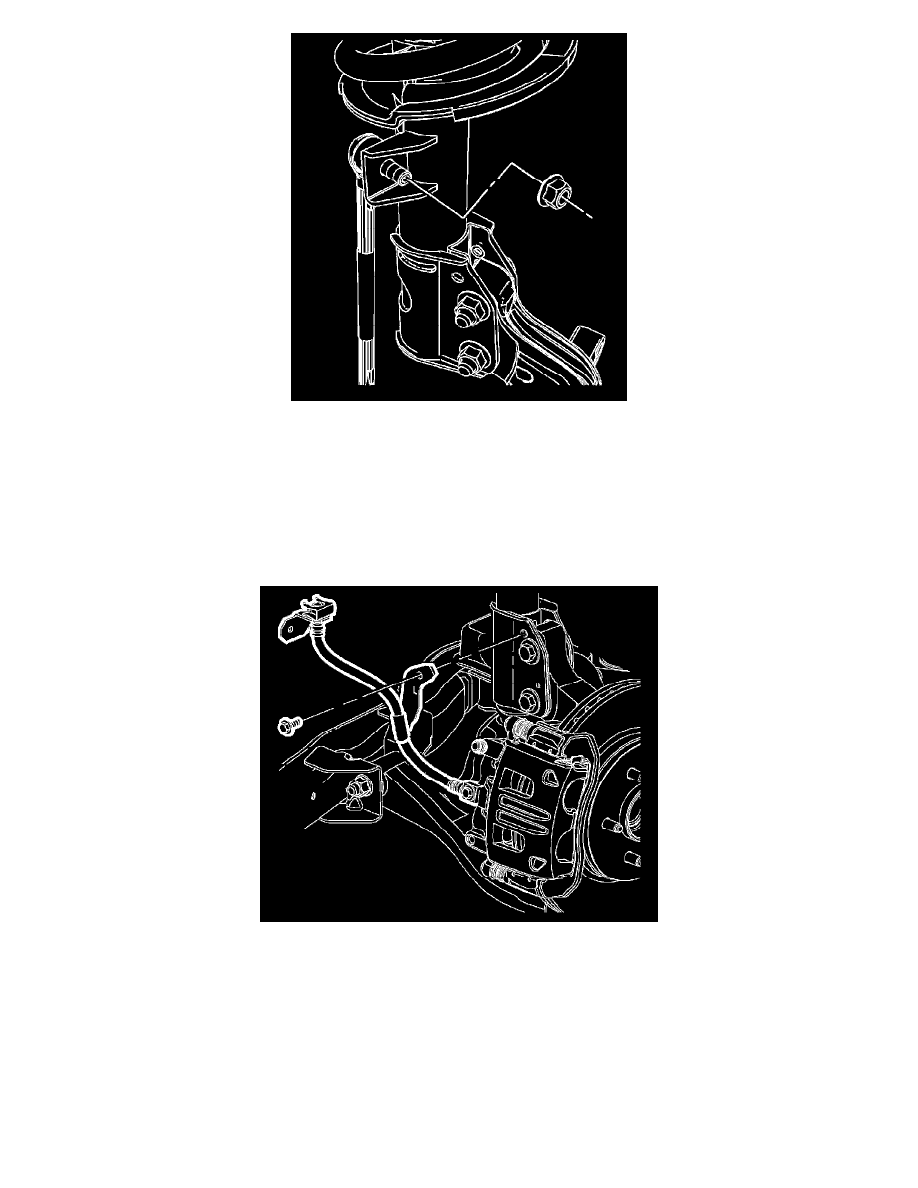
4. Position the stabilizer link to the strut and install the nut.
Tightening torque
Tighten the nut to 65 Nm (48 ft. lbs.).
5. Position the brake hose bracket to the strut assembly and install the bolt.
Tightening torque
Tighten the brake bracket bolt to 15 Nm (11 ft. lbs.).
6. Install the wheel and tire.
7. Lower the vehicle.
8. Perform a wheel alignment.
Suspension Strut Disposal
Suspension Strut Disposal
WARNING:
Use the proper eye protection when drilling to prevent metal chips from causing physical injury.