
XL-7 Limited 4WD V6-2.7L (2002)
2. Torque each bolt (2) and nut (1) to specification as indicated respectively in the figure.
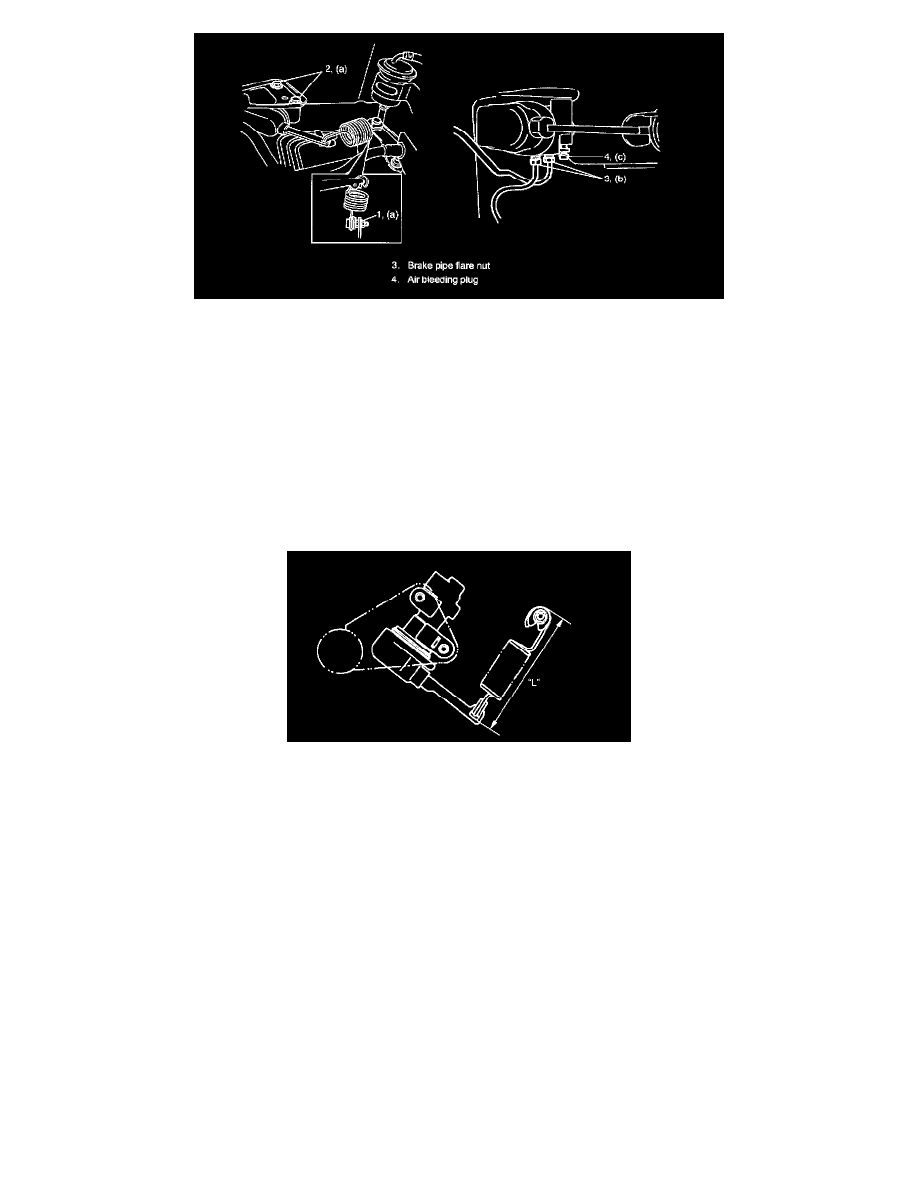
Tightening torque
LSPV spring nut (a): 23 Nm (2.3 kgf-m, 17.0 ft. lbs.)
LSPV mounting bolt (a): 23 Nm (2.3 kgf-m, 17.0 ft. lbs.)
Brake pipe flare nut (b): 16 Nm (1.6 kgf-m, 11.5 ft. lbs.)
Air bleeding plug for LSPV (c): 7.5 Nm (0.75 kgf-m, 5.5 ft. lbs.)
3. Upon completion of installation, fill reservoir tank with specified fluid and bleed air from brake system.
NOTE: Make sure to bleed air from LSPV bleeder without failure.
4. After bleeding air, check that LSPV is installed properly.
Inspection and Adjustment
Confirm the following before inspection and adjustment.
^
Fuel tank is filled with fuel fully.
^
Vehicle is equipped with spare tire, tools, jack and jack handle.
^
Vehicle is free from any other load.
With vehicle in conditions:
1. Place it on level floor.
2. Push up LSPV lever with finger till it stops and measure length of coil spring "L" as it is pulled.
3. Spring length "L" should be the value specified.
Spring length (between spring ends)
"L": 125 mm (4.92 inch)