
XL-7 Limited 4WD V6-2.7L (2002)
Steering Shaft: Service and Repair
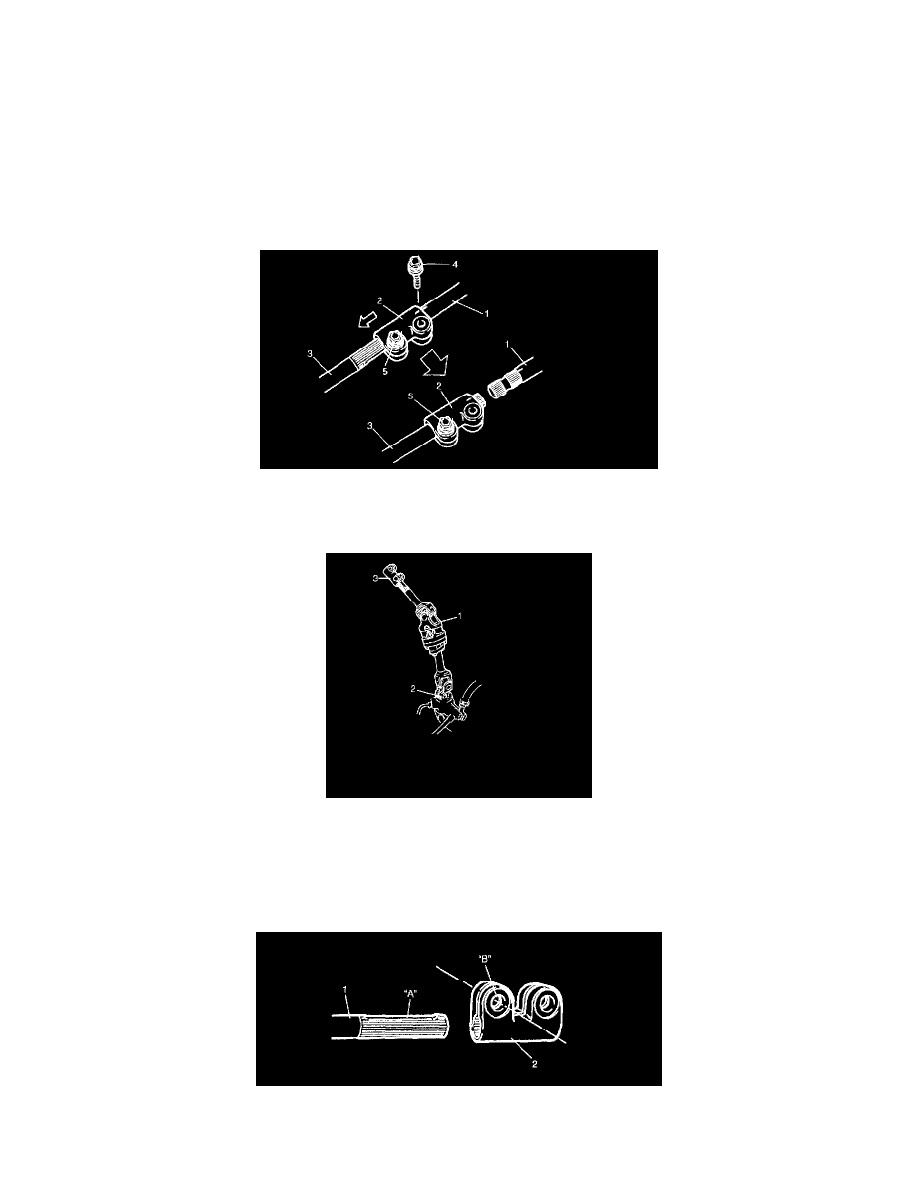
Lower Shaft Assembly
Removal and Installation
CAUTION: Never turn steering wheel while steering lower shaft assembly is removed. Should it have been turned and contact coil (on combination
switch) have got out of its centered position, it needs to be centered again. Also, turning steering wheel more than about two and a half turns will
break contact coil.
Removal
1. Turn steering wheel so that vehicle's front tires are at straight-ahead position.
2. Turn ignition switch to "LOCK" position and remove key.
3. After removing bolt (4) on upper shaft assembly (1) side of shaft joint (2) and loosening bolt (5) on its lower shaft assembly (3) side, move shaft
joint (2) to lower shaft assembly side (3) (in arrow direction in the figure).
4. Remove lower shaft assembly lower joint bolt (2) and then remove lower shaft assembly (1).
5. Remove shaft joint bolt (lower shaft assembly side) from shaft joint (3) and then remove shaft joint (3) from lower shaft assembly (1).
Installation
1. Be sure that front wheels and steering wheel are in straight-ahead position.
2. Align flat part "A" of lower shaft assembly (1) with bolt hole "B" of shaft joint as shown in the figure. Then insert shaft joint (1) into lower shaft
assembly (2).
3. Install shaft joint bolt (lower shaft assembly side) to shaft joint (2). Then tighten it by hand.