XL-7 Standard 2WD V6-2.7L (2001)

7. Using new brush, apply sufficient amount of primer for glass along glass surface to be adhered to body.
NOTE:
-
Be sure to refer to maker's instruction for proper handling and drying time.
-
Do not apply primer on outside of ceramic coated surface.
-
Do not touch primer coated surface.
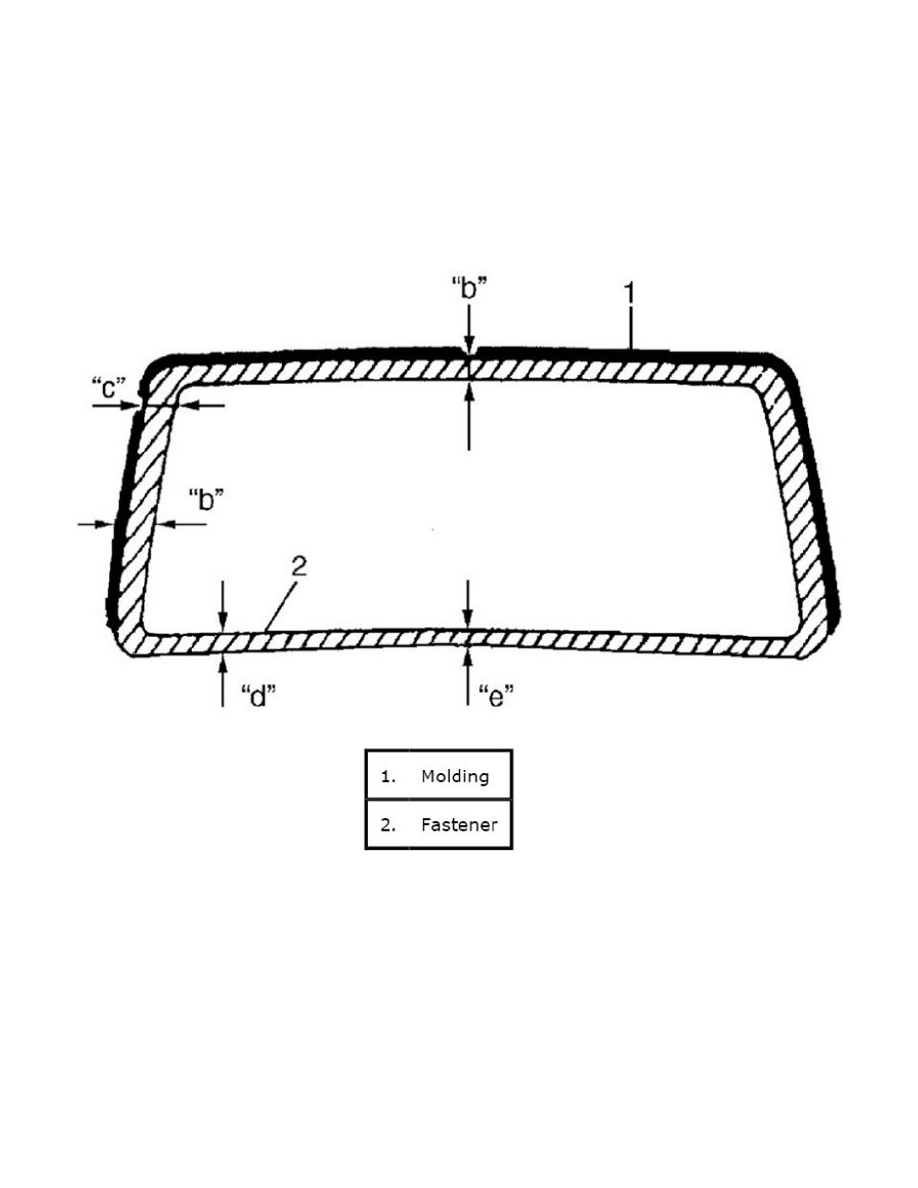
Area applied primer for windshield
Width "b": 18 - 19 mm (0.71 - 0.75 in.)
Width "c": 16 - 17 mm (0.63 - 0.67 in.)
Width "d": 24 mm (0.94 in.)
Width "e": 27 mm (1.06 in.)
8. Apply primer for molding (1) along molding surface all around as shown in the figure.
9. Apply adhesive (2) referring to the figure.
NOTE:
-
Start from bottom side of glass (3).
-
Be careful not to damage primer.
-
Height of adhesive (2) applied to lower side should be higher than that of other 3 sides.
Adhesive amount specification for windshield (upper, right and left sides)
Width "e": Approx. 11 mm (0.43 in.)
Height "f": Approx. 17 mm (0.67 in.)
Height "g": Approx. 25 mm (0.98 in.)
Distance "h": Approx. 16 mm (0.63 in.)
-
Press glass (3) against body quickly after adhesive (2) is applied.
-
Use of rubber sucker grip is helpful to hold and carry glass (3) after adhesive (2) is applied.
