vauxhall Workshop Repair Guides

Vauxhall Workshop Service and Repair Manuals

Hydraulic Clutch Actuation, Bleed (F13/F13+/F17/F17+/F18/F23/F35) > < Clutch Survey

Clutch Pedal, Remove and Install (F13/F13+/F17/F17+/F18/F23/F35)

  Remove

Remove driver's side footwell panel and air distribution duct.

If installed: Unclip clutch control switch (3).

Detach return spring from clutch pedal. Slightly bend up lock tab (7) with screwdriver and remove from pedal pin (6). Press out pedal pin.

For LHD vehicles (I): Remove pedal bracket fastening bolts (2) from steering crossmember.

For RHD vehicles (II): Remove pedal bracket fastening nut (5) from steering crossmember.

Remove fastening nuts (4) of pedal bracket (1) from clutch master cylinder. Press back clutch master cylinder until studs no longer protrude in footwell.

Carefully remove pedal bracket with clutch pedal – ensure that wiring harnesses and installation parts are not damaged.

Object Number: 2397949  Size: DEFAULT

  Install

Insert pedal bracket with clutch pedal and screw fastening bolts (or new fastening nut) on steering crossmember but do not tighten.

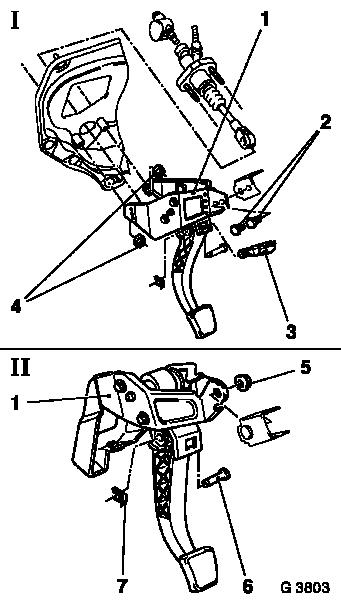
Pull clutch master cylinder (2) on thrust rod into separation surface. Install pedal bracket with new fastening nuts (1) on separation surface – tightening torque 20 Nm / 15 lbf. ft.

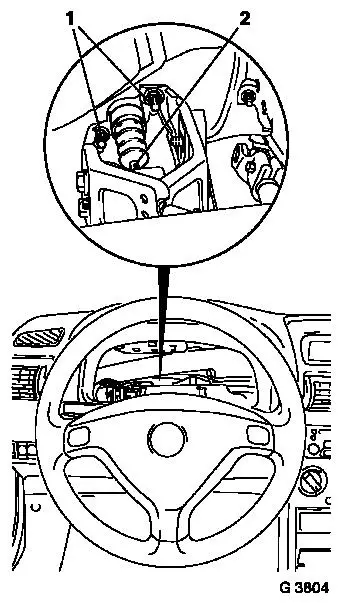
For LHD vehicles: Tighten pedal bracket fastening bolts on steering crossmember – tightening torque 20 Nm / 15 lbf. ft.

For RHD vehicles: Tighten pedal bracket fastening nut on steering crossmember – tightening torque 20 Nm / 15 lbf. ft.

Guide pedal pin in clutch pedal and clutch master cylinder yoke and secure with new lock tab. Attach return spring to clutch pedal.

If installed: Clip clutch control switch on pedal bracket.

Install air distribution duct and footwell panel.

Object Number: 2397950  Size: DEFAULT


Related Literature Units
-
-

Hydraulic Clutch Actuation, Bleed (F13/F13+/F17/F17+/F18/F23/F35) > < Clutch Survey