|
Replace electronic control unit (M20 MTA)
 Remove Remove
Important: Follow Easytronic
safety guidelines .
The electronic control unit may only be removed and reinstalled
once. If the electronic control unit is removed again, it must be
replaced.
|
| 1. |
Remove battery support
|
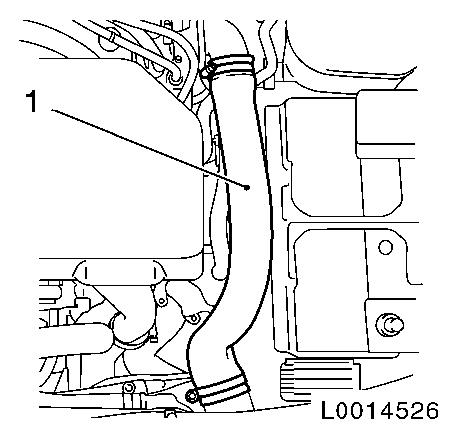
| 2. |
Remove the charge-air hose (1) from intercooler to connection
port on throttle valve housing
|
|
|
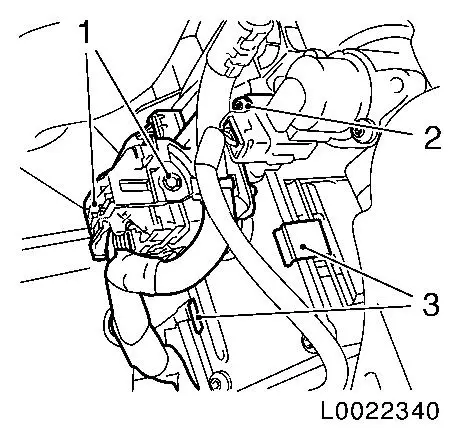
| 3. |
Release 2x wiring harness plugs (1) and disconnect
|
| 4. |
Detach wiring harness bracket
|
| 5. |
Detach 2x control unit retaining clamps (3)
Note: If present.
|
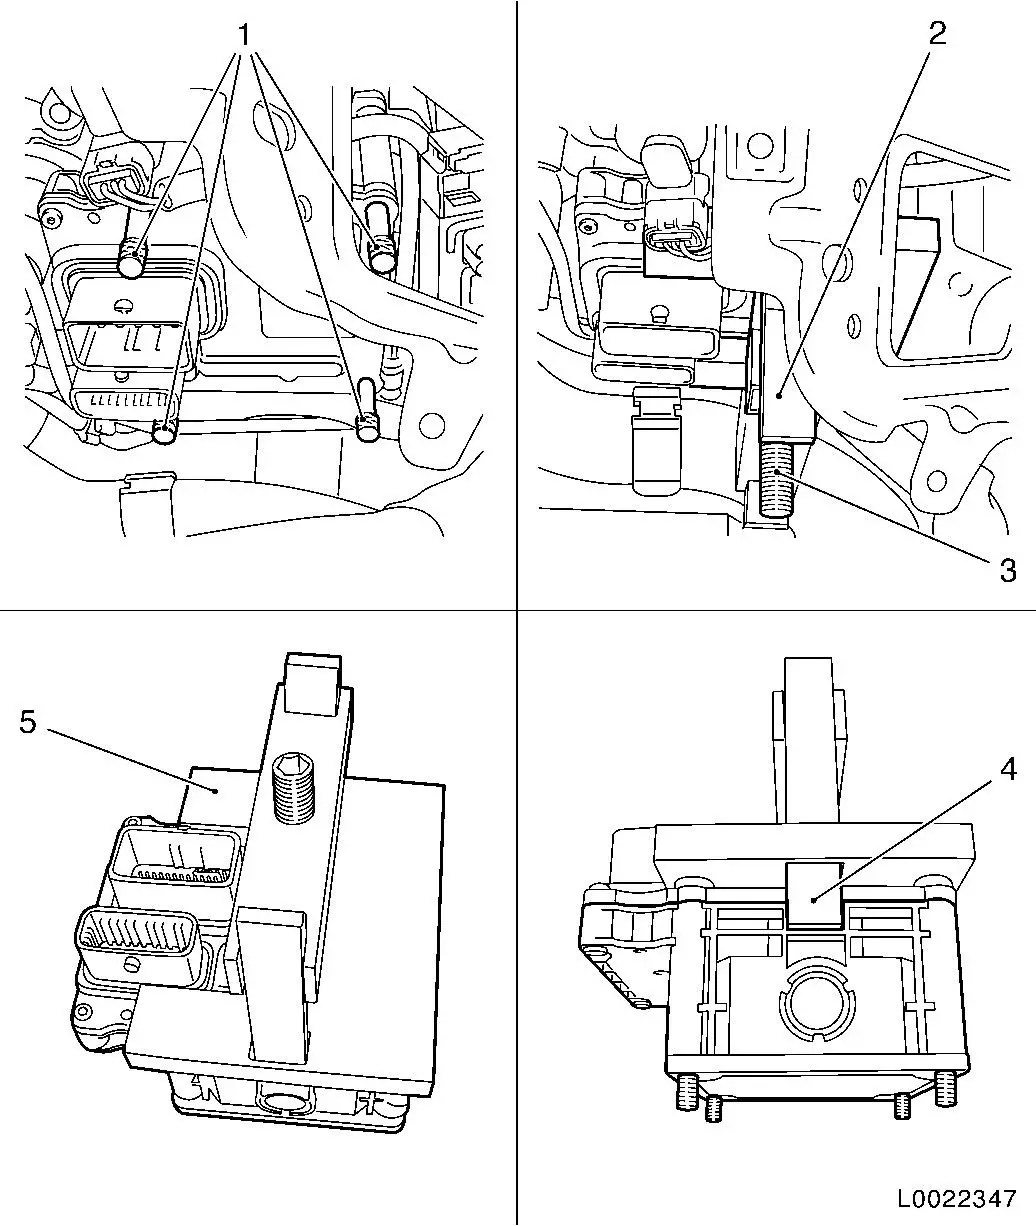
| 6. |
Unscrew 4x control unit bolts
|
|
|
|
| 7. |
Screw in 4x long bolts of DT-48660
(1) hand-tight
|
| 8. |
Attach extractor DT-48660 (2) to
control unit
Note: Check for proper
seating (5) in the notches of the control unit's plastic housing
(4)
|
| 9. |
Release control module with DT-48660
|
| 10. |
Detach extractor DT-48660
Note: After the control
module has been disconnected from the pins of the solenoid
valve
|
| 11. |
Unscrew in 4x long bolts of DT-48660
|
Important: Do not tilt or twist
the control unit during removal in order to prevent bending or
damage of the solenoid valve pins.
|
| 12. |
Carefully remove control unit
|
|
 Install
| 13. |
Install control unit
| • |
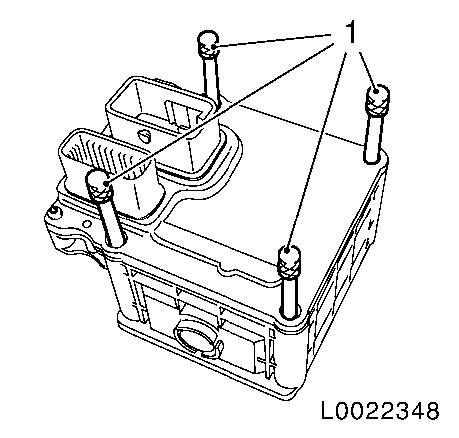
Insert guide pins DT-48659 (1) in
removed control unit
|
| • |
Screw guide pins into fastening threads of control unit to keep
control unit away from solenoid valve pins.
|
| • |
Mount control unit over the guide pins
|
|
| 14. |
Fasten control unit
| • |
Tighten 4x bolts in crosswise formation 10 Nm
|
|
|
|
| 15. |
Attach wiring harness bracket
|
| 16. |
Attach 2x control unit retaining clamps (3)
Note: If present.
|
| 17. |
Connect and lock 2x wiring harness plug (1)
|
|
|
| 18. |
Fit the charge-air hose from intercooler to connection port on
throttle valve housing
| • |
Tighten 2x clamp 3.5 Nm
|
|
|
|
| 19. |
Install battery support
|
| 20. |
Necessary Start-Up Routines for Easytronic 
|
| 22. |
Program volatile memories
|
|
