Body Hinge Pillar Reinforcement Replacement
Note: According to
different corrosion warranties, only the regional mandatory joining
methods are allowed.
Removal Procedure
| 3. |
Remove all related panels and
components. |
| 4. |
Visually inspect the damage.
Repair as much of the damage as possible. |
| 5. |
Remove the sealers and
anti-corrosion materials from the repair area, as necessary.
|
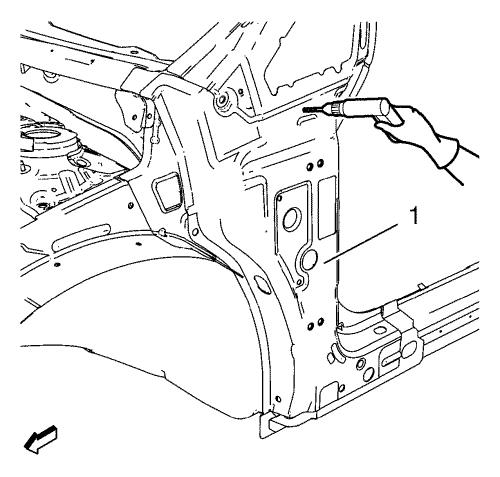
| 6. |
Locate and mark all the
necessary factory welds of the body hinge pillar reinforcement
(1). |
| 7. |
Drill all factory welds. Note
the number and location of welds for installation of the service
assembly. |
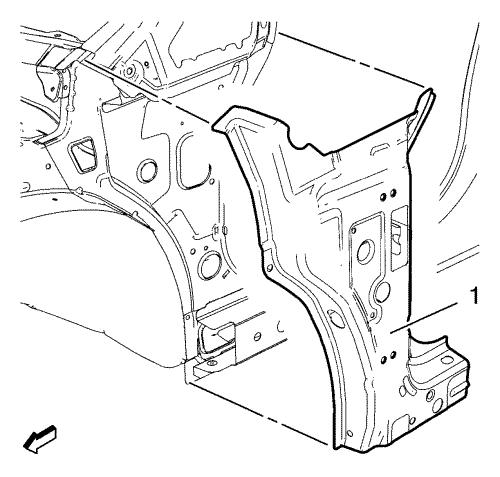
| 8. |
Remove the damaged body hinge
pillar reinforcement (1). |
Installation Procedure
| 1. |
Prepare all mating surfaces as
necessary. |
| 2. |
Align the body hinge pillar
reinforcement. |
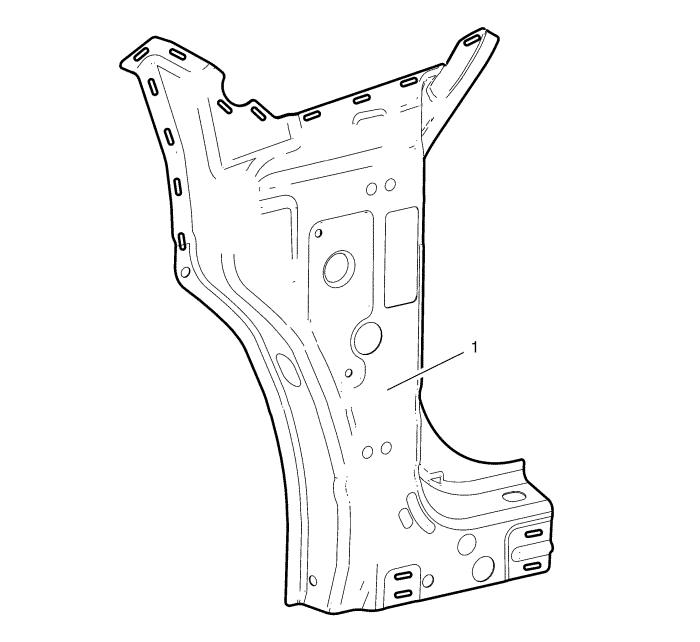
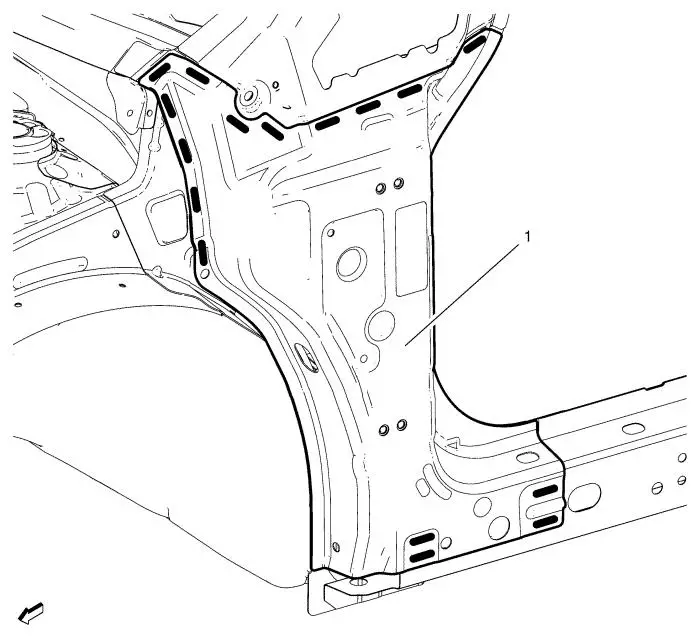
| 3. |
Create 16 x 6 x 20
mm slots on the body hinge pillar reinforcement (1) for
MIG-brazing. |
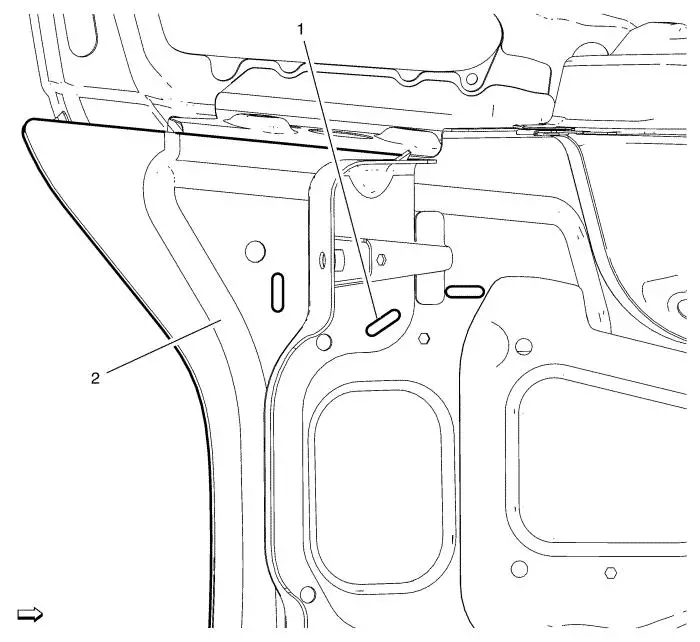
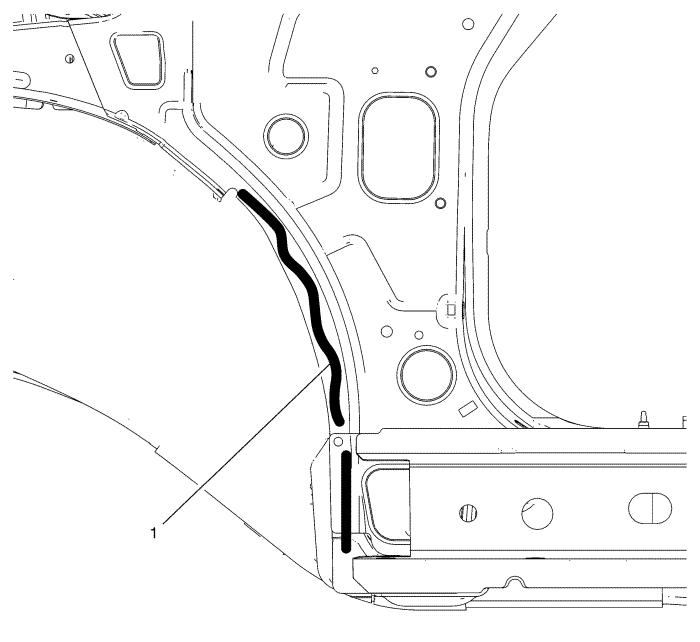
| 4. |
Create 3 6 x 20
mm slots (1) for MIG-brazing to body hinge inner panel
(2). |
| 5. |
Clean and prepare the
attaching surfaces for spot welding and brazing. |
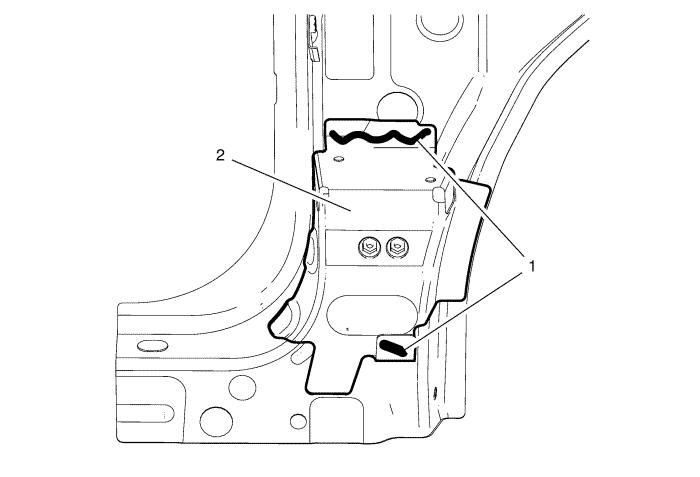
| 6. |
Apply structural adhesive (1)
to the body hinge pillar reinforcement (2). |
| 7. |
Apply structural adhesive (1)
to the body hinge pillar inner panel. |
| 8. |
Position the body hinge pillar
reinforcement (1) on the vehicle. |
| 9. |
Verify the fit of the body
hinge pillar reinforcement. |
| 10. |
Clamp the body hinge pillar
reinforcement into position. |
| 11. |
Braze the body hinge pillar
reinforcement (1) accordingly with 16 slot brazes. |
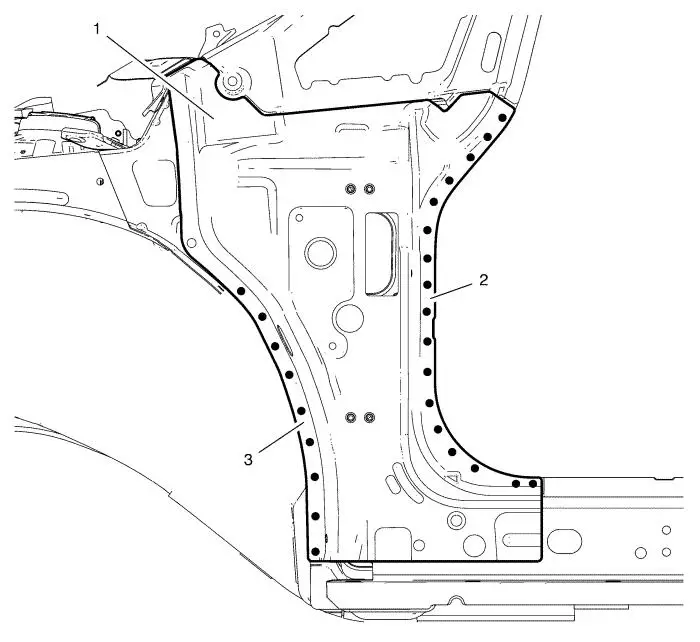
| 12. |
Spot weld body hinge pillar
reinforcement (1) accordingly. |
| |
• |
Front side door opening flange
(2) - 17 spot welds |
| |
• |
Wheelhouse flange (3) - 9 spot
welds |
| 13. |
Apply the sealers and
anti-corrosion materials to the repair area, as necessary.
|
| 14. |
Paint the repaired
area. |
| 15. |
Install all related panels and
components. |
|
