Camshaft Cover Replacement (1.4L LUH and LUJ)
Removal Procedure
| 4. |
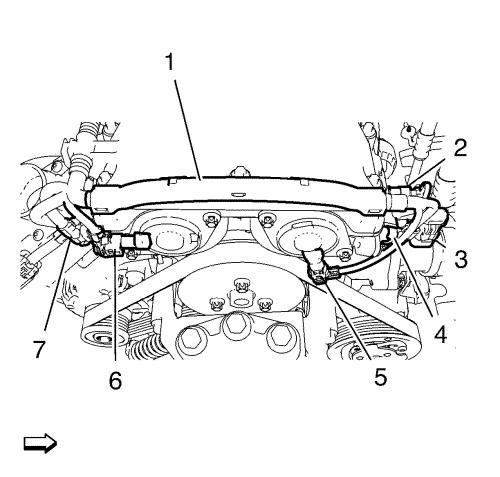
Remove engine control module
wiring harness (1) from camshaft cover. |
| |
• |
Disconnect intake camshaft
position sensor wiring harness plug (7). |
| |
• |
Disconnect intake camshaft
position actuator solenoid valve wiring harness plug (6).
|
| |
• |
Disconnect exhaust camshaft
position sensor wiring harness plug (4). |
| |
• |
Disconnect exhaust camshaft
position actuator solenoid valve wiring harness plug (5).
|
| |
• |
Disconnect engine coolant
temperature sensor wiring harness plug (3). |
| |
• |
Disconnect engine oil pressure
indicator switch wiring harness plug (2). |
| |
• |
Unclip engine control module
wiring harness plug from camshaft cover and lay aside. |
| 5. |
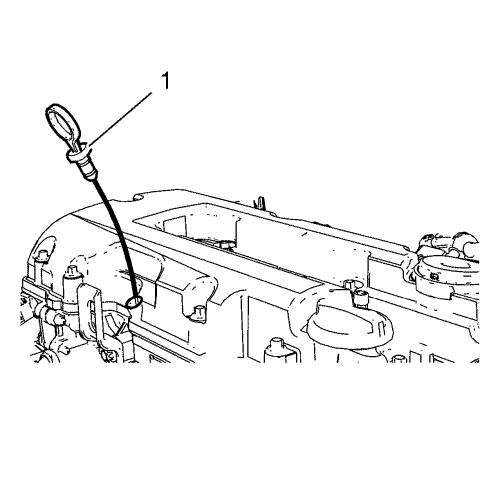
Remove the oil level indicator
(1). |
| 6. |
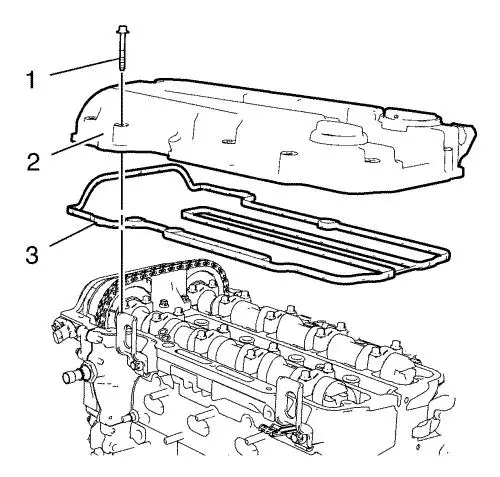
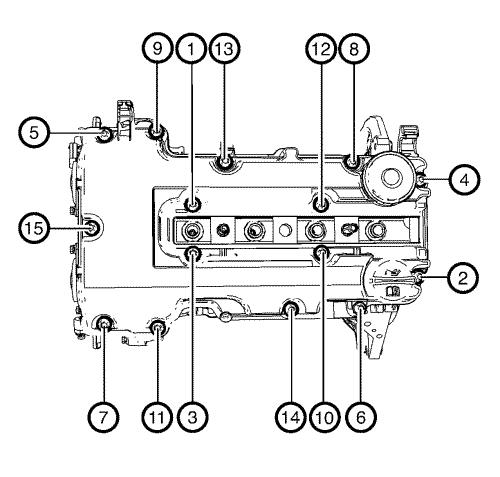
Remove the 15 camshaft cover
bolts (1). |
| 7. |
Remove the camshaft cover (2)
and the camshaft cover gasket (3). |
Installation Procedure
| 1. |
Clean the sealing
surfaces. |
|
Note: The thickness
of the sealing bead should be 2 mm (0.0787 in)
.
|
|
Note: The
installation procedure should not take longer than 10 minutes.
|
| 3. |
Install the camshaft cover (2)
and a NEW gasket (3). |
| 4. |
Install the 15 camshaft cover
bolts (1). |
| 5. |
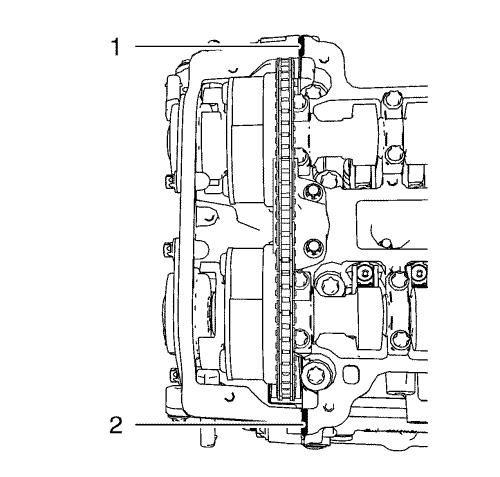
Tighten the 15 camshaft cover
bolts in a sequence as shown to 8 N·m (71 lb
in) . |
| 6. |
Install engine control module
wiring harness (1) to camshaft cover. |
| |
• |
Clip engine control module
wiring harness plug to camshaft cover. |
| |
• |
Connect intake camshaft
position sensor wiring harness plug (7). |
| |
• |
Connect intake camshaft
position actuator solenoid valve wiring harness plug (6).
|
| |
• |
Connect exhaust camshaft
position sensor wiring harness plug (4). |
| |
• |
Connect exhaust camshaft
position actuator solenoid valve wiring harness plug (5).
|
| |
• |
Connect engine coolant
temperature sensor wiring harness plug (3). |
| |
• |
Connect engine oil pressure
indicator switch wiring harness plug (2). |
| 9. |
Check and correct engine oil
level. |
|
