Body Wiring Harness Replacement (Wagon 35 - Right Hand
Drive)
Special Tools
| • |
EL-47955 Multi
Diagnostic Interface MDI |
For equivalent regional tools, refer to
Special Tools .
Removal Procedure
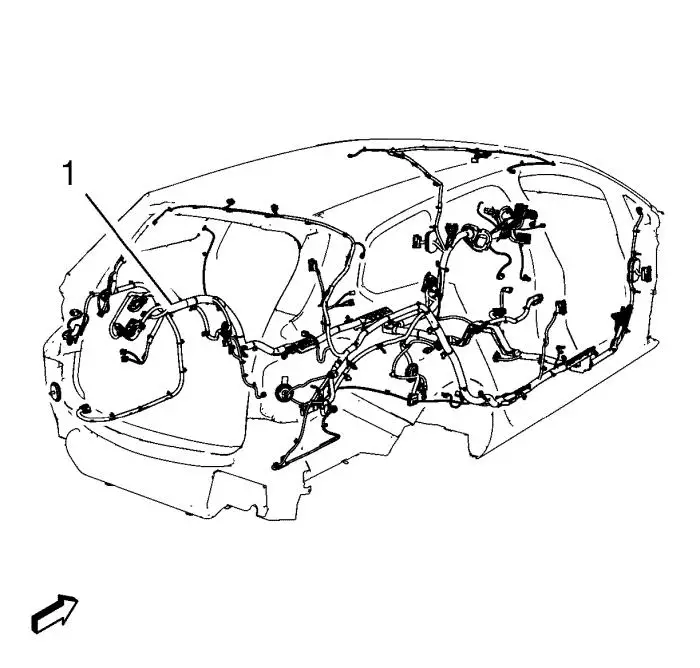
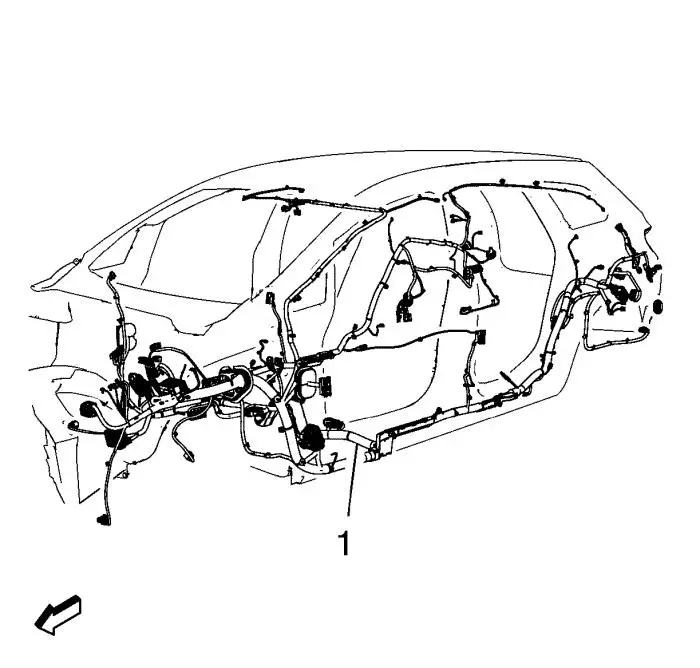
Note: For a better
description the following graphic shows the vehicle without
attaching parts.
Note: For a better
description the following graphic shows the vehicle without
attaching parts.
Note: Arrange a place to
embed the removed parts.
| 1. |
Install the MDI, turn on the
ignition and read out the trouble codes. |
| |
Delete them and read out the trouble codes again. If there are
any trouble codes notice them. |
| 10. |
Pass parts in the work
area. |
| 11. |
Make pictures for correct
orientation. |
| 14. |
Pass parts in the work
area. |
| 15. |
Make pictures for correct
orientation. |
| 18. |
Disconnect body wiring harness
from electrical park brake. |
| 19. |
Remove body wiring harness
from fuel tank filler door lock actuator. |
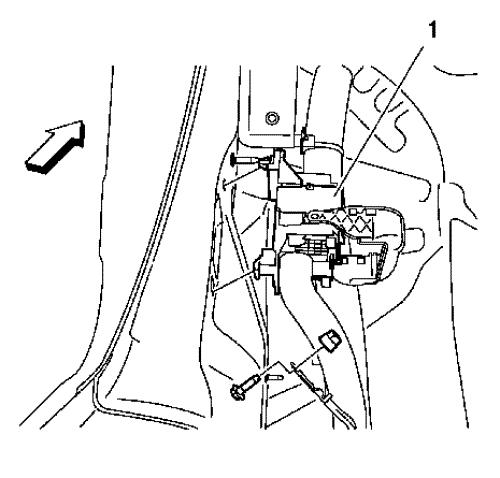
| 21. |
Disconnect body wiring harness
from steering gear. |
| 22. |
Pass parts in the work
area. |
| 23. |
Make pictures for correct
orientation. |
| 27. |
Pass parts in the work
area. |
| 28. |
Make pictures for correct
orientation. |
| 31. |
Remove the body wiring harness
from roof and A-pillars. |
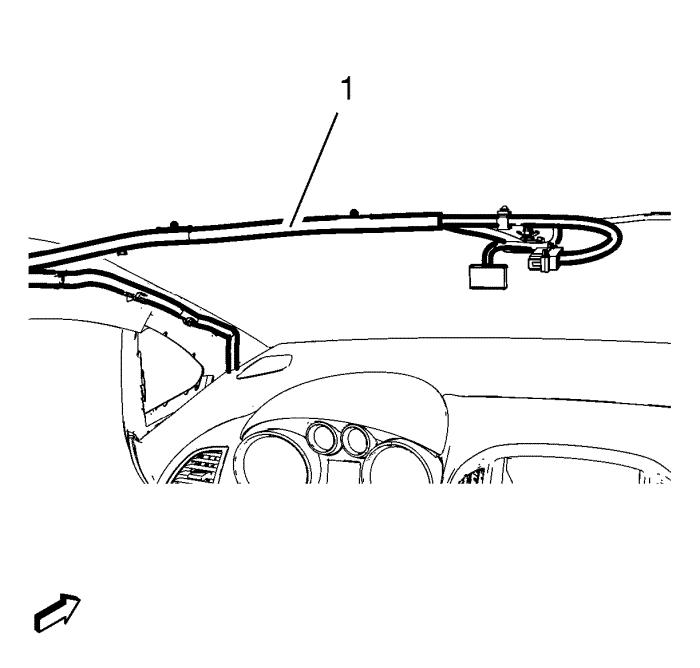
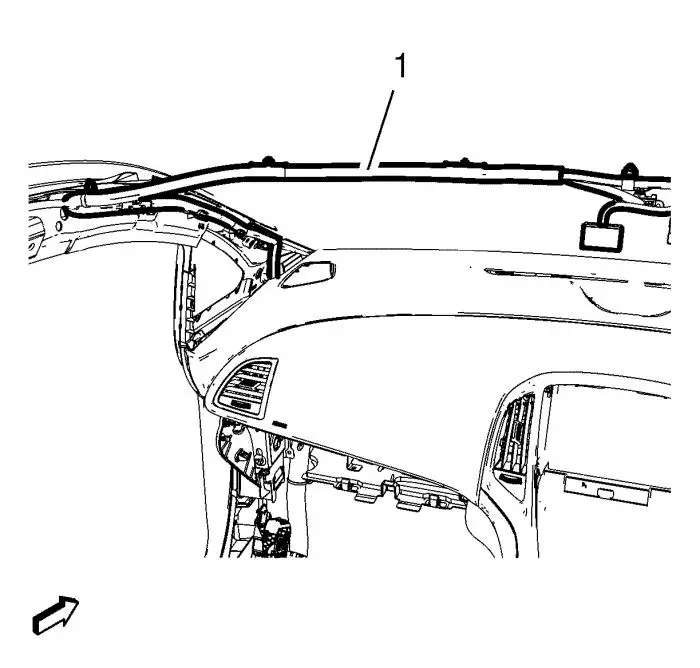
| 32. |
Remove the body wiring harness
(1) from roof to interior by means off the hole from instrument
panel upper outer trim panel on left and right side. |
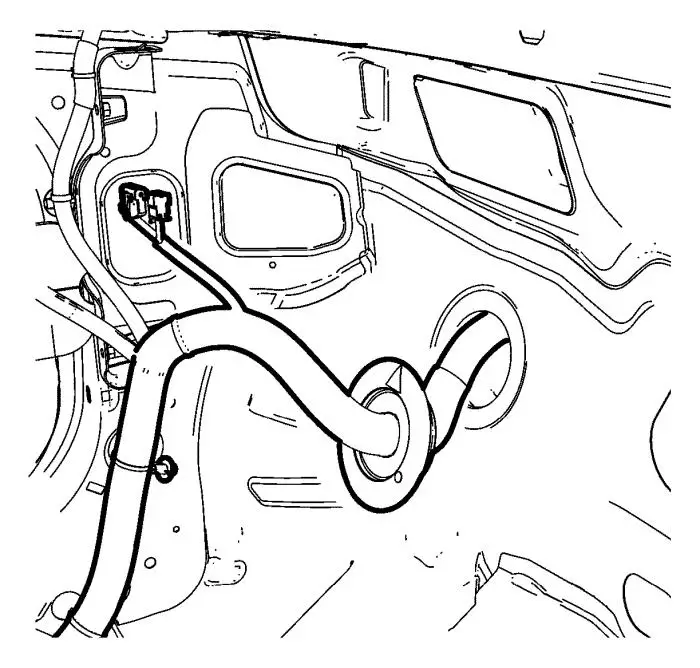
| 33. |
Release the X1 (1) plug
connector from the A-pillar. Use BO-569-A plug
lifter . |
| 34. |
Release all fixations.
|
| 35. |
Take care about destroyed
cable straps and harness guidance regarding noises and
rattle. |
| 36. |
Remove the body wiring harness
guidance in the bulkhead and draw-out the body wiring harness from
the engine compartment through the passenger compartment.
|
| 37. |
Remove the old body wiring
harness and lay it on the floor. |
| 38. |
Unpack the new body wiring
harness and compare the old with the new harness concerning
quantity of fixing points, cable straps, guides, part numbers and
pin assignments. |
Installation Procedure
| 1. |
After comparing the new with
the old harness lay the new body wiring harness into the passenger
compartment and carry the new harness trough the bulkhead into the
engine compartment. |
|
Note: Take care for
the leak tightness.
|
| 2. |
Then install the wiring
harness guidance in the bulkhead. |
| 3. |
Now check that there is no
rotation and fix the new body wiring harness. |
|
Note: Take care for
the correct counterpart and the pin assignment. Use the pictures
for orientation.
|
| 4. |
Connect all electrical
connectors. |
| 5. |
Tighten all mass cables to the
weld studs with 9 N·m (80 lb in) .
|
| 6. |
Install the body wiring
harness (1) from interior to roof by means off the hole from
instrument panel upper outer trim panel on left and right
side. |
| 7. |
Install the body wiring
harness to roof and A-pillars. |
| 10. |
Show pictures for correct
orientation. |
| 14. |
Use pictures for correct
orientation. |
| 15. |
Connect body wiring harness to
steering gear. |
| 17. |
Install body wiring harness to
fuel tank filler door lock actuator. |
| 18. |
Connect body wiring harness
from electrical park brake. |
| 21. |
Use pictures for correct
orientation. |
| 32. |
Install the MDI, turn on the
ignition and read out the trouble codes. |
| |
If there are any stored DTCs delete them and read out the
trouble codes again. |
| 34. |
Program the volatile memory
and then check all electrical functions and make a test run.
|
| 35. |
Clean the vehicle out- and
inside. |
|