Manual Transmission Shift Lever and Selector Lever Cable
Adjustment
Special Tools
DT-527-A Adjuster
For equivalent regional tools, refer to
Special Tools .
Removal Procedure
| 1. |
Shift transmission into
NEUTRAL. |
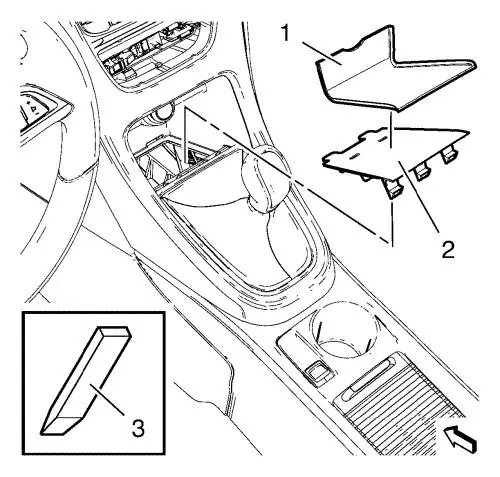
| 3. |
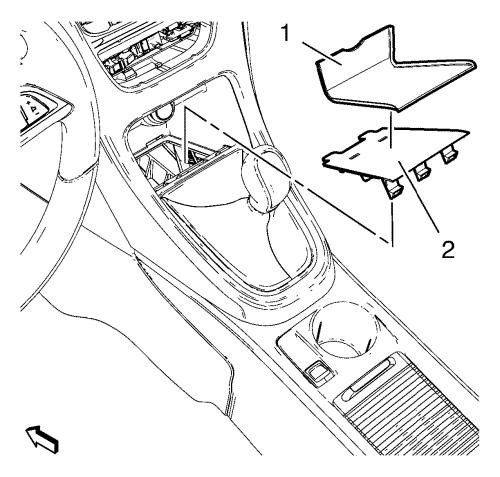
Clip instrument panel lower
center compartment liner (2) out of front floor console using a
suitable plastic tool (3). |
| 4. |
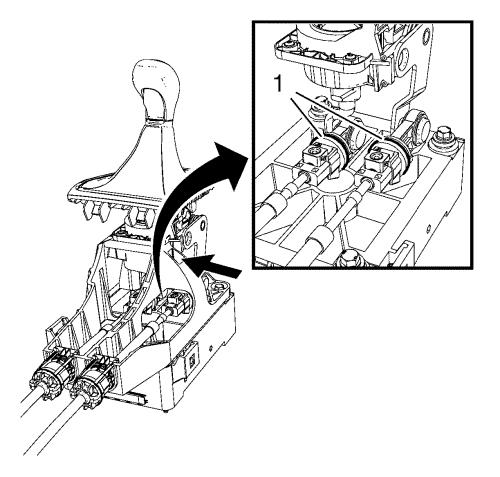
Unlock shift lever and
selector lever cable adjust locks (1), by pushing back the spring
force loaded black sliding ring until self-locking. |
| 5. |
Unlock the left cable trough
the opening at the housing (arrow) using a suitable tool.
|
| 6. |
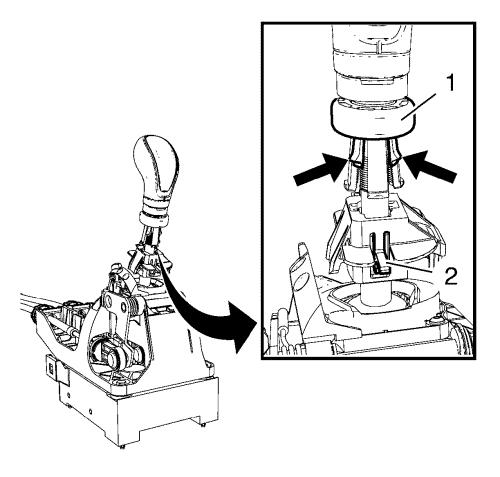
Slide transmission control
lever boot upwards. |
| 7. |
Press 2 latches
(arrows). |
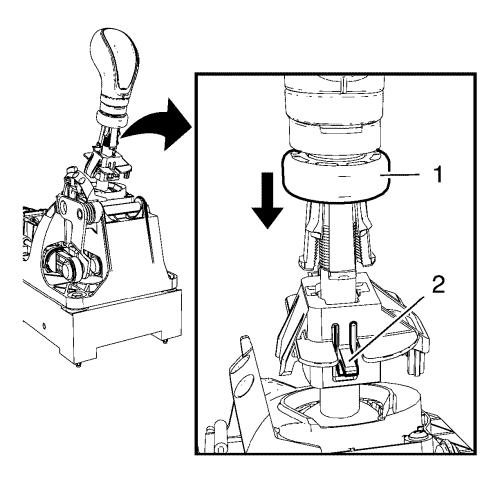
| 8. |
Slide blue transmission
control lever retainer ring (1) upwards. |
| 9. |
Pull trigger (2)
upwards. |
| 10. |
Remove transmission control
lever knob. |
| 11. |
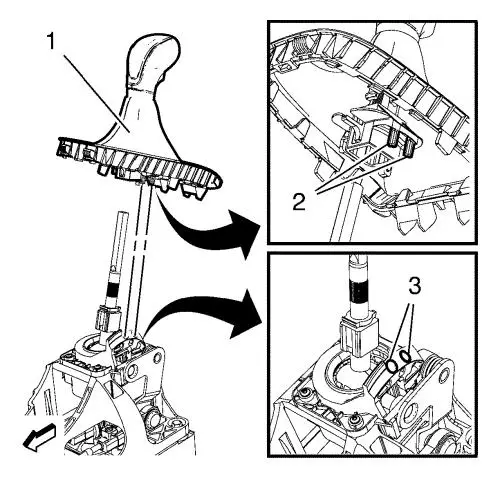
Turn transmission control
lever knob (1) 180° and install to transmission control
lever. |
| 12. |
Push the 2 pins (2) into the 2
holes (3). |
| 13. |
Remove engine control module
from battery tray and lay aside. |
| 14. |
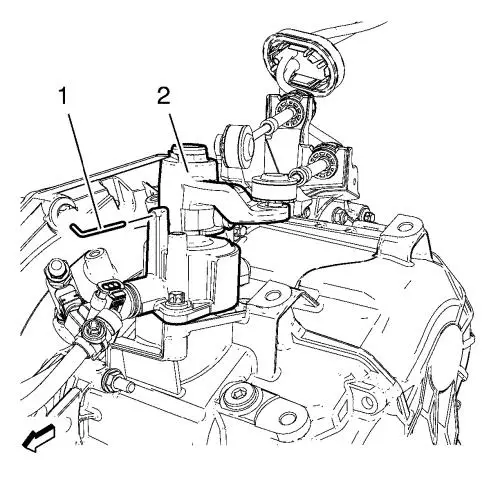
Block transmission control
housing (2) using DT-527-A adjuster (1).
|
Installation Procedure
|
Note: When locking
the adjuster locks (1) a defined snap noise should be audible / a
snap effect should be felt.
|
| 1. |
Lock shift lever and selector
lever cable adjust locks. |
| 2. |
Lock shift lever and selector
lever cable adjust locks (1), by pushing down the two blue locking
pieces WITHOUT touching/preloading the fixed shift lever.
|
| 3. |
Install transmission control
lever knob. |
| |
Turn the transmission control lever knob back 180°. |
| 4. |
Press the transmission control
lever knob during installation completely down. Push trigger (2)
upwards. |
| 5. |
Slide blue transmission
control lever retainer ring (1) downwards. |
| 6. |
Remove DT-527-A
adjuster from transmission control housing. |
| 7. |
Check correct shifting
function. |
| 8. |
If necessary repeat adjusting
procedure. |
| 9. |
Clip instrument panel lower
center compartment liner (2) into front floor console. |
|
