Important: Note
specification for welded, brazed and riveted joints and body repair
with structural adhesive !
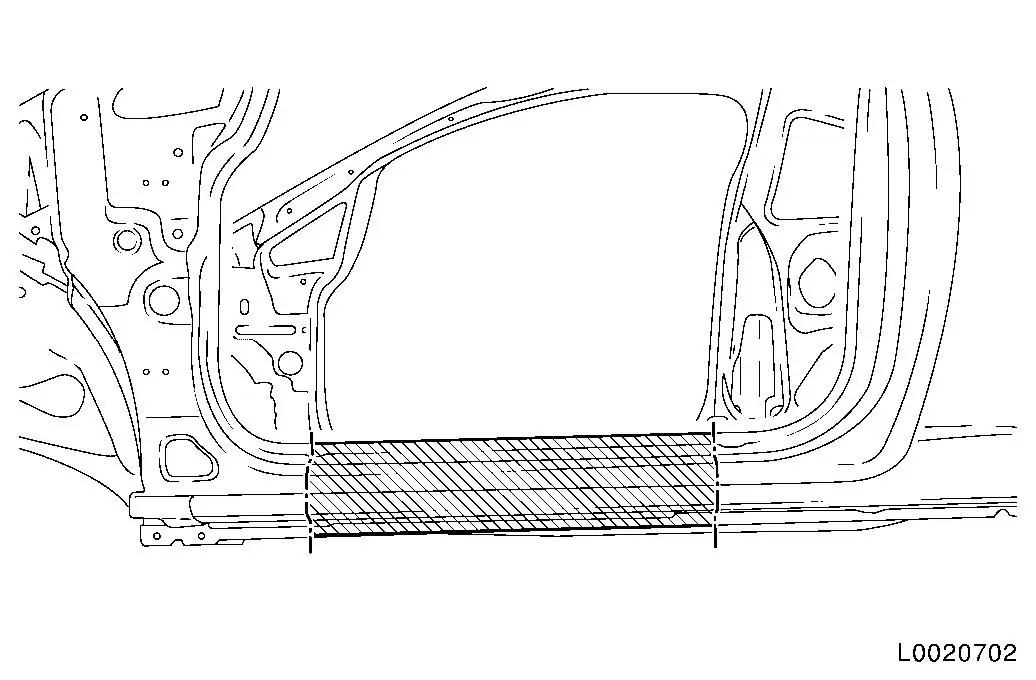
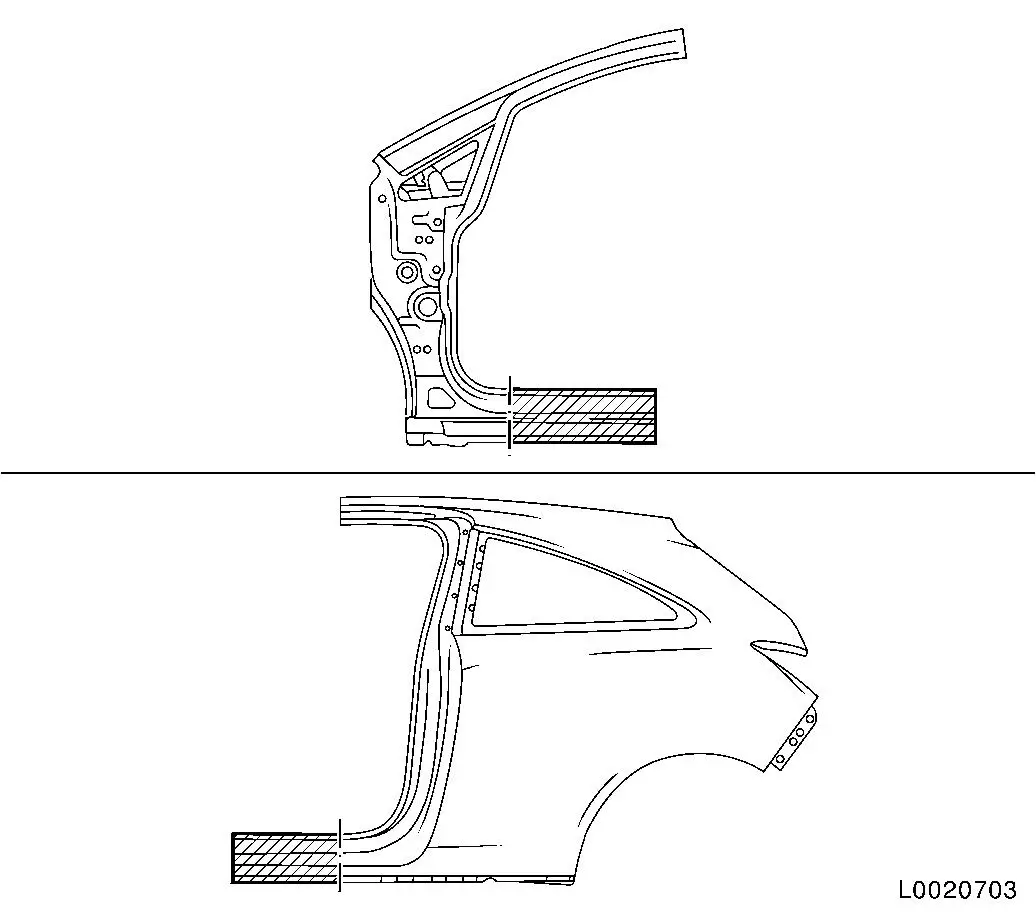
Note: If the sill
panelling in the area of the A-pillar is damaged, see front cut
line
Remove
1.
Remove attaching parts
2.
Detach and drill away sill panelling
Install
3.
Cut new parts to size within the A-pillar and side panel
supplied Note: For vehicles
without extra door seal, remove the corresponding welded bolt on
the new side panel.
4.
Prepare new parts
5.
Adjust both parts of sill panelling
6.
Remove both parts of sill panelling
7.
Apply adhesive from corrosion protection adhesive system 93 160
535/15 05 000 to sill panelling Note: Leave 40 mm around the MIG brazed seams free of
adhesive.
8.
Adjust sill panelling to fit
9.
MIG-braze sill panelling
10.
Weld in sill panelling Note: SPP, Special
Parameter Program. The precise number of points is given in the
literature from the welder manufacturer.
11.
Grind MIG brazed seams
12.
Seal body, weld and brazing seams Note: Observe corrosion
protection measures for seam seals.
13.
Apply underseal. Note: Observe corrosion
protection measures for PVC protection
14.
Seal cavity Note: Observe
protective wax corrosion protection measures.