|
Replace front panelling (from model year
2011.5)
 Remove Remove
|
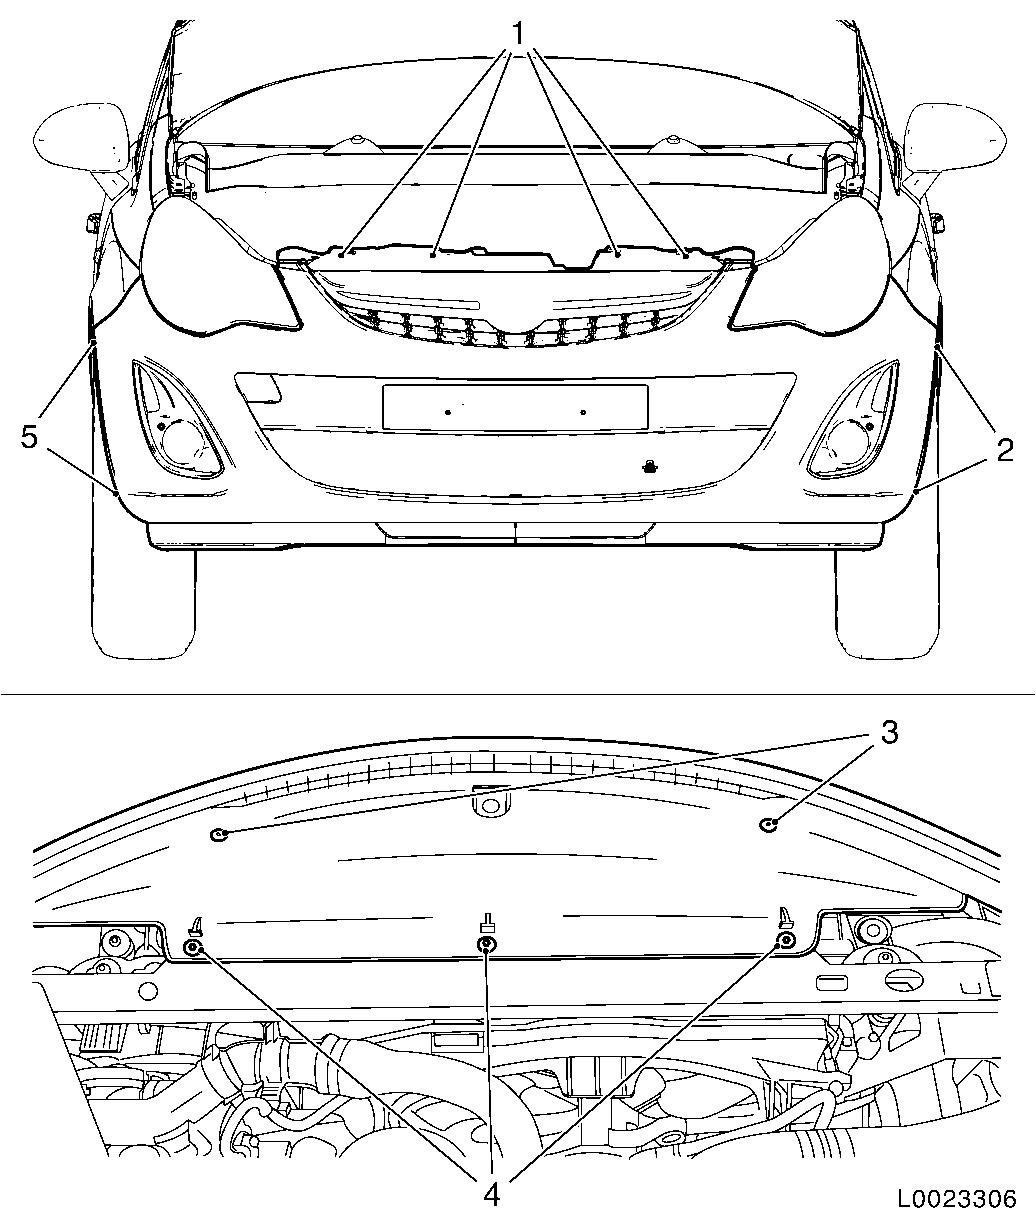
| 2. |
Release front panelling
| • |
Unscrew 4x bolt (1) at top front
|
| • |
Unscrew 2x bolt, outer left (2)
|
| • |
Unscrew 2x bolt, outer right (5)
|
| • |
Unscrew 2x bolt (3) on front panelling reinforcement,
bottom
|
| • |
Unscrew 3x bolts (4) on radiator crossmember
|
| • |
Unclip external temperature sensor from grille (arrow)
|
|
|
| 3. |
For vehicles with a fog lamp, disconnect the right and left fog
lamp wiring harness plugs
|
|
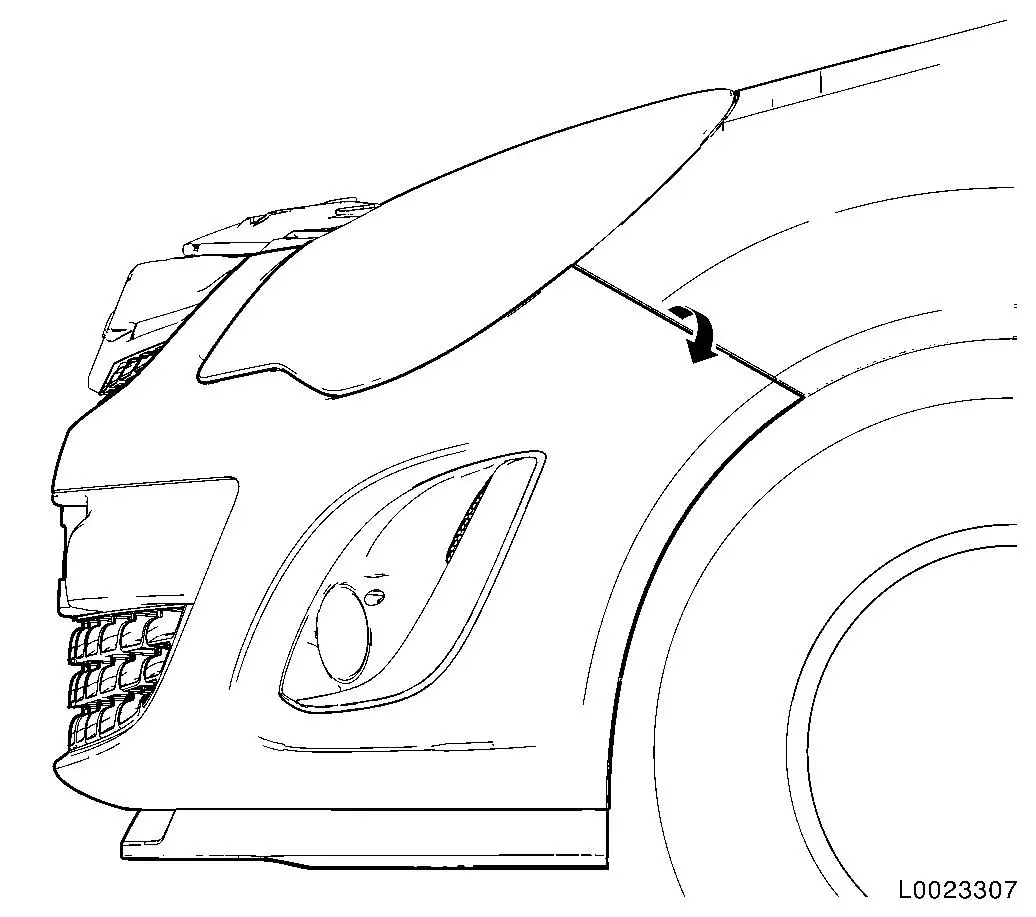
Important: Danger of damage.
Carefully disengage the front panelling from the guide rails. Press
the side of the front panelling upwards in the guide rail area and
at the same time pull it outwards (arrow).
|
| 4. |
Remove front panelling
Note: 2nd person
required
| • |
Unclip the front panelling from the right guide rail
|
| • |
Unclip the front panelling from the left guide rail
|
|
|
| 5. |
When replacing the front panelling, transfer the attaching
parts
| • |
Spoiler Lip, Remove and Install 
|
| • |
Front panelling grille centre, detach and reattach
|
| • |
Fog lamp covers, remove and install
|
| • |
Front panelling, remove and install
|
|
 Install
| 6. |
Put on front panelling
Note: 2nd person
required
| • |
Clip the front panelling into the right guide rail
|
| • |
Clip the front panelling into the left guide rail
|
| • |
For vehicles with fog lamp, connect the right and left fog lamp
wiring harness
|
|
| 7. |
Attach front panelling
| • |
Clip the external temperature sensor into the ventilation
grille
|
| • |
Tighten 3x bolts on radiator crossmember
|
| • |
Tighten 2x bolt on front panelling reinforcement, bottom
|
| • |
Tighten 2x bolt outer right
|
| • |
Tighten 2x bolt, outer left
|
| • |
Tighten 4x bolt at top front
|
|
|
