|
Replace rear quarter window (fixed) L08
Note: This
documentation describes how to remove glass from the rear quarter
window (fixed) using glass removal system BO-46974 . To supplement the existing Video VT 54,
the individual working steps for non-destructive removal of the
rear quarter window (fixed) are shown.
Warning: Before
starting work, put on the gloves and protective goggles contained
in tool kit BO-46974 to prevent injuries
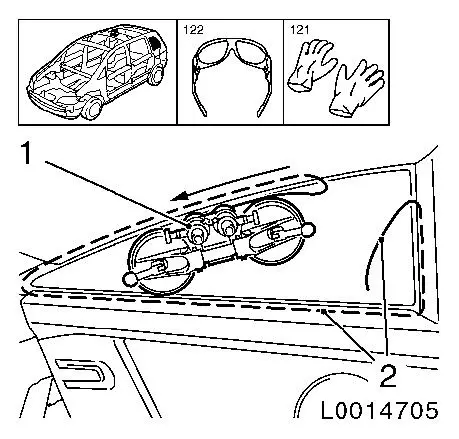
to the eyes and hands.
Tool BO-46974 is recommended for
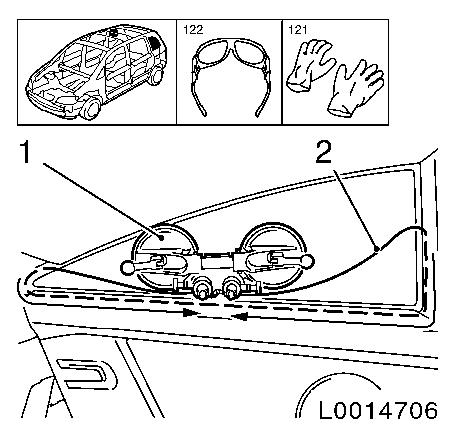
removing glass without destroying it. Further information can be
found in video VT 54.
Note: Position the
vehicle on level ground and move the front wheels to the
straight-ahead position.
 Remove Remove
|
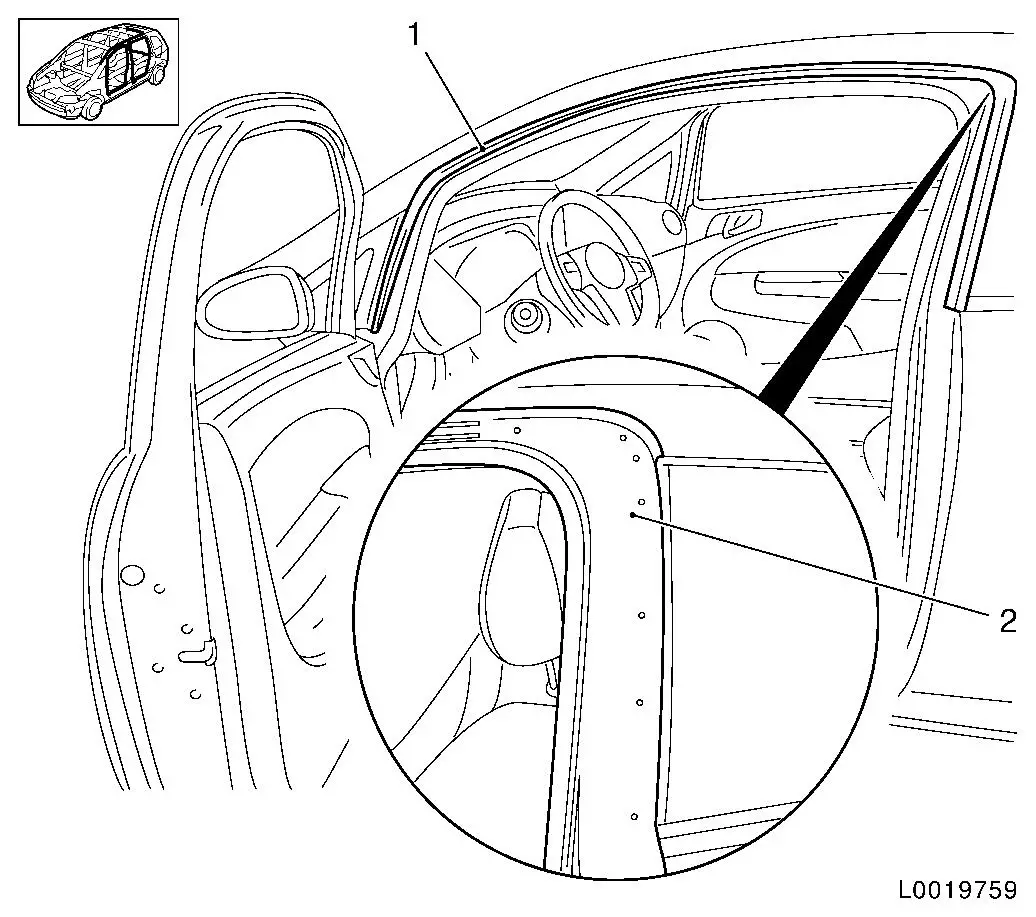
| 1. |
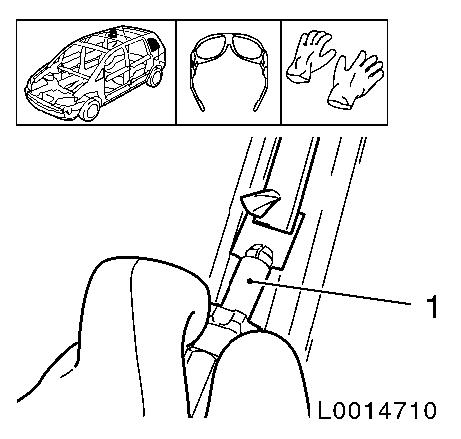
Detach additional weatherstrip on roof frame in rear area
(1)
| • |
Unclip additional weatherstrip at B-pillar (2)
|
| • |
Remove additional weatherstrip from guide
|
|
|
| 2. |
Detach upper B-pillar inner panelling
|
| 3. |
Measure diagonal of window
| • |
Cut off cutting wire to four times the required length, approx.
3800 mm
Note: The circumference
of the roll of wire is approx. 1 metre.
|
|
|
|
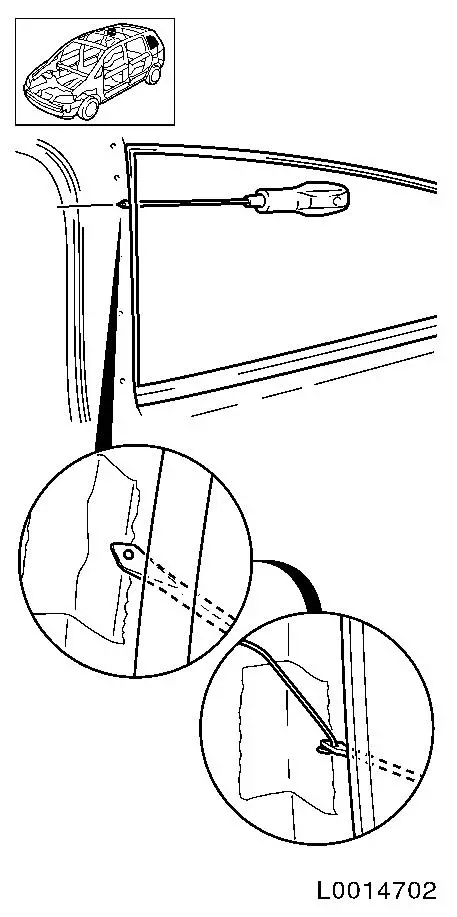
| 4. |
Heat the awl using a suitable tool
|
| 5. |
Push an awl through the adhesive bed from the inside towards
the outside
Note: Ensure that the
PU coating is not damaged
Note: Ensure that the
rear quarter window is not damaged, otherwise stress cracks may
appear in the rear quarter window
|
| 6. |
Pull in cutting wire
| • |
Thread the cutting wire into the hole of the awl and bend
up
|
| • |
Pull cutting wire through adhesive bed
|
| • |
Pull cutting wire to the middle of the pane
|
|
|
|
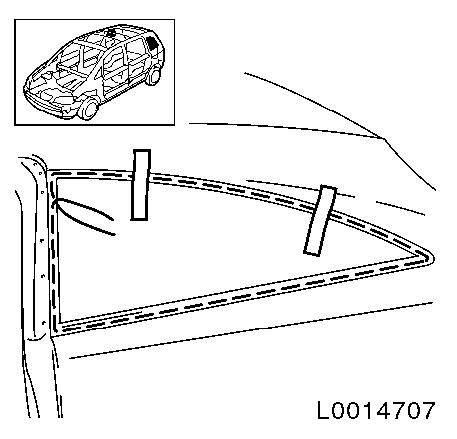
| 7. |
Lay the cutting wire all the way round
| • |
Lay below PU coating on rear quarter window
|
| • |
Secure in place with fabric tape
|
|
| 8. |
Pull second end of wire through the adhesive bed with an
awl
|
| 9. |
Fix the rear quarter window in place
|
|
|
| 10. |
Position the cutter
| • |
Position the winch with two winding heads (1) in the front
upper area of the rear quarter window
Note: Check that the
cutting wire (2) is laid correctly at the winch deflection
roller
| – |
Insert transfer ratchet and pre-tension cutting wire
|
|
|
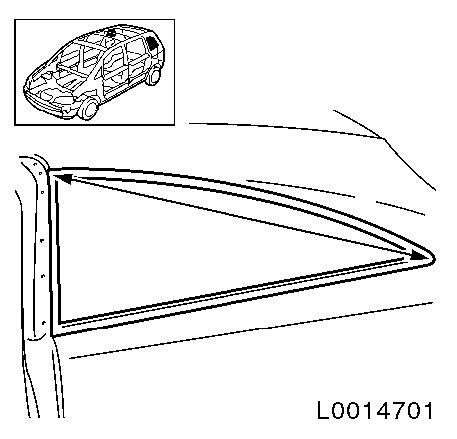
| 11. |
Cut out the rear quarter window
Note: Greater tension
is required to cut in the area of the glass radius. Use lubricant
on the deflector roller.
| • |
Cut out glass until the cutting wire is level with the
winch.
Note: Protect moulded
headlining against damage.
| – |
Arrow shows the path taken by the cutting wire
|
|
|
|

|
| 12. |
Position the cutter
| • |
Position the winch with two winding heads (1) in the upper rear
of the rear quarter window
Note: Check that the
cutting wire (2) is laid correctly at the winch deflection
roller
| – |
Insert transfer ratchet and pre-tension cutting wire
|
|
|
| 13. |
Cut out the rear quarter window
| • |
Cut out glass until the cutting wire is level with the
winch.
Note: Protect moulded
headlining against damage.
| – |
Arrow shows the path taken by the cutting wire
|
|
|
|
|
| 14. |
Position the cutter
| • |
Position the winch with the two winding heads (1) in the lower
area of the rear quarter window
|
| • |
Tension the second end of the wire in the free winding head
Note: Check that the
cutting wire (2) is laid correctly at the winch deflection
roller
| – |
Insert transfer ratchet and pre-tension cutting wire
|
|
|
| 15. |
Cut out the rear quarter window
Note: Greater tension
is required to cut in the area of the glass radius. Use lubricant
on the deflector roller.
| • |
Continue cutting until the cutting wire has cut through all the
adhesive bed
Note: Protect front
rear quarter panel from damage.
| – |
Arrow shows the path taken by the cutting wire
|
|
|
|
|
| 18. |
Remove the rear quarter window
|
| 19. |
Cut the adhesive bead off the rear quarter panel
| • |
Using the tool supplied (1), remove the adhesive bead down to a
thickness of approx. 1 mm
|
|
|
|
| 20. |
Repair any paint damage
| • |
Using a touch-up pen to match the colour of the vehicle, repair
any paint damage
|
|
| 21. |
Cut the adhesive bead off the rear quarter window
| • |
Using the tool supplied, remove the adhesive bead down to a
thickness of approx. 1 mm
|
|
 Install
| 22. |
Apply primer
Note: Only with new
glass pane
|
| 23. |
Apply adhesive bead
| • |
Cut into the tip of the cartridge in such a way that a bead of
adhesive approx. 13 mm thick is
produced
|
|
|

|
| 24. |
Insert rear quarter window
| • |
Insert windscreen with MKM-641
|
| • |
Secure the glass pane in place with fabric tape
|
|
| 26. |
Install upper B-pillar inner panelling
| • |
Insert inner panelling in guide
|
|
| 27. |
Install roof frame additional weatherstrip
| • |
Insert additional weatherstrip in guide
|
| • |
Clip in additional weatherstrip at B-pillar
|
|
|
