|
Rear axle, remove and install (drum brake)
 Remove Remove
| 1. |
Detach gaiter (arrow) on handbrake lever
| • |
Unclip gaiter
| – |
Push gaiter over handbrake lever
|
|
|
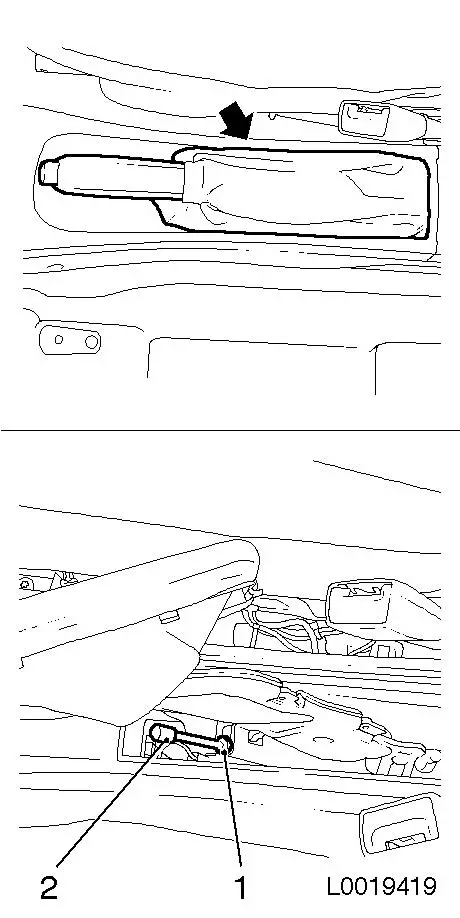
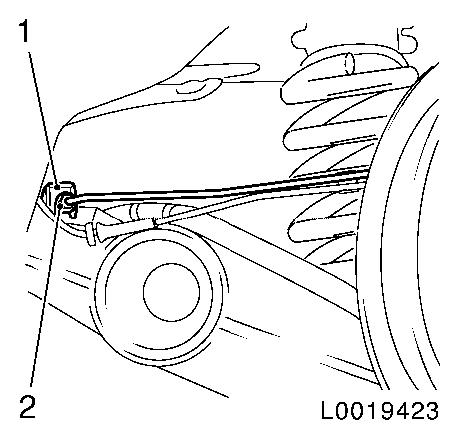
| 2. |
Release handbrake
| • |
Remove protective cap (2)
|
| • |
Loosen nut (1) from handbrake cable
|
|
|
|
| 3. |
Remove rear wheels.
| • |
Unscrew 4x wheel bolts
| – |
Mark position relative to wheel hub.
|
|
|
Important: Remove sensors
|
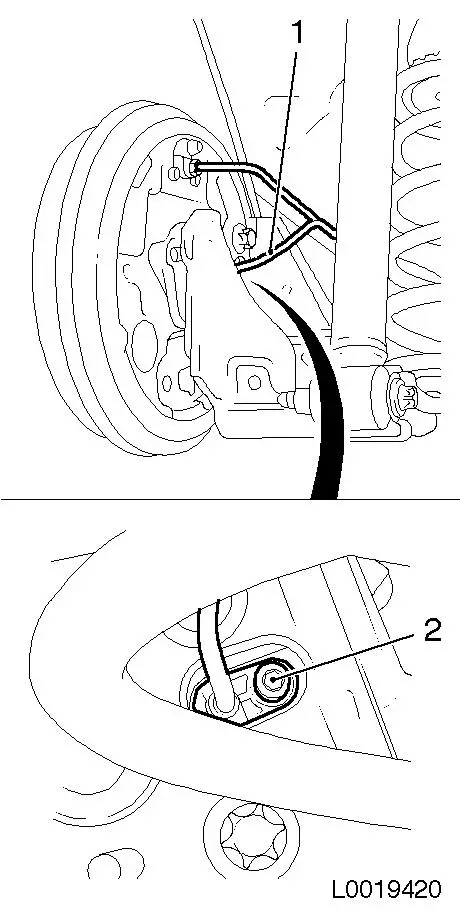
| 5. |
Remove wheel speed sensor both sides
| • |
Unclip 4x cable set (1) from brake line
|
|
|
|
| 6. |
Release heat shield left (arrows)
| • |
Carefully bend heat shield aside (arrows)
|
|
|
|
|
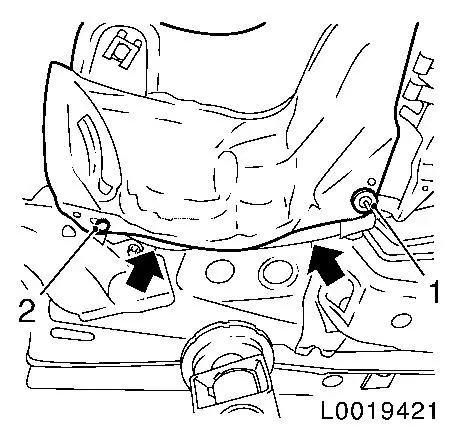
| 7. |
Detach handbrake cable (1), (3) rear
| • |
Remove handbrake cable (1), (3) rear from connector (5)
|
| • |
Unclip handbrake cable rear 4x from guide (4), (6)
|
|
|
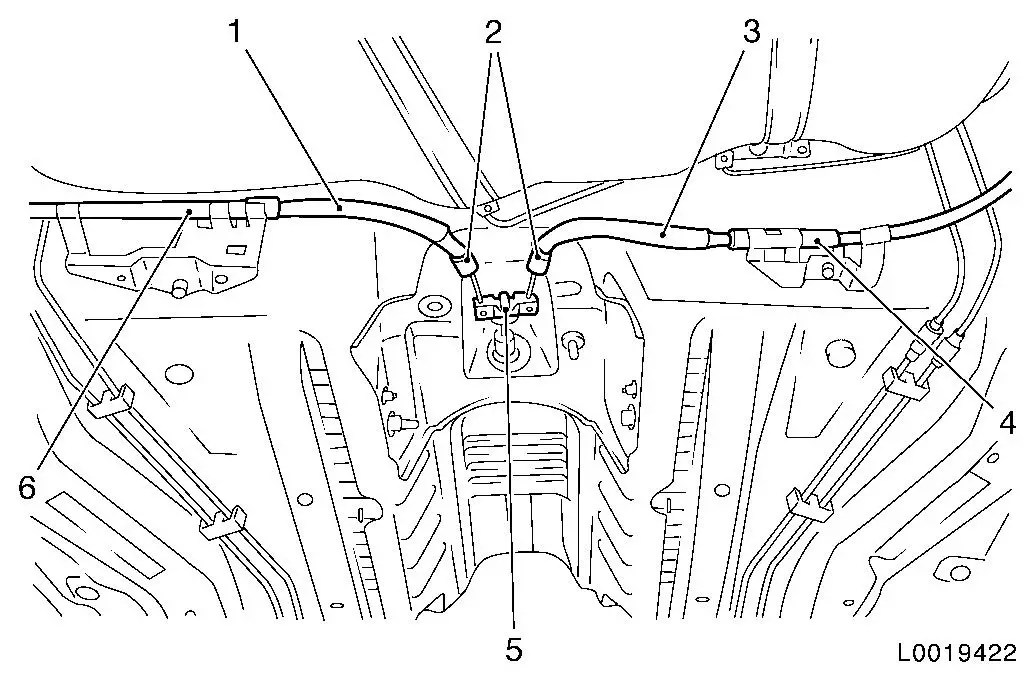
| 8. |
Remove 2x brake lines rear
| • |
Unscrew 2x union nut (2) on rear brake pressure hose
Note: Catch escaping
brake fluid
|
|
|
|
|
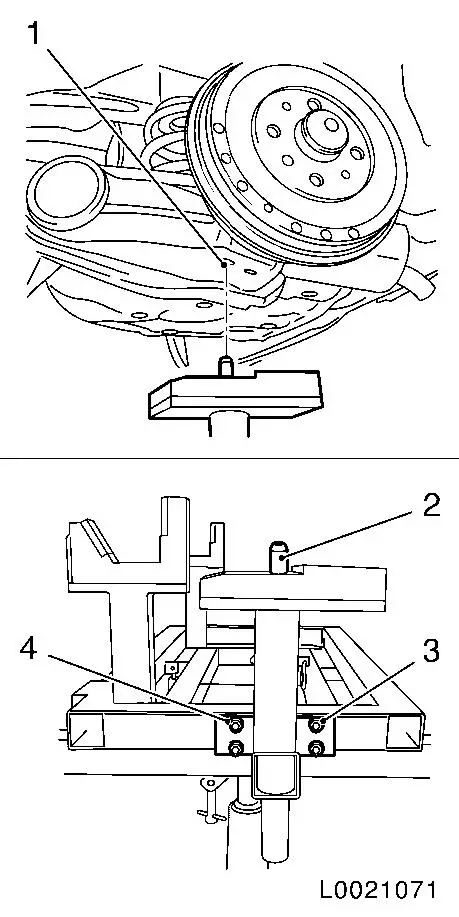
| 9. |
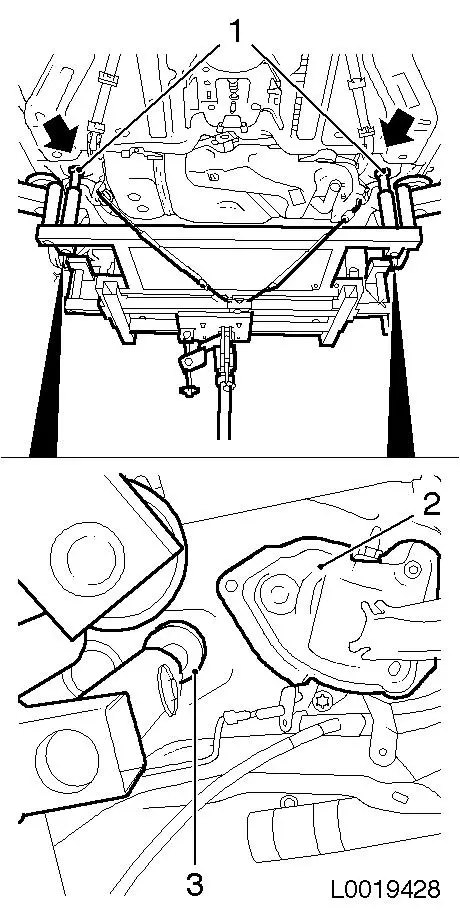
Place hydraulic jack KM-904 A and
CH-48374 (3) below rear axle and
align
Note: Check for correct
position and attachments! See magnifying glass in diagram.
| • |
Raise hydraulic jack until rear axle lies against CH-48374 (3) (magnifying glass)
|
|
| 10. |
Detach 2x dampers lower
| • |
Unscrew 2x bolt (2), (4)
|
|
| 11. |
Remove 2x coil springs (1)
| • |
Lower hydraulic jack until coil springs can be removed
|
| • |
Remove 2x coil springs (1)
|
|
|
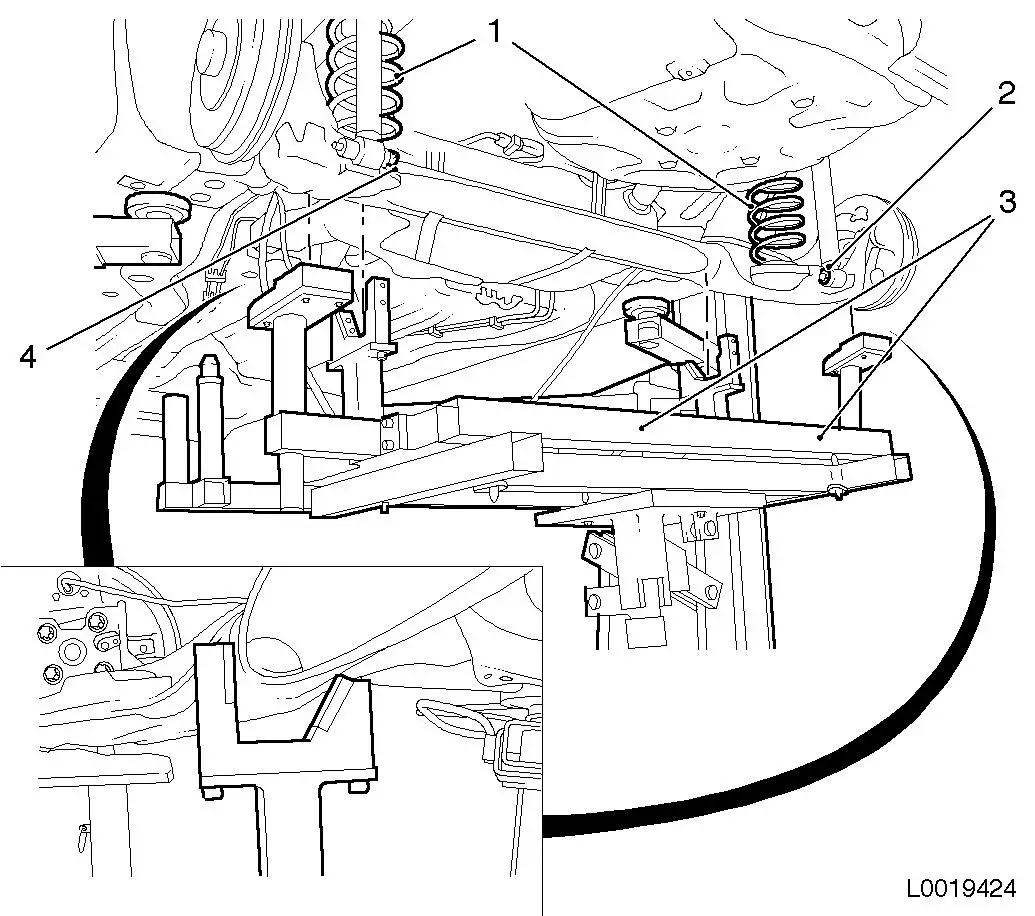
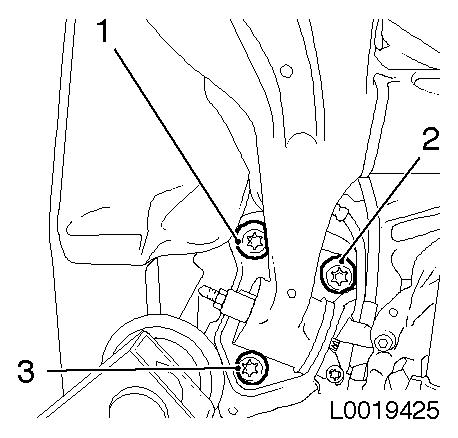
| 12. |
Detach rear axle from vehicle underbody on both sides
| • |
Unscrew 6x bolts (1), (2), (3) from rear axle holder
|
|
|
|
| 13. |
Withdraw rear axle
Note: Check for
attachments
|
| 15. |
Positioning pin (2) on left side must engage in positioning
bore (1) on longitudinal control arm
| • |
If necessary: adjust extension arm
| – |
Release bolts (4), (3) and move in longitudinal direction
|
|
|
|
|
| 16. |
Reposition rear axle
| • |
Extend guides (1) from CH-48374 and
secure with locking pins!
|
| • |
Reposition rear axle until rear axle holder (2) lies against
vehicle underbody.
Note: Check for correct
positioning (3) of rear axle!
|
|
|
|
| 17. |
Attach rear axle to vehicle underbody on both sides
| • |
Tighten 6x new bolts (1), (2), (3) 90
Nm + 60° 15°
|
|
|
|
Important: If the rear axle
holder has been detached, the rear axle must be fitted to
installation dimensions to avoid distortion of the damper bushes
during driving.
|
| 18. |
Set installation dimension (I)
| • |
Raise rear axle with hydraulic jack, KM-904 and CH-48374 until
the distance measurement I = 146.5 +/- 10 mm between the upper edge
of the damper holder on the rear axle and the back frame on the
vehicle underbody is reached.
|
|
| 19. |
Tighten rear axle holder (if loosened)
| • |
Tighten screw connection 90 Nm
|
|
|

|
| 20. |
Insert 2x rear springs
| • |
Lower hydraulic jack until rear axle is free
|
| • |
Insert 2x coil springs with damper rings top and bottom
Note: Note installation
positions
|
|
| 21. |
Attach 2x dampers lower
|
| 22. |
Remove CH-48374 in conjunction with
hydraulic jack and KM-904
Note: Check for correct
position and attachments!
|
| 23. |
Attach rear brake lines
| • |
Tighten 2x union nuts on rear brake pressure hose 16 Nm
|
|
| 24. |
Fit handbrake cable
| • |
Clip handbrake cable rear 4x into guide
| – |
Insert handbrake cable rear in connector
|
|
|
| 25. |
Attach heat shield left
|
Important: Insert sensors
|
| 27. |
Attach wheel speed sensor both sides
| • |
Clip 4x wiring harness to brake line
|
|
| 29. |
Tighten rear wheels 110 Nm
|
| 31. |
Clip in handbrake lever gaiter
|
| 32. |
Bleed brake system and check for leaks 
|
|
