|
Replace all pistons with con-rods
 Remove Remove
| 1. |
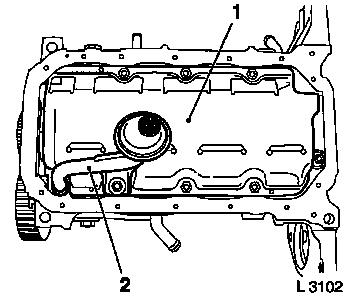
Remove upper part of oil pan 
|
| 2. |
Remove oil intake pipe (2)
|
| 3. |
Remove oil baffle plate (1)
|
|
|
| 4. |
Lower vehicle by its full height
|
| 6. |
Raise vehicle by its full height
|
Warning: Important: The fracture
surfaces of the con-rods and the con-rod bearing caps build an
individual fit and must not at any time be confused or damaged. To
prevent damage, do not not place the con-rods or con-rod bearing
caps on the fracture surfaces.
|
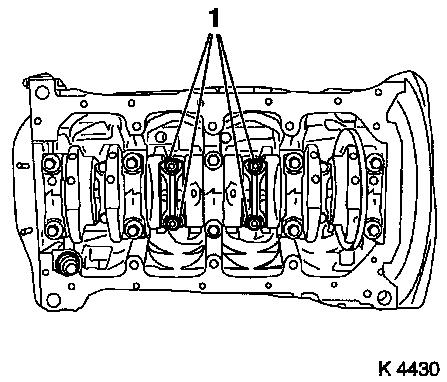
| 7. |
Remove 2x con-rod bearing cover (1)
| • |
Cylinder 2 and cylinder 3
|
| • |
Remove 2x con-rod bearing caps
Note: Pay attention to
mark on con-rod bearing cap and con-rod. If not present, apply
mark.
|
| • |
Push 2x pistons upwards
|
|
|
|
| 8. |
Turn crankshaft
| • |
Turn (180°) in direction of engine rotation
|
|
Warning: Important: The fracture
surfaces of the con-rods and the con-rod bearing caps build an
individual fit and must not at any time be confused or damaged. To
prevent damage, do not not place the con-rods or con-rod bearing
caps on the fracture surfaces.
|
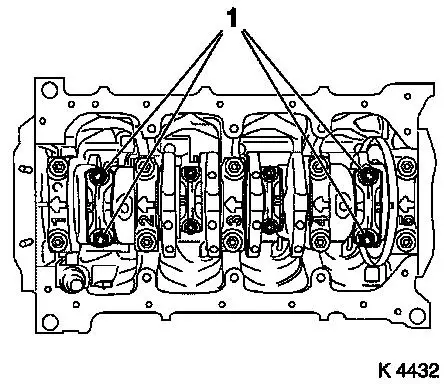
| 9. |
Remove 2x con-rod bearing cover (1)
| • |
Cylinder 1 and cylinder 4
|
| • |
Remove 2x con-rod bearing caps
Note: Pay attention to
mark on con-rod bearing cap and con-rod. If not present, apply
mark.
|
| • |
Push 2x pistons upwards
|
|
|
|
| 10. |
Lower vehicle by its full height
|
| 12. |
Remove 8x con-rod bearing shells
Note: Mark con-rod
bearing shells. Note order
|
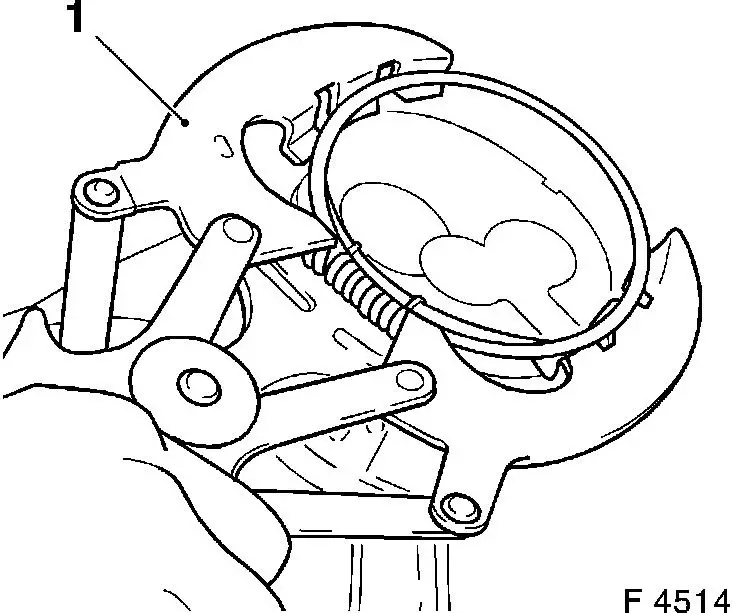
| 13. |
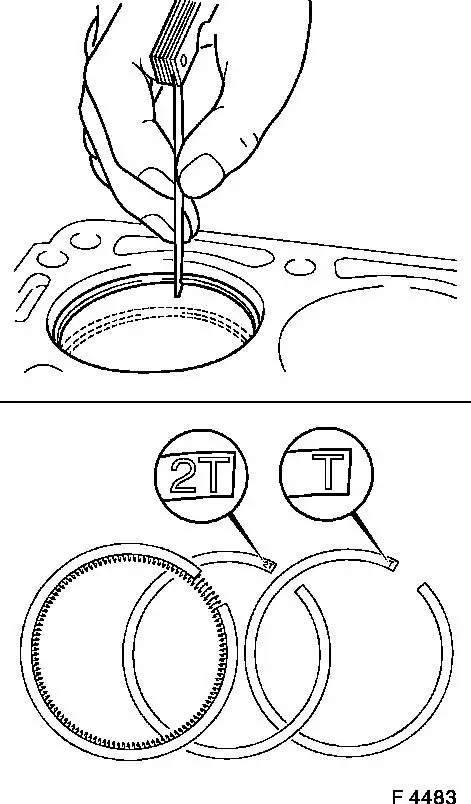
Remove 12x piston ring with piston ring pliers (1)
Note: Observe correct
assignment
| • |
Remove spiral-type expander of oil scraper ring from piston
ring groove
|
|
|
|
 Measure
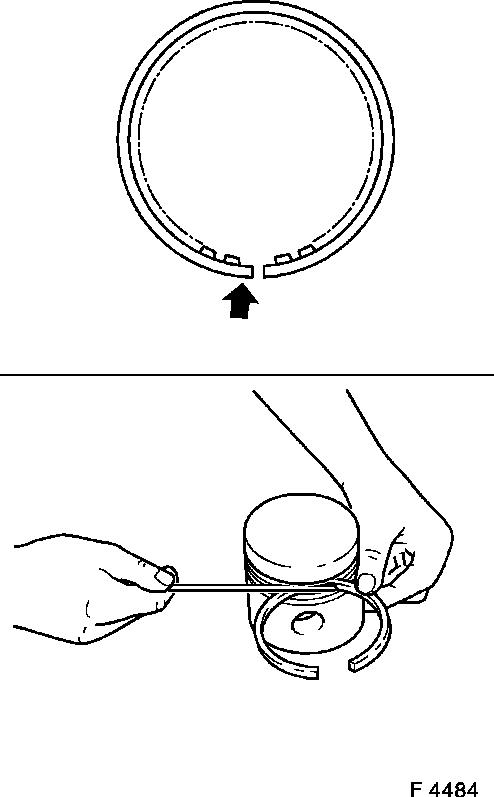
| 14. |
Measure joint play 3x
| • |
Insert 3x new piston ring in cylinder
|
| • |
Measure joint play with feeler gauge
|
|
|
|
| 15. |
Measure vertical play
| • |
Insert piston rings into piston ring groove
Note: Note markings
(arrow) on the compression rings ("T", "2T" point upwards)
| – |
1st compression ring (T)
|
| – |
2nd compression ring (2T)
|
|
| • |
Measure vertical play with feeler gauge
| – |
Permissible vertical play
|
|
|
|
|
 Install
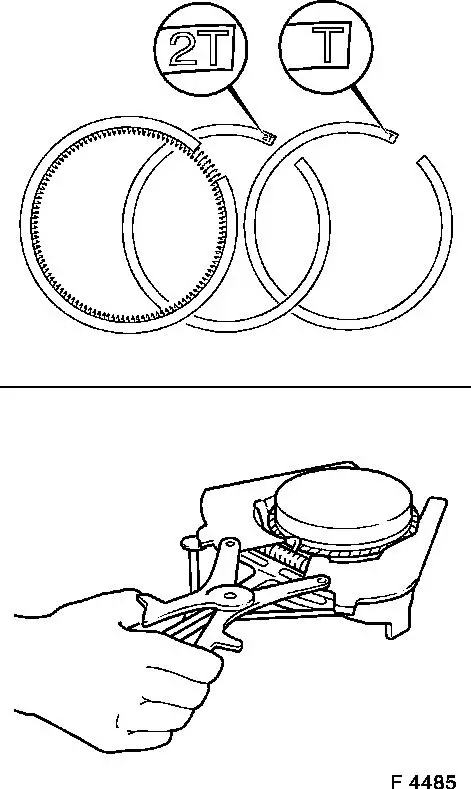
| 16. |
Install 12x piston ring with piston ring pliers
Note: Observe correct
assignment
| • |
Insert spiral-type expander of oil scraper ring into piston
ring groove
|
| • |
Install oil scraper ring
|
| • |
Install compression rings
Note: Pay attention to
marks on compression rings
| – |
1st compression ring (T)
|
| – |
2nd compression ring (2T)
|
|
|
|
|
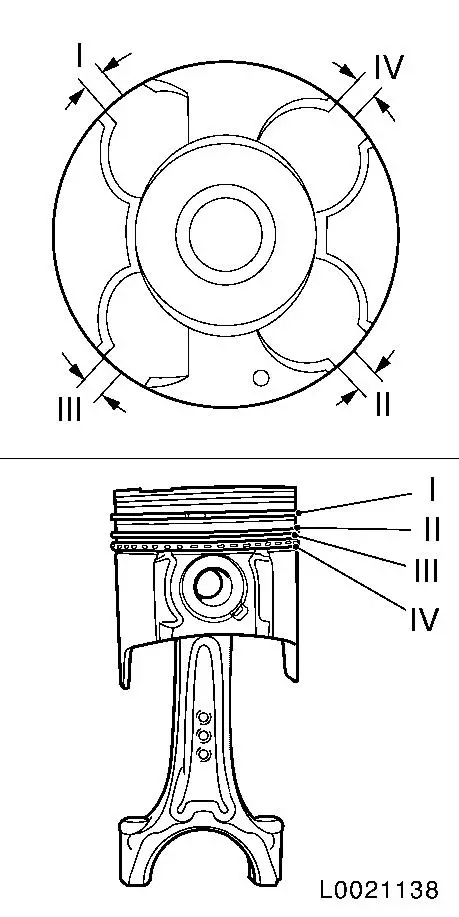
| 17. |
Set piston ring gap
| • |
Arrange joints of piston rings offset by 90°
| – |
1st compression ring (I)
|
| – |
2nd compression ring (II)
|
| – |
Spiral-type expander (IV)
|
|
|
|
|
| 18. |
Install 8x con-rod bearing shells
| • |
Coat with engine oil
Note: Observe correct
assignment
|
|
| 19. |
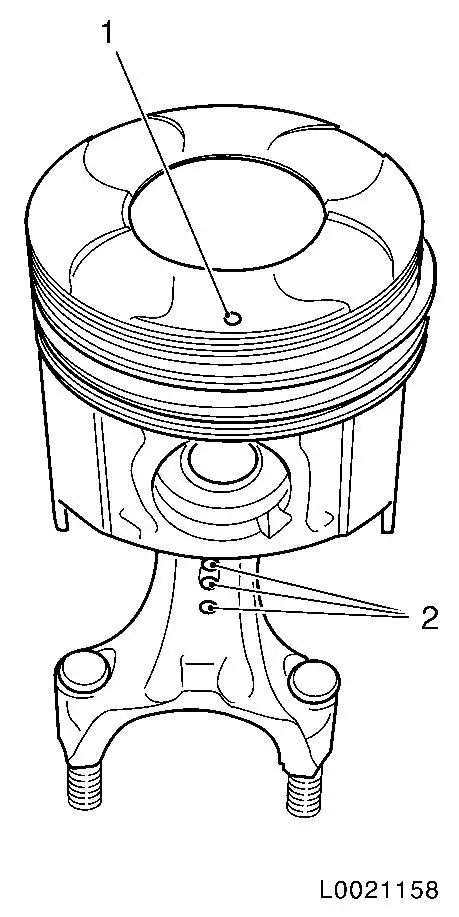
Fit 2x piston
Important: Marking (1) on piston
head and marking (2) on con-rod point towards the engine timing
side.
|
| • |
Cylinder 1 and cylinder 4
Note: Coat with engine
oil
|
| • |
Compress piston ring with piston ring clamp band
Note: Coat with engine
oil
|
|
|
|
| 20. |
Raise vehicle by its full height
|
| 21. |
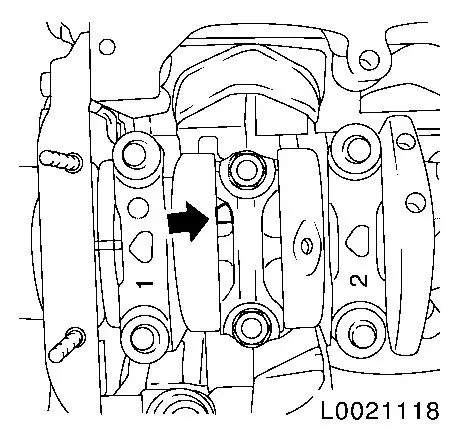
Attach 2x con-rod bearing cap
Important: Note cylinder sequence
marking on con-rod bearing cap and con-rod. Narrow bead (arrow)
points towards engine timing side
|
| • |
Tighten 4x new nuts 25 Nm + 100° +
15°
|
|
|
|
| 22. |
Turn crankshaft
| • |
Turn (180°) in direction of engine rotation
|
|
| 23. |
Lower vehicle by its full height
|
| 24. |
Fit 2x piston
Important: Marking (1) on piston
head and marking (2) on con-rod point towards the engine timing
side
|
| • |
Cylinder 2 and cylinder 3
Note: Coat with engine
oil
|
| • |
Compress piston ring with piston ring clamp band
Note: Coat with engine
oil
|
|
|
|
| 25. |
Raise vehicle by its full height
|
| 26. |
Attach 2x con-rod bearing cap
Important: Note cylinder sequence
marking on con-rod bearing cap and con-rod. Narrow bead (arrow)
points towards engine timing side.
|
| • |
Tighten 4x new nuts 25 Nm + 100° +
15°
|
|
|
|
| 27. |
Lower vehicle by its full height
|
| 28. |
Install cylinder head
|
| 29. |
Raise vehicle by its full height
|
| 30. |
Install oil baffle plate
|
| 31. |
Install oil intake pipe
|
| 32. |
Install upper part of oil pan
|
|
