|
Manual Transmission, Remove from Engine and
Install (M20-6 MTA transmission)
 Remove Remove
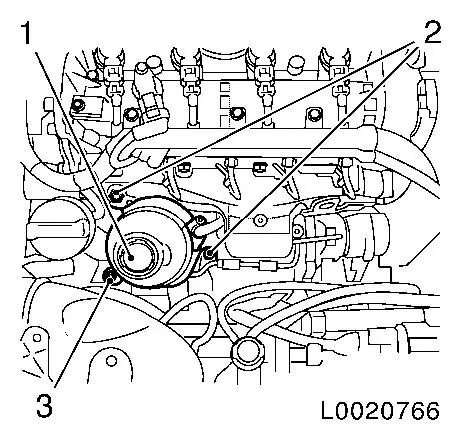
| 1. |
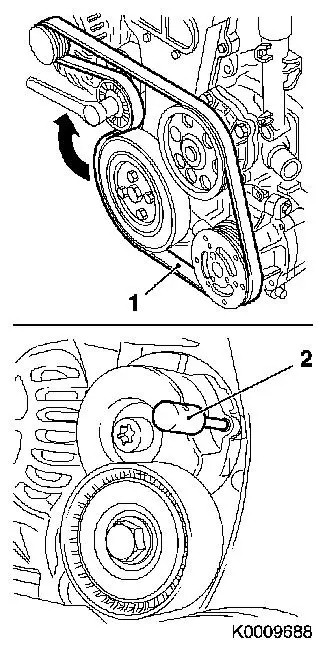
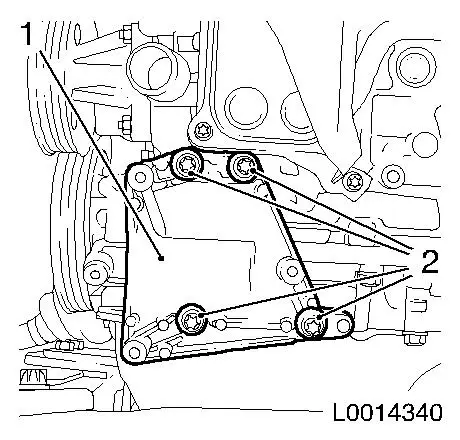
Detach ribbed V-belt (1)
| • |
Mark direction of rotation
|
| • |
Apply tension clockwise to tensioner roller at tension roller
bolt
|
| • |
Lock tensioner with KM-6130 (2)
|
|
|
|
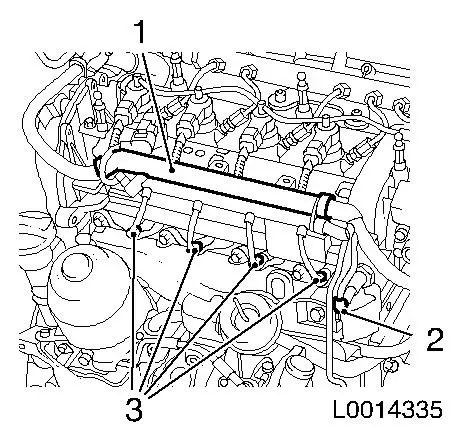
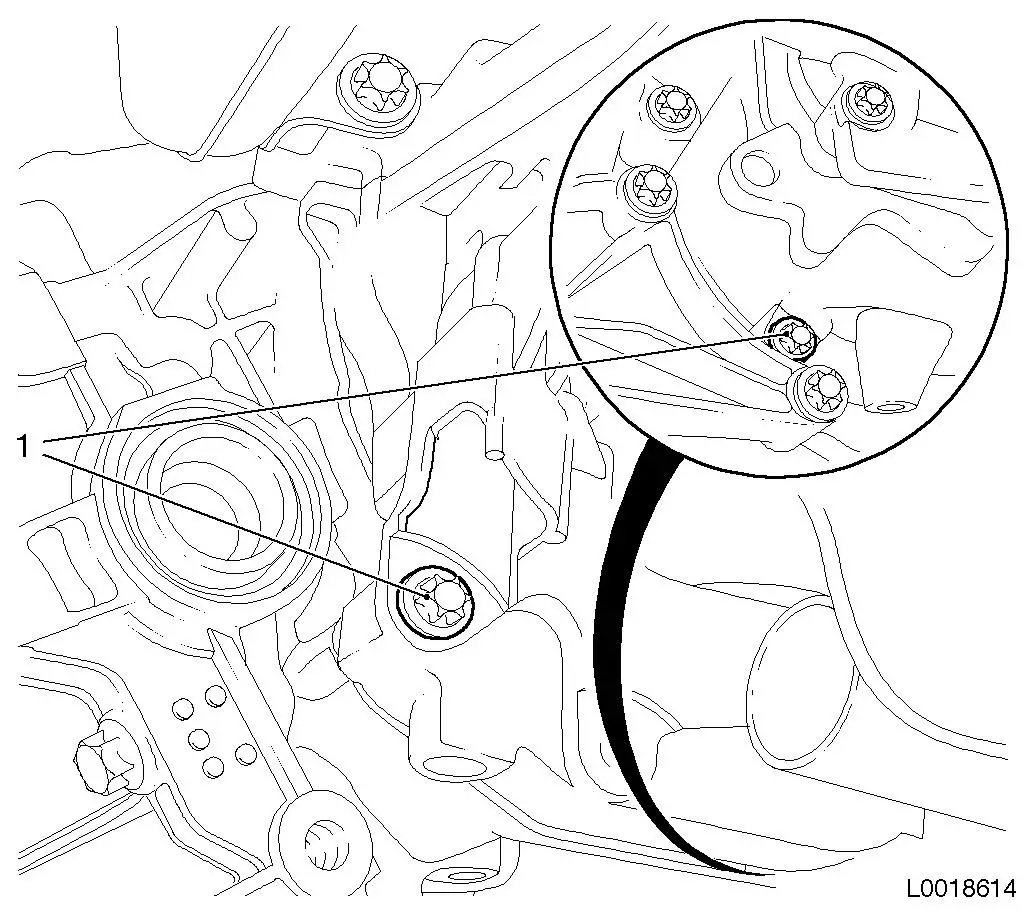
| 2. |
Detach supply unit for MTA system
| • |
Unscrew 3x bolts (1)
Note: Note different
bolt lengths
|
|
|

|
| 3. |
Detach wiring harness bracket MTA (1)
|
|
|
| 4. |
Disconnect wiring harness MTA system
| • |
Release wiring harness plug (1) and separate.
|
|
|
|
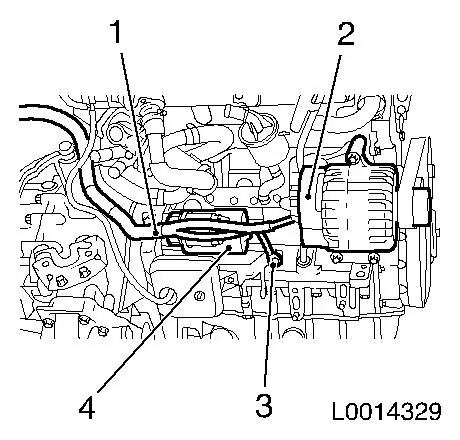
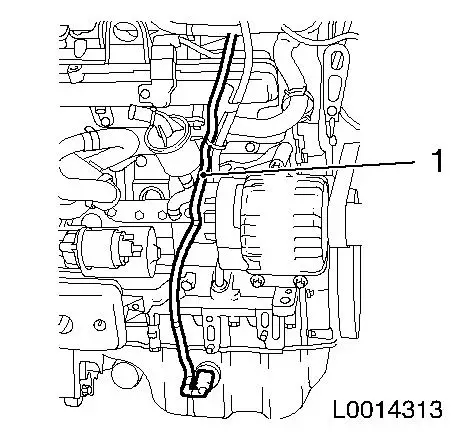
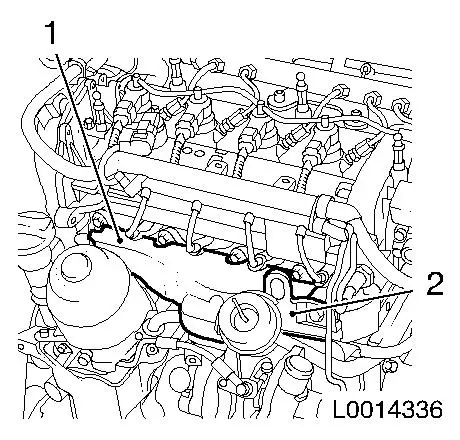
| 5. |
Detach wiring harness alternator and starter (1)
| • |
Detach from alternator (2)
|
| • |
Detach from starter (4)
|
|
|
|
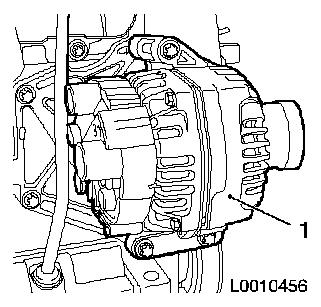
| 6. |
Detach alternator (1)
| • |
Unscrew 3 bolts
Note: Note 2x guide
sleeve!
|
|
|
|
| 7. |
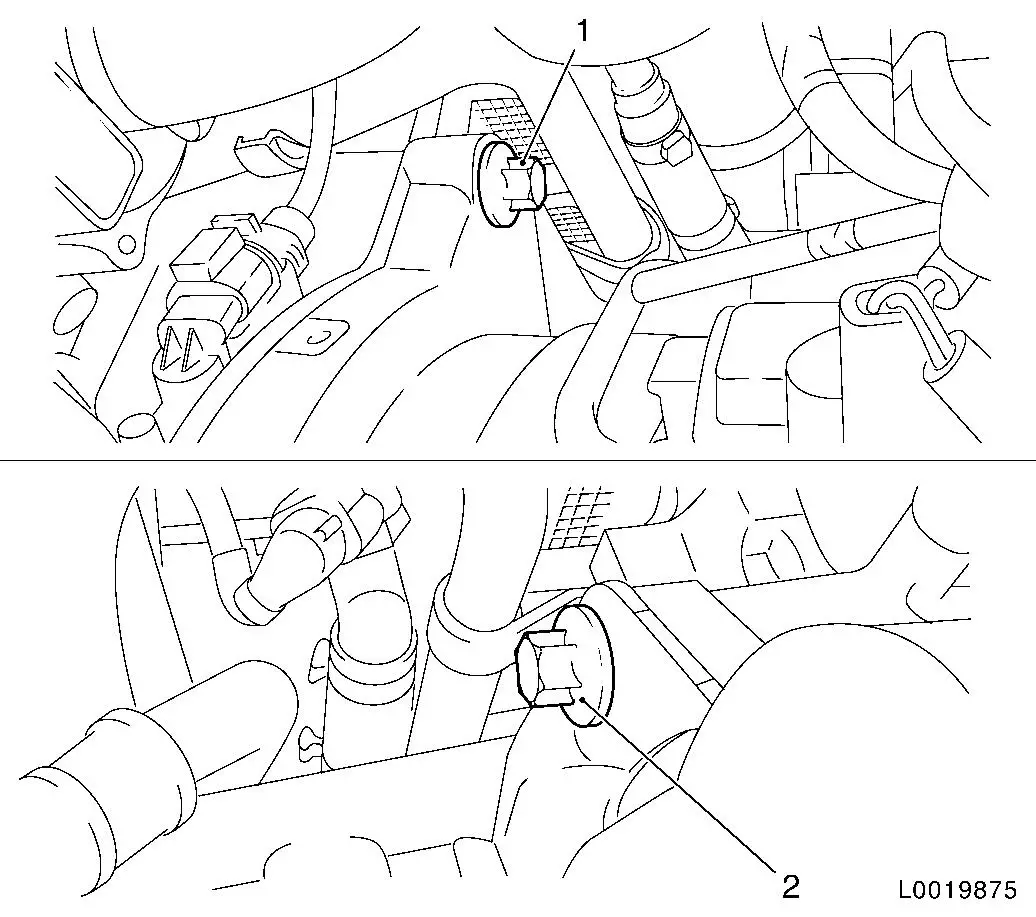
Detach wiring harness for remaining oil quantity (1)
| • |
Disconnect wiring harness connector.
|
|
|
|
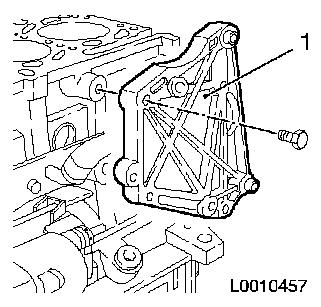
| 8. |
Detach alternator support (1)
| • |
Undo cable ties
Note: Note 2x guide
sleeve!
|
|
|
|
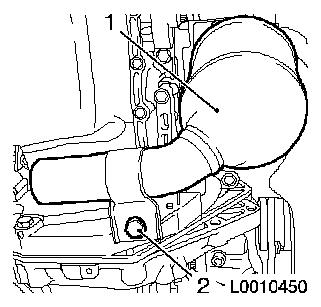
| 9. |
Remove air intake manifold
|
| 10. |
Remove heat shield, oil filter housing (1)
|
|
|
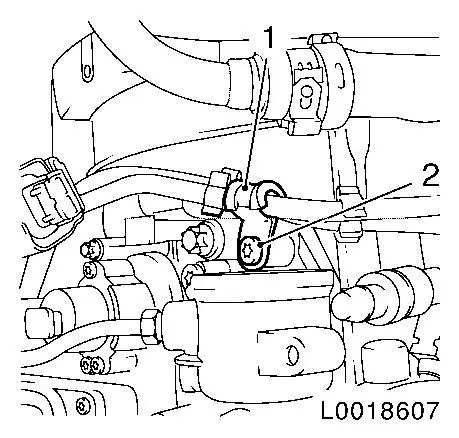
| 11. |
Detach vacuum line from charge pressure control unit
|
| 12. |
Detach engine management wiring harness
| • |
Disconnect 4x wiring harness plugs, sheathed glow plug (3)
|
| • |
Separate wiring harness plug, oil pressure switch (2)
|
|
|
|
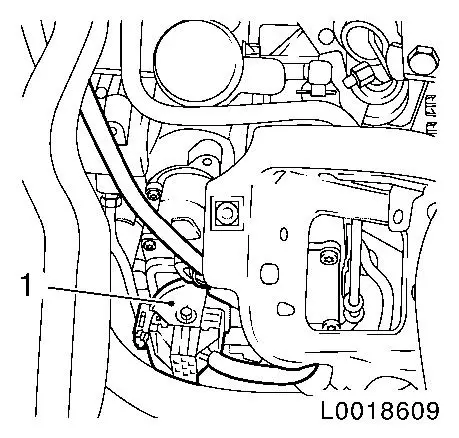
| 13. |
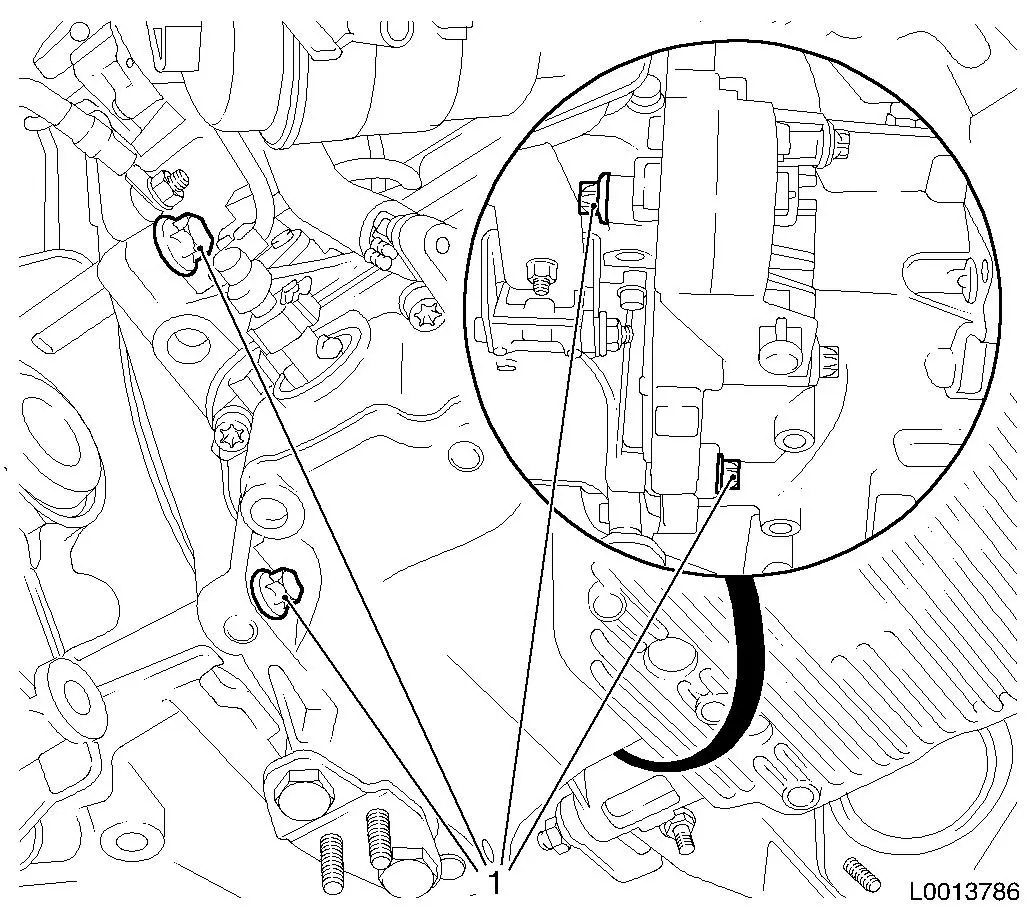
Detach exhaust manifold heat shield (1)
| • |
Unscrew bolt
| – |
Remove engine transport shackle
|
|
| • |
Fit engine transport shackle (2)
|
|
|
|
| 14. |
Detach turbocharger oil feed line (1)
|
|
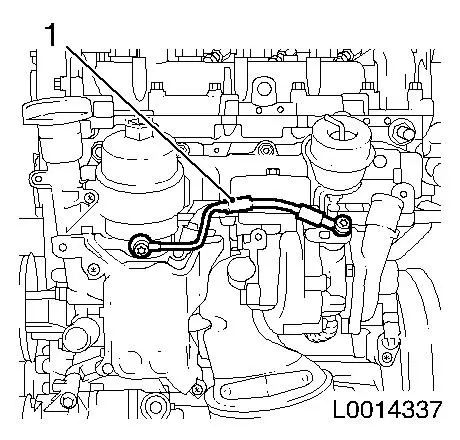
|
| 15. |
Detach turbocharger oil return line (1)
|
|
|
| 16. |
Detach catalytic converter (1) from transmission bracket
|
|
|
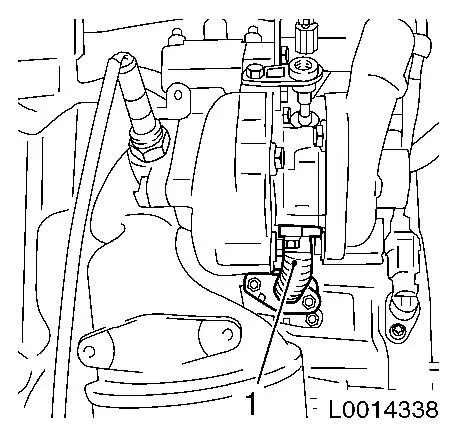
| 18. |
Detach compressor support (1)
|
|
|
| 19. |
Attach engine transport shackle to exhaust manifold
|
| 20. |
Place collecting pan underneath.
|
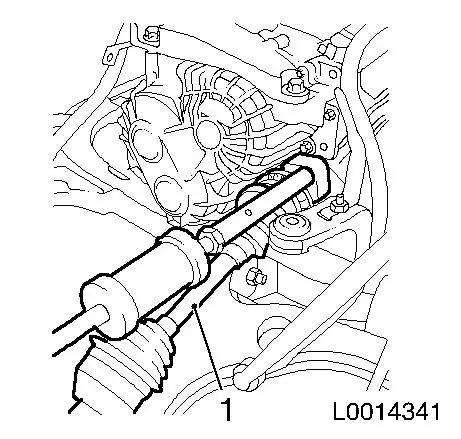
| 21. |
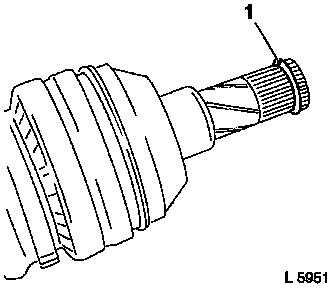
Detach right axle shaft (1) from intermediate shaft
Note: Use a second
person
| • |
Knock out axle shaft with KM-6003-1
and KM-313
Note: Seal opening
using closure plugs
|
|
|
|
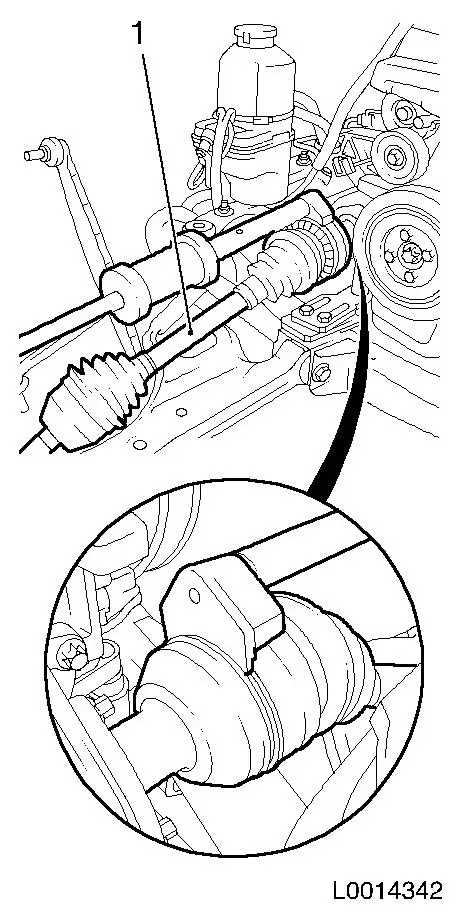
| 22. |
Remove left axle shaft (1) from transmission
Note: Use a second
person
| • |
Knock out axle shaft with KM-6003-1
and KM-313
Note: Seal opening
using closure plugs
|
|
|
|
| 23. |
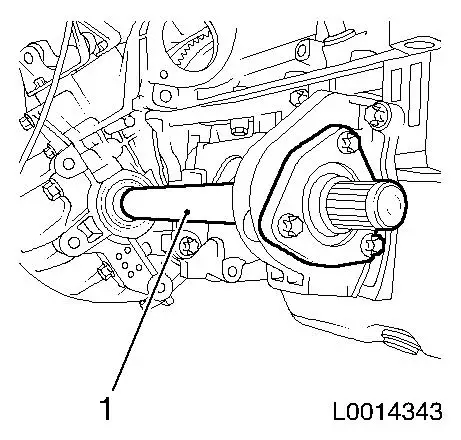
Remove intermediate shaft with bearing (1)
| • |
Detach intermediate shaft bearing from bearing support
|
|
|
|
| 24. |
Tie ropes to drive unit
| • |
Attach 3x KM-2358 to engine transport
shackle
|
|
| 25. |
Raise drive unit
| • |
Detach adapter for rear engine damping block from
transmission
|
|
| 26. |
Attach KM-412-32 to cylinder
block
|
|

|
| 27. |
Attach drive unit to KM-412-A
| • |
Tighten 8x bolted connections
|
|
|
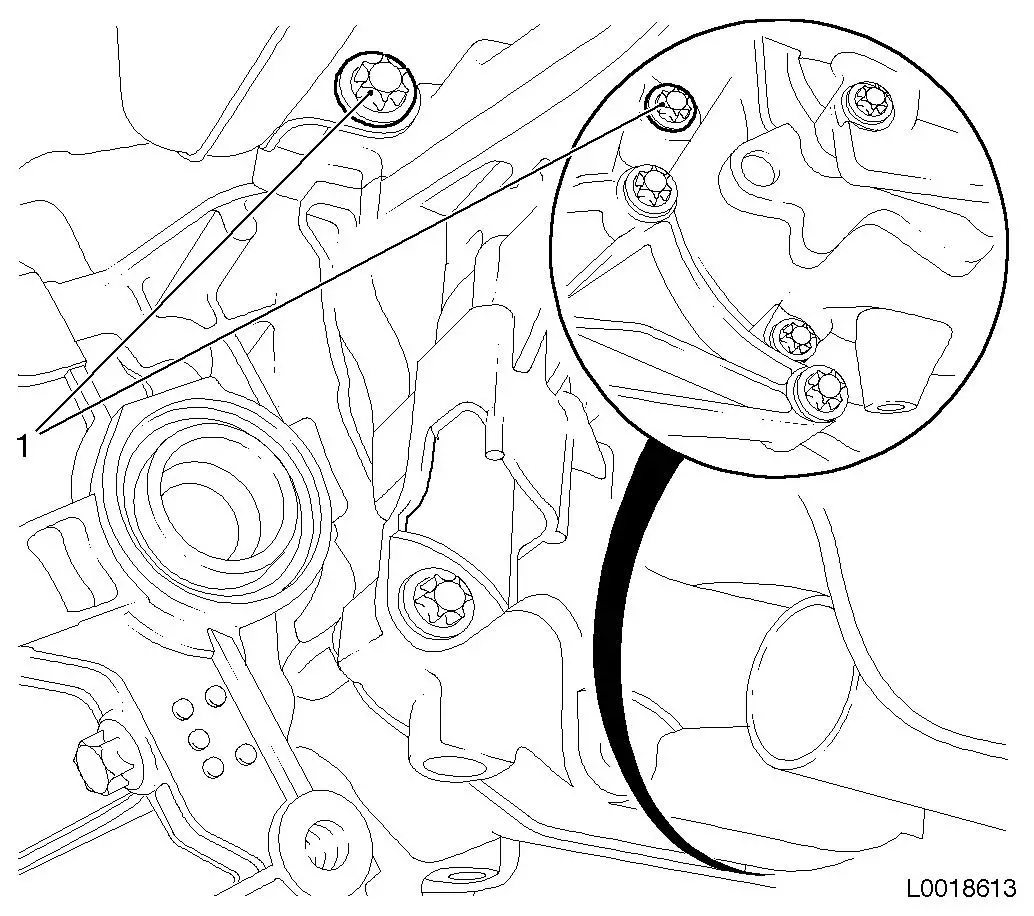
| 28. |
Release transmission at top
Note: With the vehicle
raised, release the upper gearbox bolts from below.
| • |
Unscrew front (1) and rear (2) upper gearbox bolts
|
|
|
|
| 29. |
Removing transmission
| • |
Press gearbox off engine
Note: Requires 2
people, do not damage wiring harnesses and attaching parts
|
|
|
 Install
| 30. |
Position transmission
|
|
| 31. |
Fasten transmission at the bottom
| • |
Tighten 2x M12 bolts (1)
|
|
|
|
| 32. |
Fasten transmission at the bottom
| • |
Tighten 2x bolt M10 (1) 40 Nm
Note: Note different
bolt lengths
|
|
|
|
| 33. |
Fasten transmission at the top
| • |
Tighten front (1) and rear (2) upper gearbox bolts M12 60 Nm
|
|
|
| 34. |
Tie ropes to drive unit
| • |
Attach 3x KM-2358 to engine transport
shackle
|
|
| 35. |
Detach drive unit from KM-412-A
| • |
Detach 8x bolted connections
|
|
| 36. |
Detach KM-412-32 from cylinder
block
|
| 37. |
Lower drive unit onto KM-282
| • |
Attach adapter for rear engine damping block to
transmission
| – |
Tighten 3 new bolts 80 Nm +
45°
|
|
|
| 39. |
Install left axle shaft in the transmission
| • |
Attach new circlip (1) to axle body
|
|
|
|
| 40. |
Insert intermediate shaft in transmission
| • |
Insert KM-6332 in transmission
| – |
Use KM-6332 to avoid damage
|
|
|
| 41. |
Attach right axle shaft to intermediate shaft
| • |
Attach new retaining ring to intermediate shaft
|
|
| 42. |
Detach engine transport shackle from exhaust manifold
|
| 43. |
Attach compressor support
|
| 44. |
Attach turbocharger
| • |
Tighten 3x new nut 25 Nm
|
| • |
Connect vacuum hose, charge pressure control unit
|
|
| 45. |
Attach catalytic converter to transmission bracket
|
| 46. |
Attach turbocharger oil return line
|
| 47. |
Attach turbocharger oil feed line
|
| 48. |
Attach exhaust manifold heat shield
| • |
Tighten nut M8 25 Nm
| – |
Insert engine transport shackle
|
|
|
| 49. |
Attach pre-heater system wiring harness
| • |
Connect 4x wiring harness plug, sheathed glow plug
|
| • |
Connect oil pressure switch wiring harness plug
|
|
| 50. |
Attach heat shield, oil filter housing
|
| 51. |
Attach 2x charge air hose to turbocharger
| • |
Tighten 2x clamp 3.5 Nm
|
|
| 52. |
Attach air intake pipe
|
| 53. |
Attach alternator support
| • |
Tighten 4x bolts 22 Nm
Note: Note 2x guide
sleeve!
|
|
| 54. |
Attach wiring harness for remaining oil quantity
| • |
Fix wiring harness plug
|
| • |
Clip in 2x bracket wiring harness
|
|
| 55. |
Attach alternator
| • |
Tighten 3 bolts 22 Nm
Note: Note 2x guide
sleeve!
|
|
| 56. |
Attach wiring harness alternator and starter
|
| 57. |
Connect wiring harness MTA system
| • |
Connect and lock wiring harness plug
|
|
| 58. |
Attach MTA wiring harness bracket
|
| 59. |
Attach supply unit for MTA system
| • |
Tighten 3x bolt 10 Nm
Note: Note different
bolt lengths
|
|
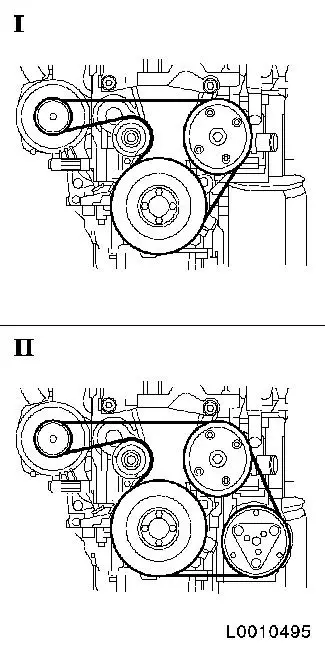
| 60. |
Install ribbed V-belt
| • |
Observe rotational direction of ribbed V-belt
|
| • |
Position ribbed V-belt
| – |
I. Ribbed V-belt routing without air conditioning
|
| – |
II. Ribbed V-belt routing with air conditioning
|
|
| • |
Apply tension to ribbed V-belt tensioner clockwise at the
tension roller bolt
|
|
|
|
|

