|
Timing, Check
 Remove Remove
| 2. |
Disconnect battery
| • |
Detach earth connection from earth terminal
|
|
| 4. |
Raise vehicle by its full height
|
| 5. |
Remove lower engine cover and right engine splash guard
|
| 6. |
Lower vehicle by its full height
|
| 7. |
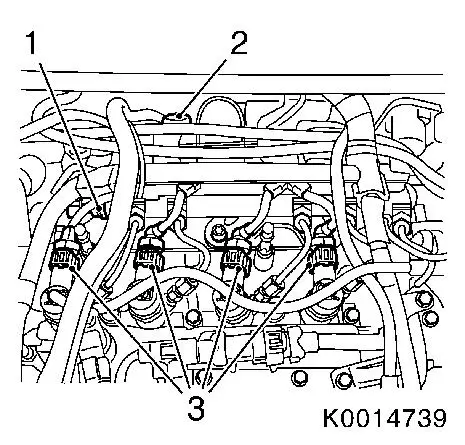
Disconnect wiring harness connector for engine management
| • |
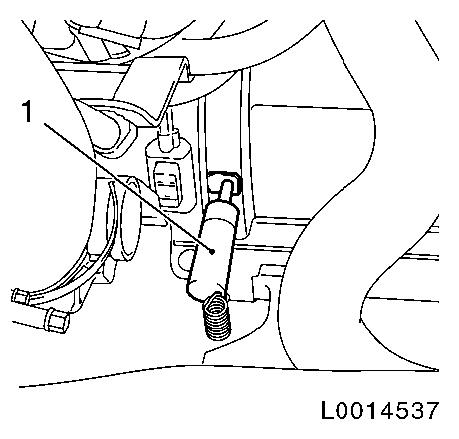
Wiring harness connector for charge pressure sensor (2)
|
| • |
Wiring harness connector for pressure reservoir pressure sensor
(1)
|
| • |
4x injector wiring harness connectors (3)
|
|
|
|
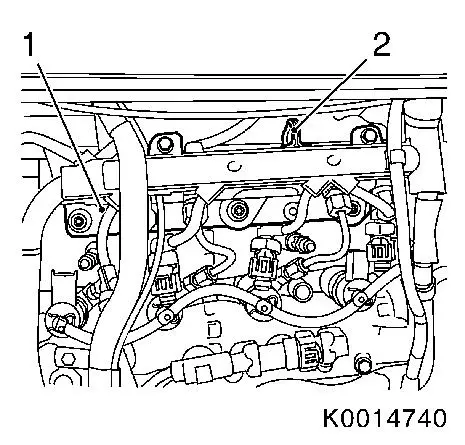
Important: The accumulator may
not be subjected to the effects of any external forces after the
bracket has been removed which would lead to the high pressure
pipelines being damaged.
|
| 8. |
Remove pressure reservoir bracket (1) in conjunction with
engine transport shackle (2)
|
|
|
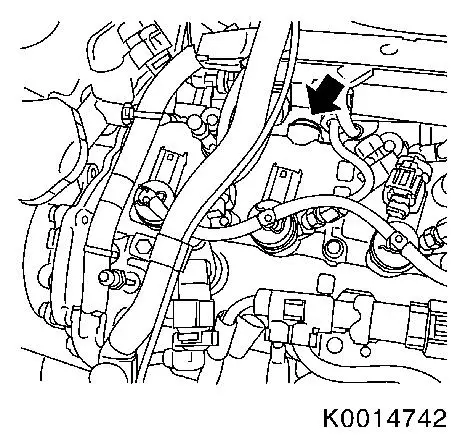
| 9. |
Remove closure bolt (arrow) from intake side of camshaft
housing
|
|
|
 Inspect
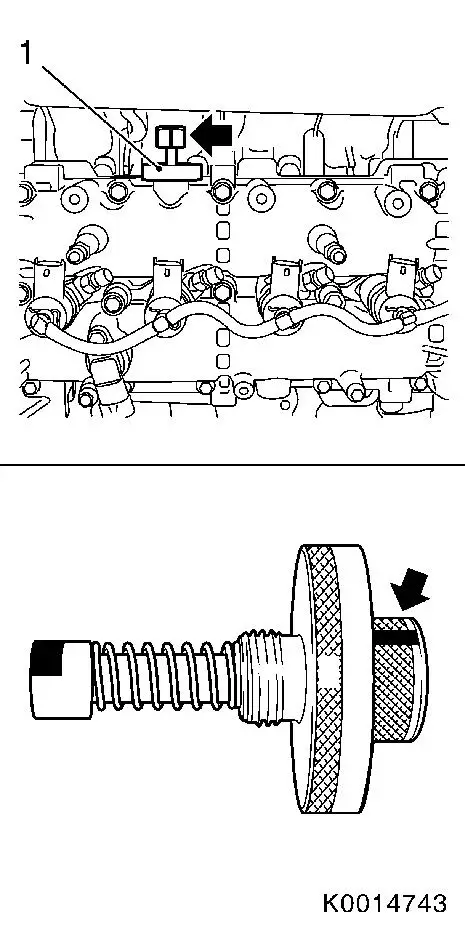
| 11. |
Disconnect intake camshaft
Note: Apply guidance
marking on reference drift (arrow).
| • |
Screw in camshaft reference drift EN-46781 (1)
|
| • |
Ensure correct installation position
Note: Reference drift
fixing must be installed in a horizontal position.
|
|
|
|
| 12. |
Lock intake camshaft
| • |
Turn crankshaft in direction of engine rotation until EN-46781 engages in intake camshaft
|
|
| 13. |
Raise vehicle by its full height
|
| 14. |
Lock crankshaft
| • |
Insert EN-46785 (1) through hole in
side of transmission bell housing
|
| • |
Turn crankshaft carefully at bolt for torsional vibration
damper flange until EN-46785 engages in
flywheel
Note: If it is not
possible to fix in position, then valve timing must be adjusted  . .
|
|
|
|
 Install
| 16. |
Install lower engine cover and right engine splash guard
|
| 17. |
Lower vehicle by its full height
|
| 18. |
Unscrew camshaft reference drift EN-46781
|
| 19. |
Install closure bolt in camshaft housing
Note: Complete assembly
work within 10 minutes.
| • |
Use bolt locking compound
Note: Select a suitable
locking compound from the spare parts catalogue.
|
|
Important: The accumulator may
not be subjected to the effects of any external forces after the
bracket has been removed which would lead to the high pressure
pipelines being damaged.
|
| 20. |
Install accumulator bracket with engine transport shackle
| • |
Accumulator to accumulator bracket
|
|
| 21. |
Connect wiring harness connector for engine management
| • |
4x injector wiring harness connectors
|
| • |
Wiring harness connector for pressure reservoir pressure
sensor
|
| • |
Wiring harness connector for charge pressure sensor
|
|
| 23. |
Connect battery
| • |
Attach earth connection to earth terminal
|
|
| 24. |
Program volatile memories
|
|
