|
Con-rod Bearing Play, Check (with Plastigage)
 Remove Remove
| 1. |
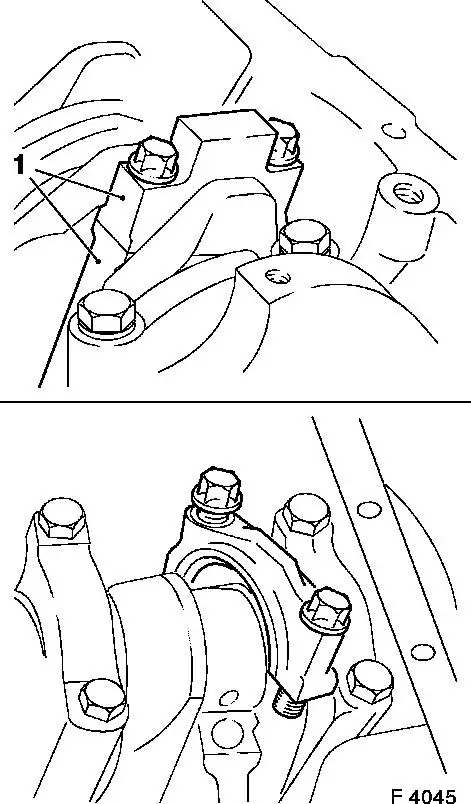
Mark installation position (1) of con-rod bearing cap
|
|
|
| 2. |
Detach con-rod bearing shell with con-rod bearing cap
|
| 3. |
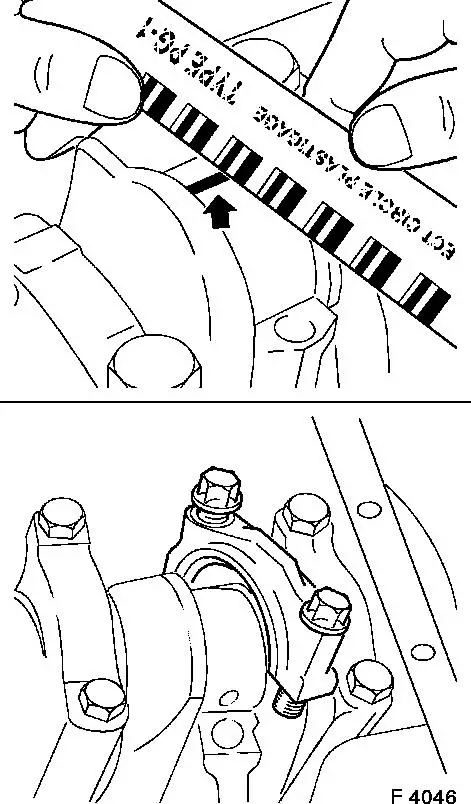
Measure con-rod bearing play with Plastigage (deformable
plastic thread)
Note: Plastigage is
available for various tolerance ranges.
| • |
Cut thread to match the width of the con-rod bearing
|
| • |
Place thread axially between con-rod bearing journal and
con-rod bearing shell
|
| • |
Install con-rod bearing cap
Note: To prevent thread
from breaking when removing con-rod bearing cap, remove grease from
con-rod journal and lightly oil con-rod bearing shell. Do not twist
crankshaft.
| – |
Tighten 2x bolt 13 Nm + 60° +
15°
Note: The old bolts may
be used to check the con-rod bearing clearance.
|
|
|
| 4. |
Remove con-rod bearing cap
|
Important: Do not mix up
millimetre and inch data on the measuring scale.
|
| 5. |
Measure width of the flattened Plastigage thread with the
measuring scale
| • |
Permissible con-rod bearing play: 0.013 mm to 0.061 mm
|
|
|
|
 Install
| 6. |
Attach con-rod bearing cap with con-rod bearing shell
| • |
Clean con-rod bearing journal and con-rod bearing shell
|
| • |
Oil con-rod bearing shells lightly
|
| • |
Tighten 2x bolt 13 Nm + 60° +
15°
Important: Only use bolts of size
M6.5.
|
| – |
Use new bolts
|
|
|
|
