|
Synchroniser body assembly, remove+install
(F13+/F13+ MTA)
Note: Transmission
remains installed.
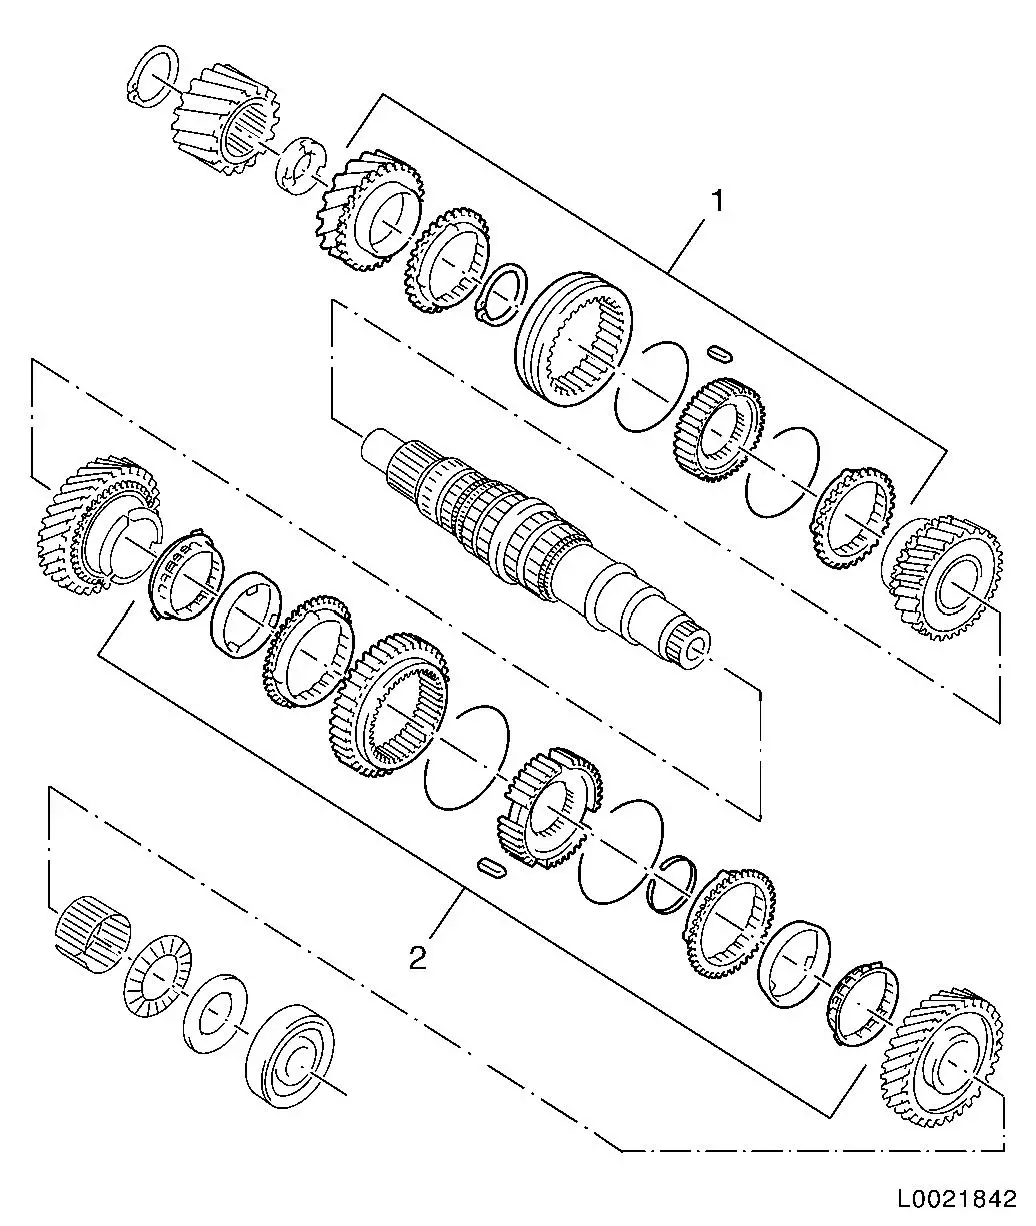
Overview synchronisation
 Remove Remove
| 2. |
Remove main shaft
Note: In case of damage
to the gear wheels, the toothed gear block must be replaced as
well.
|
|
| 3. |
Dismantle main shaft
| • |
Replace affected synchroniser body assembly if necessary
Note:
Removal/installation of synchroniser body assembly 5th gear is
described in procedure "End plate, dismantle and reassemble
(F13+/F13+ MTA)" .
| 1. |
Synchroniser body assembly 3rd/4th gear |
| 2. |
Synchroniser body assembly 1st/2nd gear |
|
|
|
 Install
|
Important: If synchroniser body
assembly has been completely dismantled, the following procedure is
to be followed for reassembly.
|
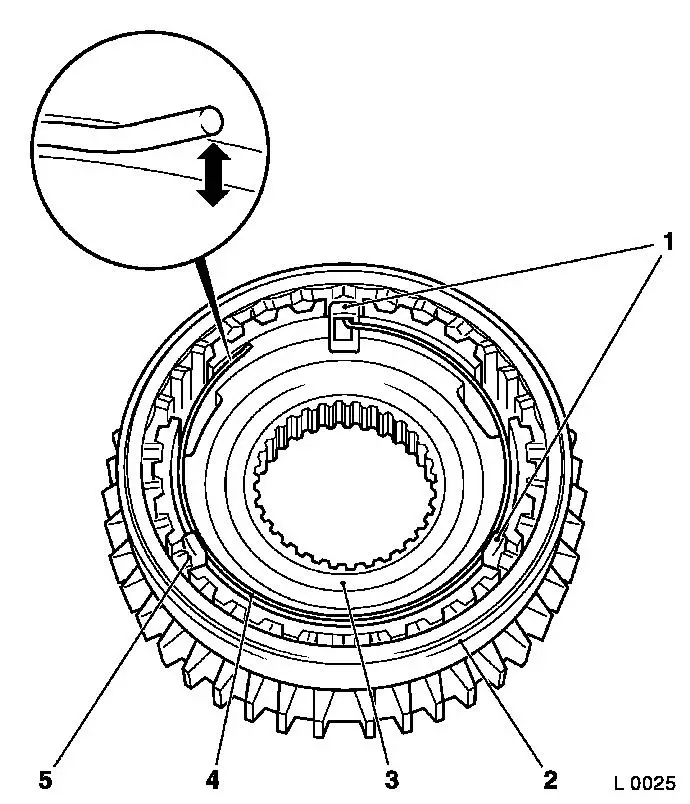
| 4. |
Assemble synchroniser body
| • |
Install synchronising spring (4)
Note: The free end
lifts up from the synchroniser body (arrow).
If this is not the case, turn synchronising spring 180° and
reinstall.
The bent end of the synchronising spring engages with a
slider.
|
| • |
Insert synchroniser body (3) in synchroniser sleeve (2)
|
| • |
Insert sliders (1) and (5) with the open side to the
synchroniser body
|
|
|
|
