|
Water Vapour Barrier, Replace
 Remove Remove
|
Front door inner panelling or rear door inner panelling –
see operation "Front Door Inner Panelling, Remove and Install" or
"Rear Door Inner Panelling, Remove and Install". Clip on bolt-on
angled bracket for front door or rear door inner panelling (7). As
of MY 2000: remove bracket (6) – only for rear door (6).
Detach water vapour barrier completely.
 Install
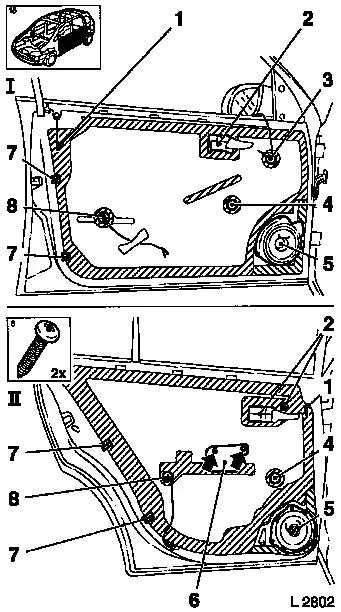
Cut water vapour barrier to size of
removed water vapour barrier and door contour. Cutouts for door
actuation (1 and 2) and cable insertion (3 and 8). For vehicles
with manual window actuation, cutout for window crank (4). For
vehicles without door loudspeakers, cut barrier (5) over loud
speaker cutout.
- shows front door
- shows rear door
Apply double-sided adhesive tape to door frame according to the
shaded areas shown.
|
|
Note: The protective
paper must be removed after applying the adhesive tape. Make
certain that the adhesive tape is free of bubbles and completely
sticks to the door frame.
Stick on water vapour barrier. When sticking on the water vapour
barrier, ensure it is positioned without folds. The water vapour
barrier must lay on the sticking surfaces perfectly. It is
recommended that the water vapour barrier is pressed down using a
blade.
Install
Bolt-on angled bracket for front door or rear door inner
panelling. As of MY 2000: Bracket – only for rear door. Front
door inner panelling or rear door inner panelling.
Note: The Aftersales
department supplies water vapour barrier (Parts No. 90 510 299 /
Catalogue No. 22 37 971) by the metre. Use double-sided adhesive
tape to affix the water vapour barrier (Parts No. 90 241 170 /
Catalogue No. 22 37 980).
|
