volkswagen Workshop Repair Guides

Volkswagen Workshop Service and Repair Manuals

Brakes, hydraulics, regulator, servo > < Brake light switch to week 45 of 2006
Brake light switch from week 45.06
  Note
t  Use only new type brake light switches.
   
t  
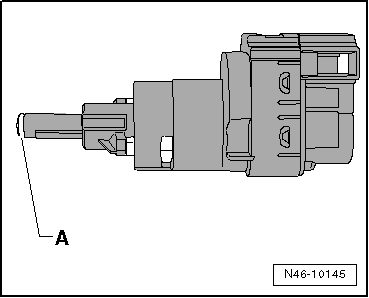
The most visible distinguishing feature is the new lighter coloured end of the push rod head -A-.
Removing
–  Remove trim on driver's side → General body repairs, interior; Rep. Gr.70
–  If necessary remove footwell vent → Heater, air conditioning; Rep. Gr.80.
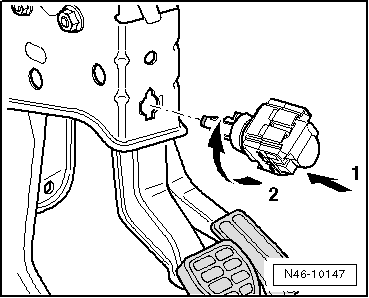
–  Pull connector off brake light switch.
The brake light switch may be removed only while operating rod is pressed in (brake pedal is not operated), or the locking mechanism of the brake light switch will be damaged.
–  Remove brake light switch by turning 45° to left.
Installing, adjusting and locking
Before installing the brake light switch, grease the lighter coloured end of the push rod head with polycarbamide grease G 052 142 A2.
l  The brake light switch must not be operated while the brake light switch is being installed. The brake pedal may only come into contact with the push rod head of the brake light switch during the whole installation process.
  N46-10145
–  Guide the brake light switch through the assembly aperture -arrow 1- and push it with the push rod head against the brake pedal. Then turn the brake light switch through 45° to the right -arrow 2- until it noticeably engages.
–  Fit brake light switch connector.
–  Check function of brake light.
–  Install footwell vent → Heater, air conditioning; Rep. Gr.80.
–  Install trim on driver's side → General body repairs, interior; Rep. Gr.70
  N46-10147

Brakes, hydraulics, regulator, servo > < Brake light switch to week 45 of 2006