Note | t
| Note safety precautions before beginning work → Chapter. |
| t
| We advise using fuel extractor -VAS 5190- to drain fuel tank. |
| –
| First check whether a coded radio is fitted. If so, obtain anti-theft coding. |
| –
| With ignition switched off, disconnect battery earth strap. |
| –
| Drain fuel tank and clean area around fuel filler neck. |
| –
| Remove securing bolts and remove tank flap unit with rubber cup. |
| –
| Remove securing bolt on filler neck. |
| –
| Fold rear bench seat forward. |
| –
| Remove cover from fuel gauge sender -G- and unplug connector. |
| –
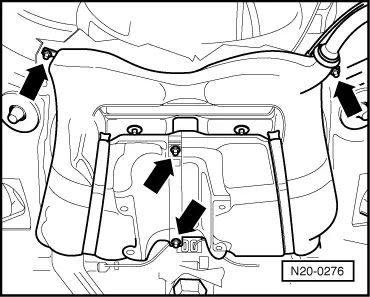
| Remove covers from under fuel tank. |
| Vehicles with front wheel drive |
| Vehicles with all-wheel drive |
| Continuation for all vehicles |

WARNING | Fuel system is under pressure! Before loosening hose connections, wrap a cloth around connection. Then release pressure by carefully pulling hose off connection. |
|
|
|
|