
Golf Mk4
|
Removing and installing cylinder head
Removing, installing and tensioning toothed belts
|
 |
|
|
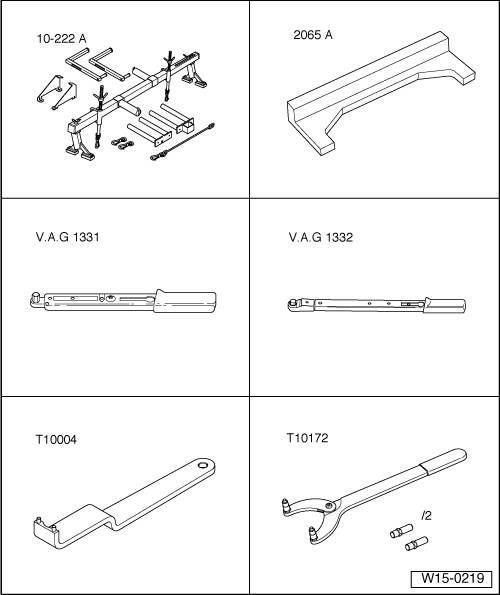
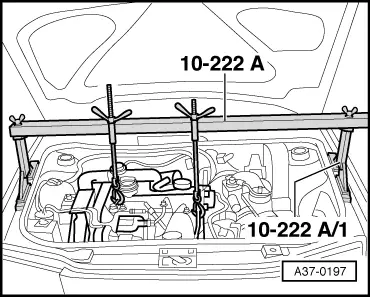
Special tools, workshop equipment, testers, measuring instruments and auxiliary items required
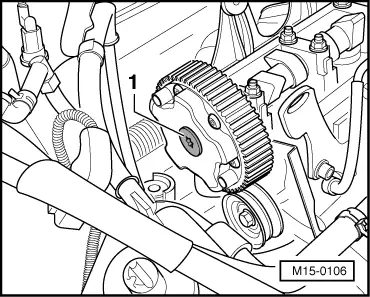
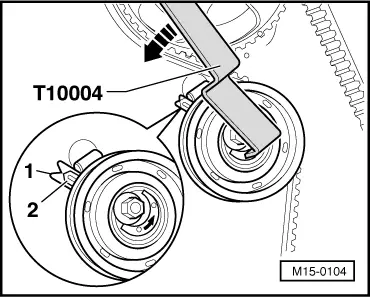
Notes: If you only have to take the toothed belt off the camshaft sprocket, e.g. when removing the camshaft or the cylinder head, the following must be considered:
|
 |
|
|
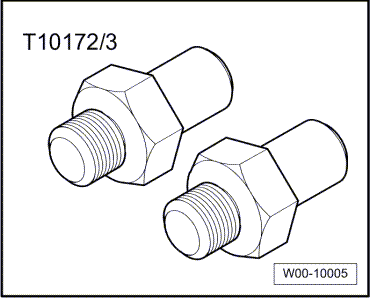
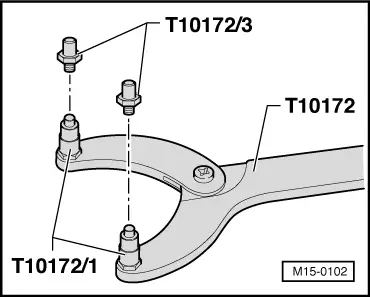
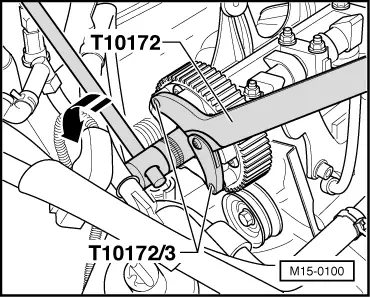
Retrofit counter-bracket T10172
Removing
|
 |
|
|
 |
|
Notes:
|
 |
|
|
 |
|
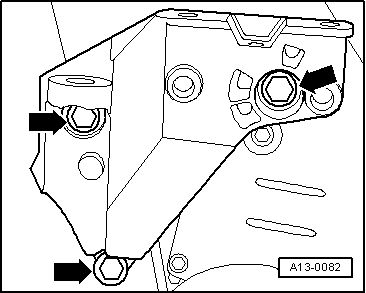
Note: When loosening the front engine mounting bolt the engine must be raised slightly with the support device.
|
 |
|
|
 |
|
Notes:
|
 |
|
|
 |
|
Note: |
 |
|
|
If the crankshaft is positioned after TDC No. 1 cylinder turn the crankshaft again a bit against the engine direction of rotation and set to TDC No. 1 cylinder.
|
 |
|
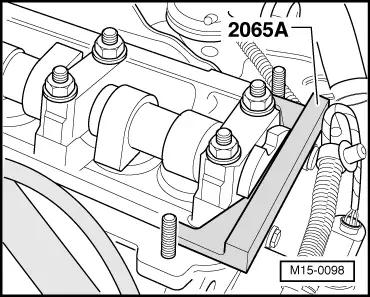
Note: If the crankshaft has been turned to far, turn the crankshaft 1/4 turn back and set the camshaft to TDC No. 1 cylinder again (insert the adjustment bar 2065 A into the camshaft). |
|
|
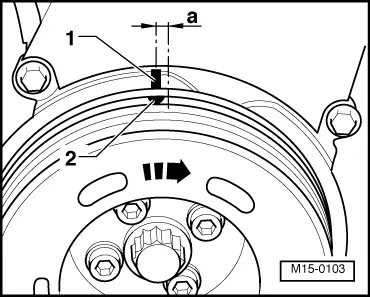
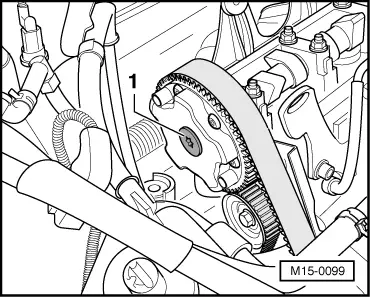
The notch -2- on the vibration damper/belt pulley must be positioned -a- max. 5 mm after the TDC marking -1- on the toothed belt guard lower part. If the crankshaft is not in this area:
|
|
|
|
If the crankshaft is in this area:
Continuation, install toothed belt complete |
 |
|
Notes:
Tightening torques for assembly mounting .
|