volkswagen Workshop Repair Guides

Volkswagen Workshop Service and Repair Manuals

Torque settings > < Removing
Installing
Installing
Install in the reverse sequence, noting the following:
  Note
   
t  Do not damage seals -arrow- in propshaft flanges during removal and installation.
t  Renew propshaft if damaged.
t  Do not cant front or rear propshaft tube; push horizontally onto respective guide pin.
Installation position for rear flexible coupling
t  Three projecting sleeves each on Haldex coupling flange and propshaft flange engage in mounting holes of flexible coupling.
  V39-1366
–  Attach propshaft to Haldex coupling flange so that markings -arrows- align.
  N39-0836
From 06.99, new balancing discs and new securing bolts between propshaft and Haldex coupling flange have been used -arrows-.
The new securing bolts have 12-point socket heads.
  N39-0835
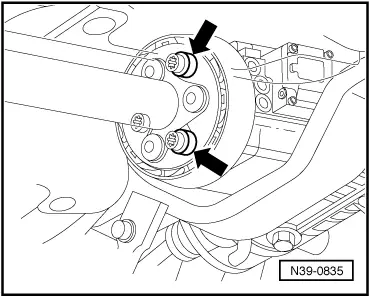
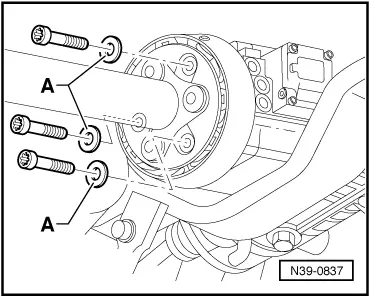
Two of the new securing bolts might be installed with one balancing disc each.
–  Balancing discs must always be replaced with washers -A-.
→ Electronic parts catalogue (ETKA)
Installing intermediate bearing free of tension.
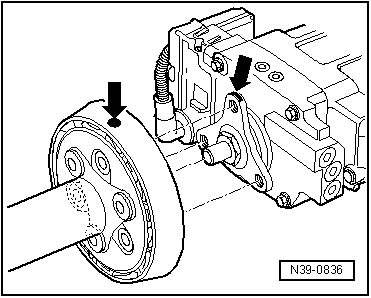
–  Align intermediate bearing in its elongated holes so that propshaft is not under tension.
–  Do not tighten intermediate bearing bolts to body until after propshaft has been installed.
  Note
t  If droning noises occur during travel, note the following:
t  Unbolt propshaft with flexible coupling from Haldex coupling flange and offset it by one hole.
t  If droning noises are still audible, front propshaft must be rotated one more hole.
  N39-0837

Torque settings > < Removing