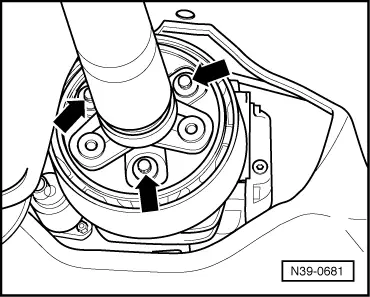
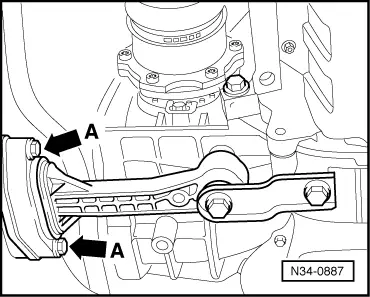
volkswagen Workshop Repair Guides

Volkswagen Workshop Service and Repair Manuals

Installing > < Removing and installing rear flexible coupling
Removing
Removing
   
–  Unbolt flexible coupling from rear final drive -arrows-.
  N39-0681
–  Remove retainer -1- above exhaust system -arrows-.
–  Separate exhaust system at double clamp -2- and remove with catalytic converter (2nd mechanic) → Rep. gr.26.
–  Now remove middle shield.
–  Unbolt propshaft intermediate bearing from vehicle.
  N34-1123
–  Remove pendulum support from subframe -arrows A-.
–  Position engine and gearbox jack -V.A.G 1383/A- with universal mounting -V.A.G 1359/2- and a wooden block under rear propshaft.
  N34-0887
–  Carefully press engine and gearbox forwards, bringing pendulum support in contact in front of subframe -arrow-.
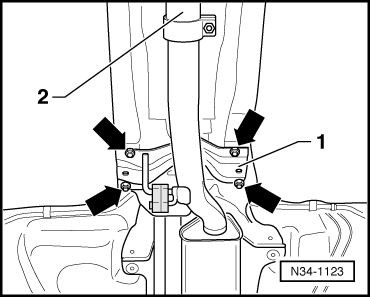
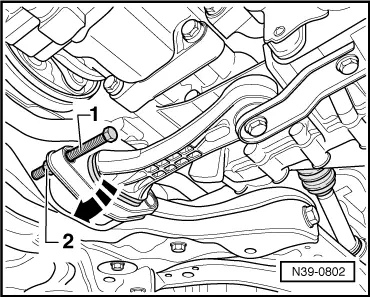
–  Secure pendulum support with bolt -1- (8 x 80 mm) and nut -2- to subframe.
–  Repair possible paint damage as follows: remove residual grease or oil with nitro thinner -L 001 600-. Apply 2 component acrylic paint -ALN 769 041- with hardener -ALZ 009 001-.
  N39-0802
–  Secure propshaft to gearbox jack against falling with belt -A-.
–  To unbolt rear propshaft tube, push forwards.
–  Do this by securing gearbox jack -2004- with bolt -B- and M10 nut to flexible coupling with vibration damper and support it on flange of rear propshaft -arrow-.
–  Lower propshaft slightly and remove flexible coupling.
  N39-0801

Installing > < Removing and installing rear flexible coupling