volkswagen Workshop Repair Guides

Volkswagen Workshop Service and Repair Manuals

Installing > < Removing and installing fuel tank
Removing
Removing
–  Note safety precautions before beginning work → Chapter.
  WARNING
When doing any repair work, especially in the engine compartment, pay attention to the following due to the cramped conditions:
t  Route all the various lines (e.g. for fuel, hydraulics, activated charcoal filter system, coolant and refrigerant, brake fluid and vacuum) and electrical wiring in their original positions.
t  Ensure that there is sufficient clearance to all moving or hot components.
t  The fuel and the fuel lines in the fuel system can become very hot (danger of scalding)!
t  The fuel system is also under pressure! Before opening the system, place cloths around the connections. Then carefully loosen connection to release the pressure!
t  Wear eye and hand protection when performing any type of repair work on the fuel system!
–  First check whether a coded radio is fitted. If so, obtain anti-theft coding.
–  With ignition switched off, disconnect earth strap from battery.
–  Remove rear axle: → Rep. Gr.42
Vehicles with four-wheel drive
–  Remove rear axle: → Rep. Gr.42
Continuation for all vehicles
–  Remove rear right wheel housing liner: → Rep. Gr.66
Front-wheel drive vehicles
   
–  Remove fuel tank cover.
Continuation for all vehicles
–  Open fuel tank filler flap.
–  Drain fuel tank and clean fuel filler neck and surrounding area.
–  Unscrew securing bolt and remove tank flap unit with rubber cup.
–  Remove filler neck securing bolts.
–  Fold rear seat bench forwards.
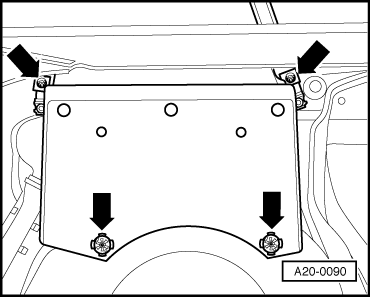
–  Remove cover plate from fuel gauge sender and pull connector off flange.
Vehicles with four-wheel drive
–  Remove cover plate from fuel pump flange and pull 4-pin connector off flange.
  WARNING
t  The fuel and the fuel lines in the fuel system can become very hot (danger of scalding)!
t  The fuel system is also under pressure! Before opening the system, place cloths around the connections. Then carefully loosen connection to release the pressure!
t  Wear eye and hand protection when performing any type of repair work on the fuel system!
Continuation for all vehicles
  A20-0090
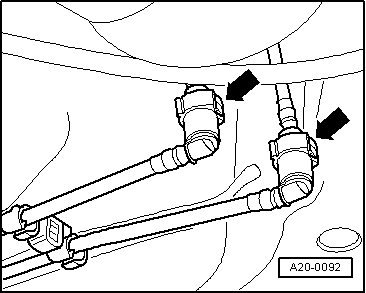
–  Disconnect fuel supply and return lines on front right of fuel tank.
  Note
Press buttons on hose couplings -arrows- to do this.
Vehicles with four-wheel drive
  A20-0092
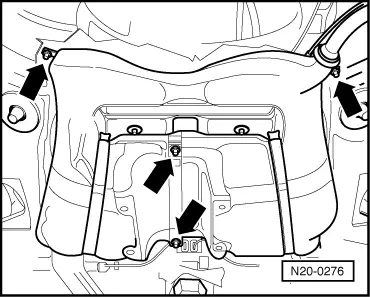
–  Remove securing nuts/bolts -arrows-.
Continuation for all vehicles
–  Remove securing straps. To do this, support with engine and gearbox jack -V.A.G 1383 A-.
–  Lower fuel tank.
  N20-0276

Installing > < Removing and installing fuel tank