volkswagen Workshop Repair Guides

Volkswagen Workshop Service and Repair Manuals

Removing and installing cylinder head > < Removing
Installing
Installing
Prerequisites
l  The crankshaft toothed belt pulley is secured to the crankshaft with the securing bolt and two washers.
l  The pistons must not be positioned at TDC.
l  
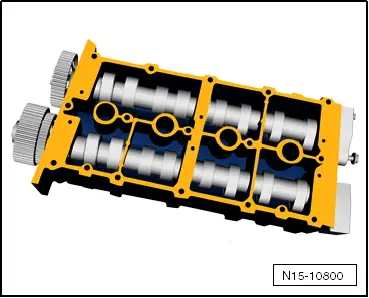
Camshaft pulleys locked into camshaft housing fitting holes with camshaft lock -T10016- and secured against turning.
  Note
If a piston is at TDC, the valves could strike the piston when the camshafts turn.
–  Remove sealant residue from cylinder head and camshaft housing with commercially available sealant remover.
–  Also prevent dirt and residual sealant from entering cylinder head.
–  Clean sealing surfaces. They must be free of oil and grease.
   
–  Apply thin, even coat of sealant on clean camshaft housing sealing surface. See highlighted area in illustration.
  Note
Sealant must not be applied too thickly; otherwise excess sealant can enter oil channels and cause damage to engine.
  N15-10800
–  Ensure that all roller rocker fingers contact valve stem ends -1- correctly and that they are clipped into their respective support elements -2-.
–  Screw two studs (M 6 x 70) into cylinder head before installing camshaft housing.
  N15-0076
–  Carefully fit camshaft housing vertically from above onto studs -arrows- and cylinder head dowel pins.
–  Evenly tighten new camshaft housing securing bolts from inside to outside alternately and diagonally.
Ensure that camshaft housing is not canted. Specified torque: 10 Nm + 1/4 turn (90°) further.
  Note
After installing the camshaft housing, wait about 30 minutes for the sealant to dry.
Further assembly is basically the reverse of the dismantling sequence.
  N15-0173

Removing and installing cylinder head > < Removing