volkswagen Workshop Repair Guides

Volkswagen Workshop Service and Repair Manuals

Removing and installing drive plate > < Renewing crankshaft oil seal - belt pulley end
Removing and installing front sealing flange
   
Removing and installing front sealing flange
Special tools and workshop equipment required
t  Counterhold tool -3415-
t  Fitting tool -T10053-
t  Torque wrench -V.A.G 1331- (5...50 Nm)
t  Torque wrench -V.A.G 1332- (40...200 Nm)

Not illustrated:
t  Hand-held drill with plastic brush attachment
t  Silicone sealant -D 176 404 A2-
t  Protective glasses
t  Flat scraper
Removing
–  Removing poly V-belt and tensioning element → Chapter.
–  Remove toothed belt → Chapter.
   
–  Remove crankshaft toothed belt pulley. To do this, lock pulley using counterhold tool -3415-.
–  Remove oil sump → Chapter.
–  Unbolt front sealing flange.
–  Remove sealing flange; if necessary, loosen using light blows with a rubber headed hammer.
–  Remove sealant residue on cylinder block with a flat scraper.
–  Cover seal with a clean cloth.
  N13-0401
–  Remove residual sealant on sealing flange using a rotating plastic brush (wear protective goggles).
–  Clean sealing surfaces. They must be free of oil and grease.
Installing
  Note
t  Observe the use-by date of the sealing compound.
t  The sealing flange must be installed within 5 minutes of applying the silicone sealant -D 176 404 A2-.
  A17-0030
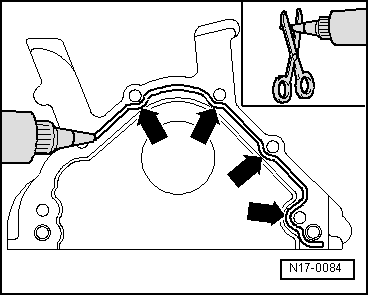
–  Cut off tube nozzle at forward marking (Ø of nozzle approx. 3 mm).
–  Apply silicone sealant -D 176 404 A2- to clean sealing surface of sealing flange, as shown. Sealant bead must be:
t  2...3 mm thick.
t  Run bead along inner side of bolt holes -arrows-.
  Note
t  Sealant bead should not be thicker, otherwise excess sealant may enter oil sump and plug up strainer in oil pump suction pipe, as well as drip onto crankshaft oil seal.
t  Before applying sealant bead, cover sealing surface of oil seal with a clean rag.
t  
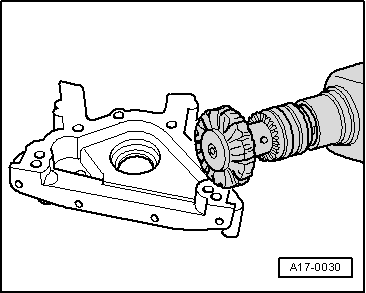
When fitting sealing flange with oil seal installed, use guide sleeve -T10053/1-.
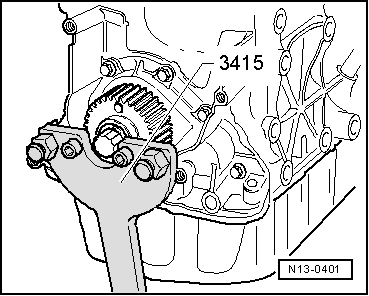
–  Fit sealing flange immediately and lightly tighten all bolts.
–  Tighten sealing flange securing bolts diagonally and alternately. Torque setting: 15 Nm.
–  Remove excess sealant.
–  Install oil sump → Chapter.
  Note
Sealing compound must dry for approx. 30 minutes after installation. Only then fill engine oil.
  N17-0084
–  Install crankshaft toothed belt pulley and lock with counterhold -3415-.
–  Tighten new centre bolt to 90 Nm and turn 90° (1/4 turn) further (turning further can be done in several stages).
  Note
Thread and shoulder must be free of oil and grease.
–  Install toothed belt and adjust timing → Chapter.
–  Installing poly V-belt and tensioning element → Chapter.
  N13-0401

Removing and installing drive plate > < Renewing crankshaft oil seal - belt pulley end